Configuring Exchange 2010/2013 with Kemp Load Balancer
Hardware load balancers have been gaining popularity over the years with Exchange versions and it has been a while I thought I should review one of my favorite in this area.
Steps in this article doesn’t require you to purchase any licenses but you can use the trial version. Remember – it is always best to know how a hardware load balancer function.
So let’s walk-through of the setup, configuring and managing a virtual KEMP load balancer to use with Exchange 2010.
Virtual LoadMaster installs and runs as a hardened, ‘Guest’ operating OS/Application on a dedicated virtual machine. It provides the same features of the LoadMaster appliance including L4 load balancing, L7 content switching, SSL Offload, Server and Application Health Checking, IP and L7 Persistence, Caching, Compression, IPS and much more. It also supports stateful Active/Hot-standby configuration between two VLMs for redundancy and high-availability.
I am going to start with step 1 which is downloading the VM.
Virtual LoadMaster Download: www.kemptechnologies.com/us/server-load-balancing-appliances/virtual-loadbalancer/vlm-download.html
I used – VMware Workstation, Server, and Player (Requires 512MB disk space and at least 1GB memory) VMDK file. Remember you may need to download VM Player and go to the properties of the machine and make it run using one processor as the default value is 1.
The purpose of this article is to have the load balancer accept all connections send to my exchange 2010 server and we will test this using OWA access.
Once you load the VM to player and switch on the machine, you will be asked to put the username and password.
For me, the username was bal and password was 1fourall
Once you login, you would be required to put a license code which will be generated to you when you contact their helpdesk for a trial license.
Once the license is loaded, it’s now time to setup the load balancer.
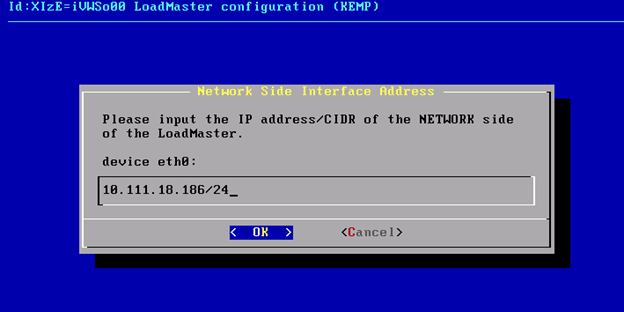
This is the first screen you will presented with:
The ip shown is an ip that I reserved in my DNS to use the load balancer
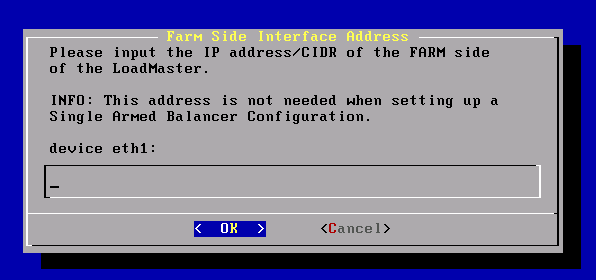 The next screen can be ignored
Type in a name for the host as shown

Type the DNS server name here

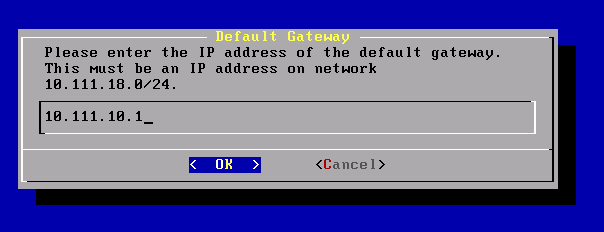 Now type the default gateway here
Once the setup process is over, the load balancer will reboot.
Once rebooted, login to a web browser:
https://10.111.xx.xxx/
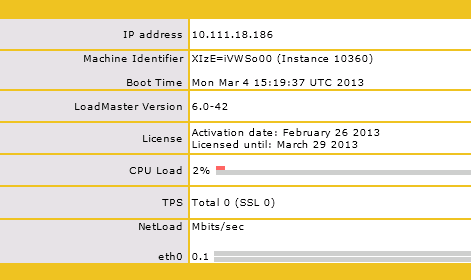
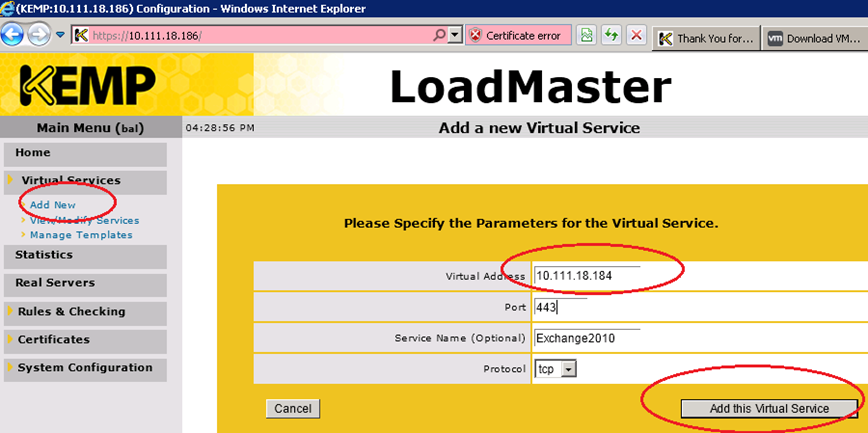
It will prompt you to login, once logged in, you will be seeing this screen:
Now create a new Virtual service for Exchange 2010 as shown
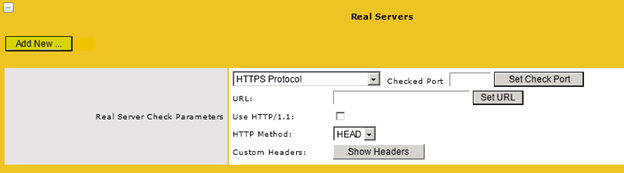
Scroll down and click real servers and ADD NEW
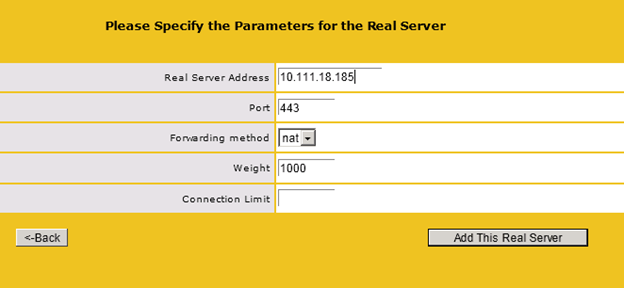
Add the server ip where LB should forward traffic to
Once this step is completed, now you may view the status

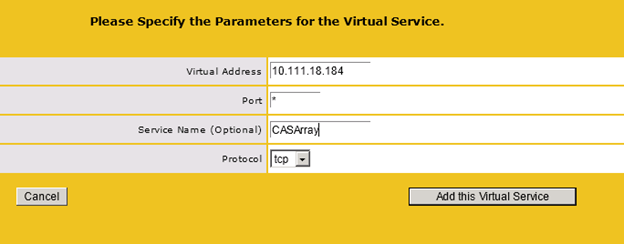
Create a new instance for CASArray and specify the port to *
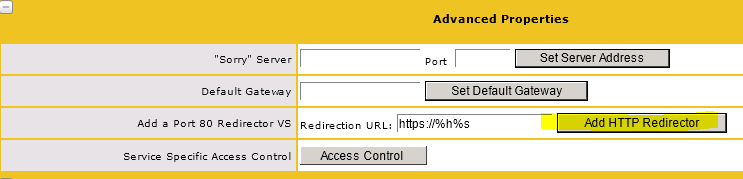
If you need to create an HTTP redirector, click the option as shown:
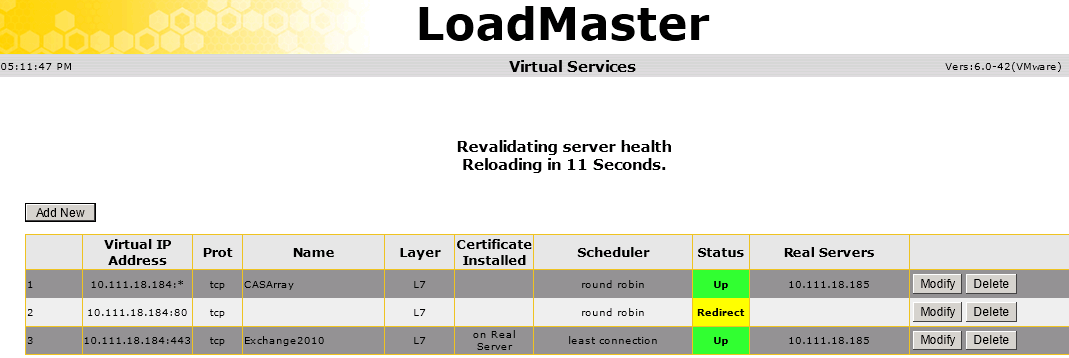
The final status will be like as shown which is a standard Exchange 2010 configuration for Load balancer:
Now it is time to test. Simply open a web browser and navigate to the address of the virtual instance and you should be able to view the OWA page.
There are several standard templates available for you to use with and an amazing Sizing guide for Exchange 2010:
LoadMaster Sizing Guide for Microsoft Exchange 2010 (Beta v0.8): http://www.kemptechnologies.com/fileadmin/templates/sizingDoc/lme_calc_2k/lme_calc_2k.htm
Conclusion
To sum it all up, I think Kemp load balancer is an outstanding product just not for Exchange but other applications too. For instance, I have an SMTP relay service which is now hosted on Kemp which is used by several applications like Sharepoint, SAP, Oracle etc to relay emails. The product also feature excellent reporting features and SSL certificate offloading services too. Here comes the best part – You don’t need to be a networking expert or load balancer guru with specialized skills to administer this product – an exchange admin knowledge would do just fine ! Kemp also provides superior customer support round the clock…
Ratish Nair
MVP Exchange
Team @MSExchangeGuru
")


March 8th, 2013 at 7:09 am
[…] Configuring Exchange 2010/2013 with Kemp Load Balancer – […]