AD RMS: Template Copy Process
Below is the AD RMS Template copy Configuration for different Client side computers. RMS Client Deployment For Windows Vista, 7 and above AD RMS client 1.0 (MSDRM) is installed with Windows Vista and above, so clients applications that use the MSDRM client and do not need an additional client to be installed. But the RMS client 2.x (latest is 2.1) was released after Windows 7 was released, and if you install an application that uses it AND that doesn’t install the required client during setup, you must deploy it manually. Most applications that use the client 2.x install it automatically (e.g. Office 2013, the RMS app, etc.) so you should only install it if an application that you are using explicitly tells you that this client is required. In most cases, no additional installation is required. If you need RMS Client 2.1, please download from here. For Windows XP
Manual Installation:
- Login to the computers with Administrative Privilege.
-
Download the ADRMS client from the below link:
https://www.microsoft.com/en-us/download/details.aspx?id=38396
- Copy RMS client setup to your desktop or keep it in some shared folder.
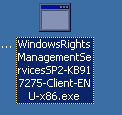
- Locate WindowsRightsManagementServicesSP2-KB917275-Client-ENU-x86.exe
- Double click to execute it.
- Click Next to welcome screen

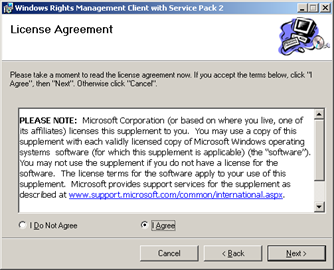
- Click Agree to accept the license agreement.
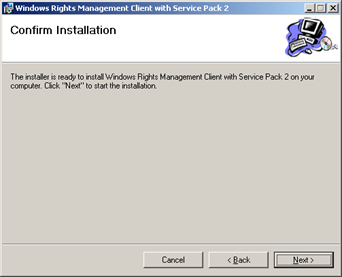
- Click next to begin the installation
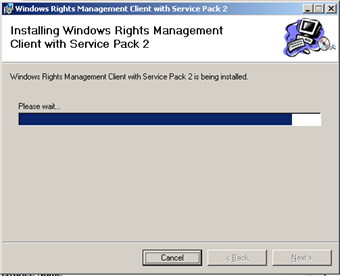
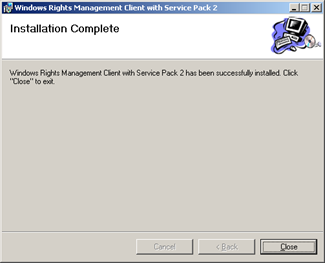
- Wait till the Installtion complete.
- Click Close to finish the installtion
 Note : If RMS client copied Locally, delete the source file after installtion. Automatic Installation: Extract the RMS Client Contents
- Log on Domain Controller with Domain Admin account
- Copy the RMS client in C:
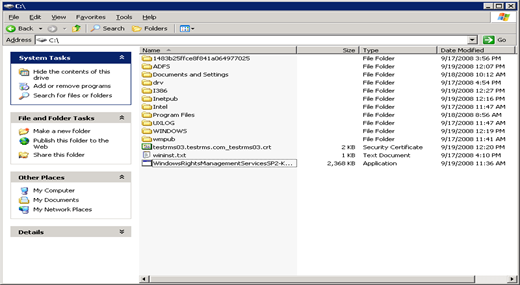
- Create a folder in C:RMSClient
-
Open command prompt and type
C:>WindowsRightsManagementServicesSP2-KB917275-Client-ENU-x86.exe /x c:RMSClient

- Now we have to add MSDRMClient.msi and RMClientBackCompat.msi for the deployment from GPO.
- Log on with Domain Admin Privilege to the Domain Controller.
- Open Active Directory
- Locate the OU which contains Computer Account
- Right Click OUà PropertyàGroup Policy
- Type Name RMSClientInstalltion
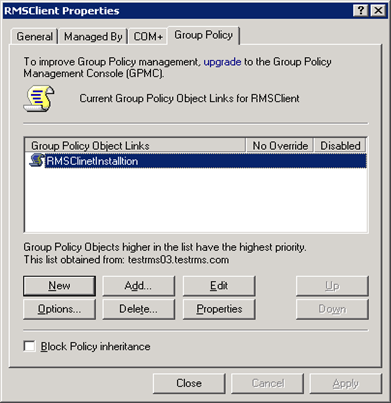
- Click Edit
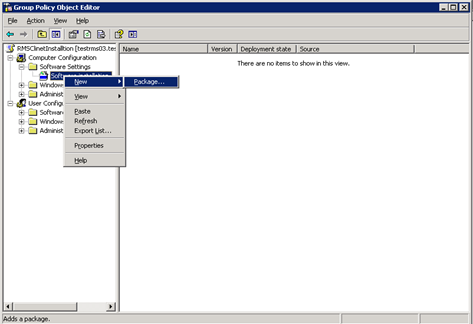
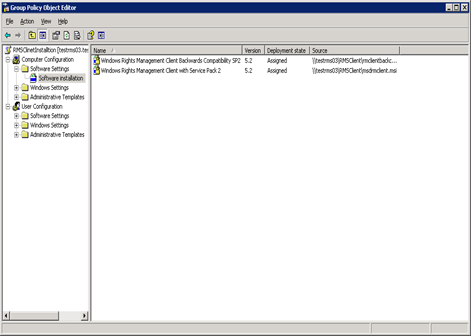
- Click Computer ConfigurationàSoftware Setting àRight Click Software Installation
- Select New Package
- Browse Share Folder RMSClient through UNC Path
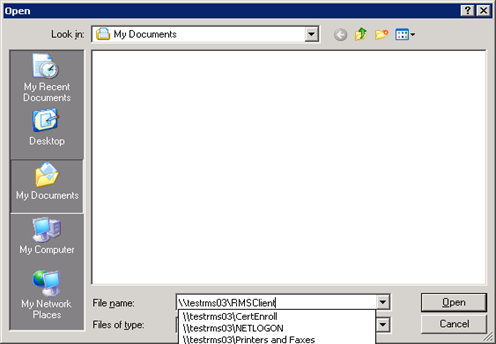
- Locate Client
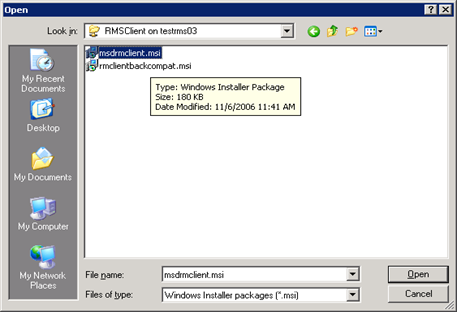
- Click Assign
- Repeat the Process Step 9 to 12 for RMClientBackCompat.msi
- Close the Group Policy
Template Location: For the template to copy from the ADRMS server or share location (for XP) and made it available offline we need to create the folder for every user. To accommodate it we will create AdminTemplatePath Registry Key on every client computer.
- Log on to Client machine.
- Click Start, type regedit.exe in the Start Search box, and then press ENTER.
-
Expand the following registry key:
-
For Office 2003:
HKEY_CURRENT_USERSoftwareMicrosoftOffice11.0CommonDRM
-
For Office 2007:
HKEY_CURRENT_USERSoftwareMicrosoftOffice12.0CommonDRM
-
For Office 2010:
HKEY_CURRENT_USERSoftwareMicrosoftOffice14.0CommonDRM
-
- Right-click DRM, click New, and then click Expandable String Value.
- In the Value name box, type AdminTemplatePath, and then press ENTER.
-
Double-click the AdminTemplatePath registry and type below mentioned path in the Value data box, and then click OK.
-
For Windows Vista and above, type %LocalAppData%MicrosoftDRMTemplates
and
- For windows XP type %AppData%MicrosoftDRMTemplates
-
-
Close Registry Editor.
Deploy registry through Group Policy
- Open GPO management à create a new GPO
- Type Name “RMS Template Registry Entry”
- Click Edit
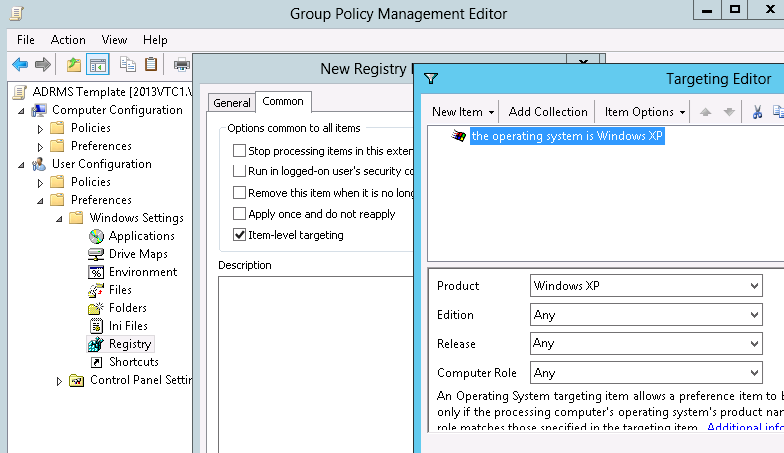
- Expand User Configuration
- Navigate PreferencesàWindows Settings àRegistry
- Add multiple registry keys one per client side OS and select the OS in the Common à Item-level targeting.
- Apply and ok. Close the GPO Management.
- Replicate AD from site and services.
- On the client side either run gpupdate /force or ask user to re-login.
Add the AD RMS URL to Trusted Sites Follow the steps to add the AD RMS URL to trusted sites in Internet Explorer.
- Log on to Client machine.
- Click Start, click All Programs and select Internet Explorer.
- Once Internet Explorer opens, in the top right corner, select Tools and click Internet Options from the drop-down. This will bring up the Internet Options window.
- From the Internet Options screen, click the Security tab, and select Local Intranet from the Select a zone to view or change security settings box.
- Click the Sites button. This will bring up a Local Intranet window.
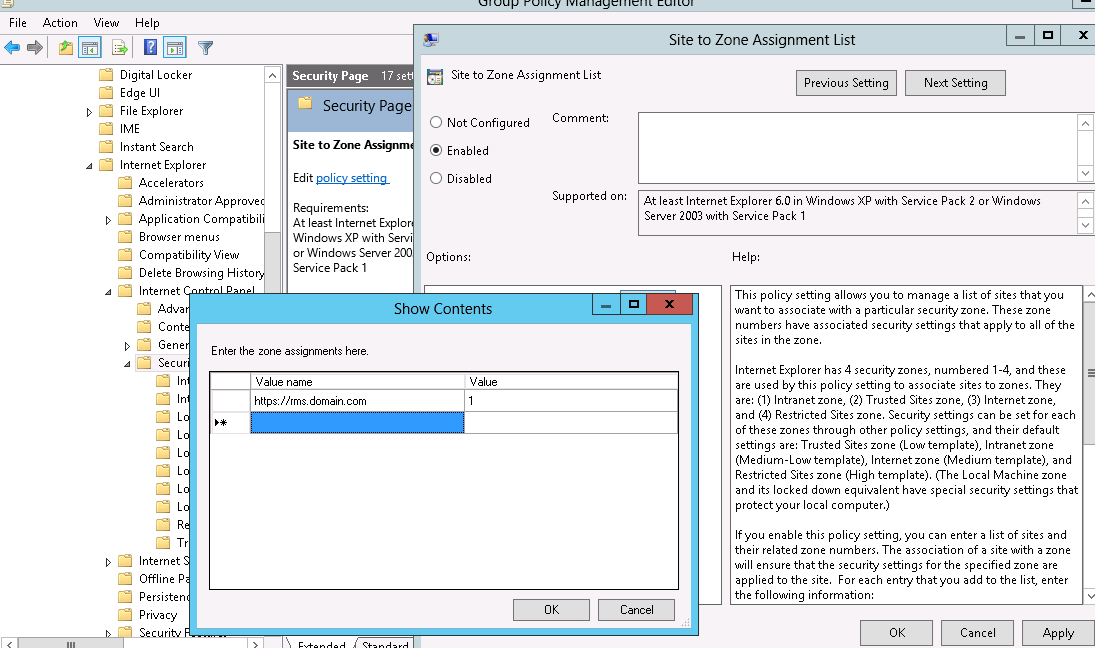
- In the Add this website to the zone: type https://rms.domain.com and click Add.
- Click Close.
- From the Internet Options screen, click OK.
- Close Internet Explorer.
- Get this added in your IE GPO.
-
If GPO is not present then go to the below location and create one to add this url with number 1.
User Configuration à Policies à Administrative Templates à Windows Components àInternet Explorer à Internet Control Panel à Security Page à “Site to zone assignment List” à Enabled à Show Then add url with https with Value 1 – this will add the url to the Intranet Zone.
RMS Schedule Task Enabling
For Windows 7
We also need to enable the task in the task scheduler. For which we have to use below mentioned command
schtasks /Change /TN “MicrosoftWindowsActive Directory Rights Management Services ClientAD RMS Rights Policy Template Management (Automated)” /ENABLE
-
GPO based deployment of Task enabling script to Windows 7 Clients
Add the above cmd to a batch file and name it RMS.bat

- Publish RMS.bat through Group Policy
- Copy Rms.bat File to %logonserver%netlogon location
- Open GPO management à create a new GPO
- Type Name “RMS Template Deployment Schedule Task”
- Click Edit
- Expand User Configuration
- Navigate Login Script
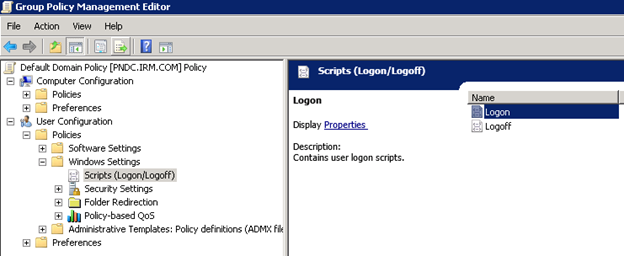
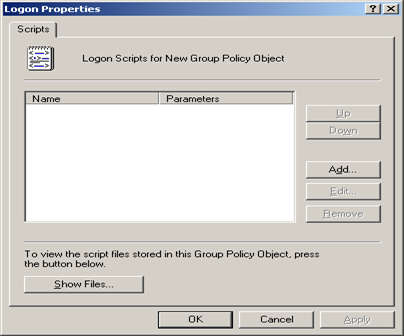
- Double click Login Script
- Click Add Button
-
Click Browse
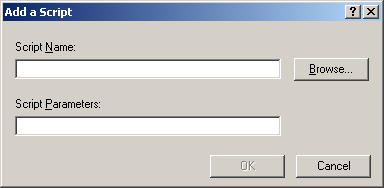
-
Paste it in Default Logon Folder
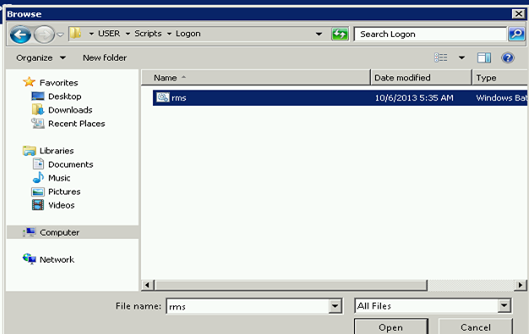
- Click Open
-
Click OK
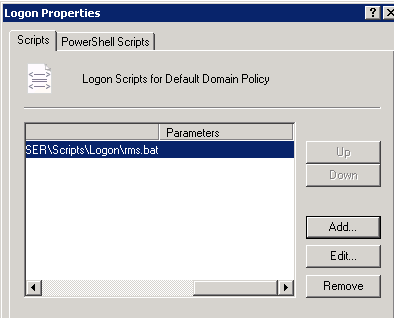
- Click Apply
- Click Ok
It will change to ready 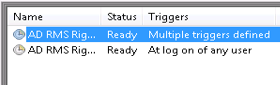 For Windows XP Windows XP does not have scheduled task for ADRMS so Enabling will not help and need to run a task with a script to copy the template files. Task 1: Create a script to copy the file:
- We can produce a VB script mentioned below:
‘ ——————————————————————-‘
‘ This is an example Visual Basic script to copy the xml files to the ADRMS
‘ template locations for both Windows XP SP2 and Windows Vista.
‘
‘ This script always copies the xml files to the location. You
‘ can improve the script to copy the files only when not existing or when
‘ updated. You should also add error checking. Make sure that a firewall
‘ is open to copy the files through a network.
‘ ——————————————————————–
Option Explicit
Dim Obj,objFileSys
Dim OSVersion
Dim ADRMSTemplatePath, ADRMSTempatePathParent
Dim pathUserProfile, pathLocalAppData
Dim orginalTemplatePath
‘ ——————————————————————–
‘ Change this file location for AD RMS rights policy templates.
‘ ——————————————————————–
orginalTemplatePath = “FileServerTemplates*.xml”
Set Obj=WScript.CreateObject(“Wscript.Shell”)
Set objFileSys = CreateObject(“Scripting.FileSystemObject”)
OSVersion=Obj.RegRead(“HKEY_LOCAL_MACHINESOFTWAREMicrosoftWindows NTCurrentVersionCurrentVersion”)
‘ ——————————————————————–
‘ Check operating system version and call create directory and copy
‘ the file functions.
‘ ——————————————————————–
If OSVersion = 5.1 then ‘ XP
pathUserProfile=ExpandEnvironment(“%USERPROFILE%”)
ADRMSTemplatePath = objFileSys.BuildPath(pathUserProfile, “Application DataMicrosoftDRMTemplates”)
CreateFolderAndCopy(ADRMSTemplatePath)
Elseif OSVersion = 6.0 then ‘ Vista
pathLocalAppData=ExpandEnvironment(“%LocalAppData%”)
ADRMSTemplatePath = objFileSys.BuildPath(pathLocalAppData, “MicrosoftDRMTemplates”)
CreateFolderAndCopy(ADRMSTemplatePath)
Else ‘ add more if you wish
End If
Set Obj = Nothing
Set objFileSys = Nothing
‘ ——————————————————————–
‘ Create folder and copy subroutine.
‘ ——————————————————————–
Sub CreateFolderAndCopy(Path)
ADRMSTempatePathParent = objFileSys.GetParentFolderName(Path)
If objFileSys.FolderExists(Path) <> True Then
if objFileSys.FolderExists(ADRMSTempatePathParent) <> True then
objFileSys.CreateFolder ADRMSTempatePathParent
End If
objFileSys.CreateFolder Path
End If
‘ add path and error checking
objFileSys.CopyFile orginalTemplatePath, Path
End Sub
‘ ——————————————————————–
‘ Get environment variable.
‘ ——————————————————————–
Function ExpandEnvironment(Environment)
On Error Resume Next
Dim objWshShell
Set objWshShell = WScript.CreateObject(“WScript.Shell”)
If Err.Number = 0 Then
ExpandEnvironment = objWshShell.ExpandEnvironmentStrings(Environment)
Else
WScript.Echo “Error: ” & Err.Description
End If
Set objWshShell = Nothing
End Function
Or
- We can create a xcopy script something like this:
cd %appdata%Microsoft if exist DRM goto Skip1 md DRM :Skip1 xcopy ServerNameRMSTemplateSharename DRMTemplates /C /I /Q /R /Y
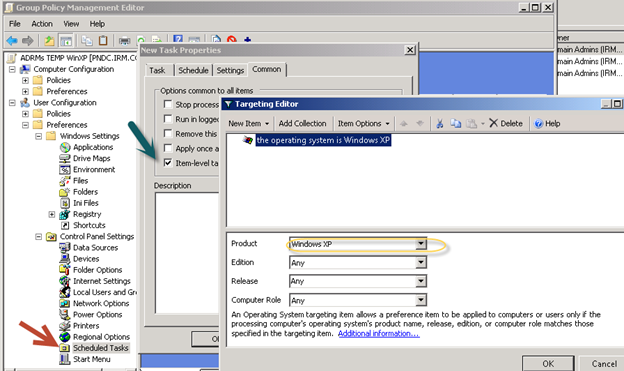
Task2: Create a task scheduler GPO with a preference to apply only to the windows XP client.
- Open GPO management à create a new GPO
- Type Name “Windows XP Template Deployment”
- Click Edit
- Expand User Configuration àPreferences àControl Panel Settings àScheduled Tasks à New Task à Add the script
- Then select Windows XP in Item-Level Targeting
WOW6432 Key If you have windows 7 64 bit and Office 32 bit then it is recommended to add the following register key as well.
- Open Regedit and go to below location.
HKCUSoftwareWoW6432NodeMicrosoftOfficeX.0CommonDRM
- Right-click DRM, click New, and then click Expandable String Value.
- In the Value name box, type AdminTemplatePath, and then press ENTER.
- Double-click the AdminTemplatePath registry value and type %LocalAppData%MicrosoftDRMTemplates in the Value data box, and then click OK.
- Close Registry Editor.
Additional Time Frequency Key: The automated scheduled task will not query the AD RMS template distribution pipeline each time that this scheduled task runs. Instead, it checks the updateFrequency DWORD value registry entry. This registry entry specifies the time interval (in days) after which the client should update its rights policy templates. By default the registry key is not present on the client computer. In this scenario, the client checks for new, deleted, or modified rights policy templates every 30 days. To configure an interval other than 30 days, create a registry entry at the following location: HKEY_CURRENT_USERSoftwareMicrosoftMSDRMTemplateManagement.
If we need to increase the Template copy interval then we can create this additional Key
- Open Regedit and go to the below location
- HKEY_CURRENT_USERSoftwareMicrosoftMSDRMTemplateManagement
-
Create a 32 bit REG_DWORD named UpdateFrequency
Value: Number of day between downloads
- Close the regedit and restart the client.
Troubleshooting: Automated task will run once and will not be doing anything for next 30 days so in case automated task has run and you have deleted the template folder and you can’t wait for 30 days then go to the below location and delete or Empty lastUpdatedTime key. HKEY_CURRENT_USERSoftwareMicrosoftMSDRMTemplateManagement
Prabhat Nigam
Microsoft MVP | Exchange Server
Team@MSExchangeGuru
")


November 20th, 2013 at 8:05 am
[…] AD RMS: Template Copy Process […]
September 4th, 2015 at 6:34 pm
HI
I have try in every way I can, to push the the right policy template to the client(win 7) but it is not working.error msg: cannot use test manifests against production server.
The template works fine on the server it self,when the users log in to the server to access the right enable documents, they access it without any error, but when they login on a client they gets the above error. PLEASE HELP!!!!
September 5th, 2015 at 4:43 pm
Check if this is the case
http://blogs.technet.com/b/rmssupp/archive/2009/02/18/setting-up-microsoft-office-2007-in-a-pre-production-environment-by-carsten-kinder.aspx