Exchange 2013: Hybrid Part 3
In the previous blog we covered ADFS and Trust with Azure AD which also allowed Single Sign on. In this blog we will cover Directory Synchronization.
This is a 7 blog series which was successfully tested and written with the help of Microsoft Exchange Deployment Assistant.
Here is the link of Microsoft Exchange Deployment Assistant: https://technet.microsoft.com/en-us/exdeploy2013/Checklist?state=2419-W-AABoAQqA0gCIAIEGAwAAAAg~
Directory Synchronization:
Directory Synchronization is important for us to do the smooth login and migration to office 365. We need to sync all the users and DLs with correct attributes. To review the AD objects Microsoft has provided the utility named Idfix to fix the AD attributes.
I would refer to MVP Benoit Hemat blog on Idfix here. http://blog.hametbenoit.info/Lists/Posts/Post.aspx?ID=537
Please follow this blog and fix your AD objects attributes as suggested. Once IDs are fixed then only move to the next step
Prerequisite: Let us have a look on prerequisite and make sure they are installed.
-AD Forest should be 2003 or higher
-Domain Controllers should be Windows 2003 SP1 or higher
-Dir Sync Computer must be domain joined.
-Dir Sync computer must be 64 bit with OS windows 2008 SP1 and above.
-Dir Sync computer must be running .net framework 3.5 SP1 and 4.5.1
-Dir Sync Computer must have PowerShell
– You can only install one computer running the Directory Sync tool between an on-premises Active Directory and an Office 365 tenant.
-You must be domain Admins, local admin of dirsync computer and admin in office 365.
The Azure AD service supports synchronization of up to 50,000 mail-enabled objects. To synchronize more than 50,000 mail-enabled objects, contact Support.
Objects that have been synchronized from your on-premises directory service appear immediately in the Global Address List (GAL); however, these objects may take up to 24 hours to appear in the Offline Address Book (OAB) and in Lync Online.
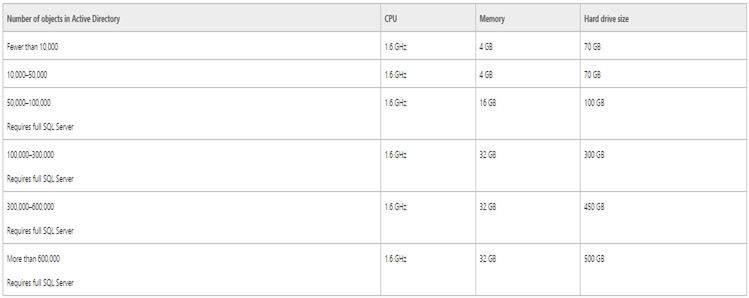
Hardware Requirement: Depends on number of objects in the AD to sync.
Split Domain name:
Many org’s use different domain name for AD domain and email domain. To handle this issue we can update the UPN with the email domain as a fix.
1st method is update all users userprinciplename but alternative is adding alternate UPN in AD trust and forest.
Below are the steps to configure alternate UPN.
- Click Start, Administrative Tools, and then click Active Directory Domains and Trusts.
- Log on to one your organization’s Active Directory domain controllers
- In the console tree, right-click Active Directory Domains and Trusts and then click Properties.
- Select the UPN Suffixes tab, type an alternative UPN suffix for the forest, and then click Add.
-
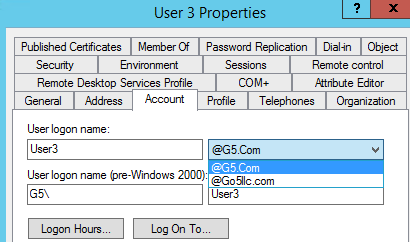
Repeat step 3 to add additional alternative UPN suffixes
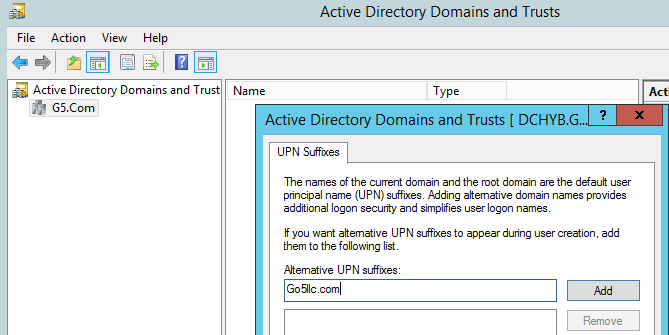
Now it will look like below:
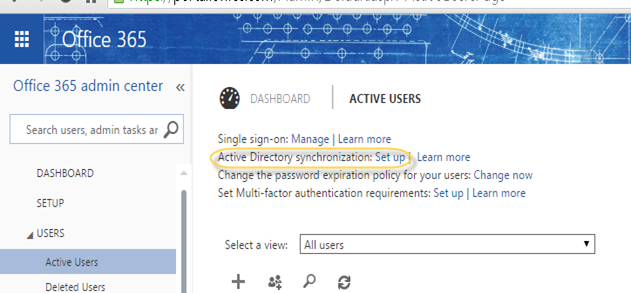
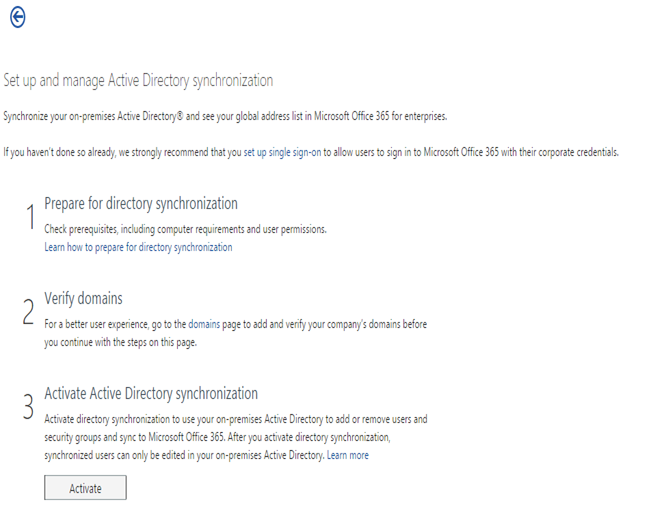
Activate Directory Synchronization:
To activate directory synchronization, use the following steps:
- Install and run the Microsoft Deployment Readiness Tool. Try to fix the issues which are showing here.
-
Depending on which portal you are using, do one of the following:
- If you are using Office 365 or another account portal, click Users, click Set up next to Active Directory synchronization, and then proceed to the next step.
- If you are using the Azure Management Portal, click Active Directory, click on your directory showing on the Enterprise Directory page, click Directory Integration, and then proceed to the next step.
- If you are using the Azure AD Preview Portal, in the left pane, click Integration, click Deploy directory sync, and then proceed to the next step.
- If you are using Office 365 or another account portal, click Users, click Set up next to Active Directory synchronization, and then proceed to the next step.
- Click Activate.
I am using first option.
I reached to this page and clicked on Activate in 3rd step.
Click Activate on the popup
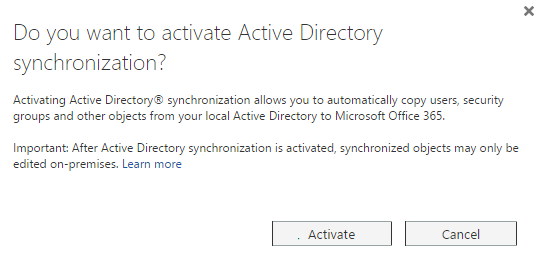
Now you will see

Install Dir Sync tool – At this time we are ready to install Dir Sync tool. We have 3 options available to use
-
Dirsync.exe – This is the default tool which is expected to be decommissioned sooner. This tool only support single AD forest.
-
WAAD – This tool allows multi forest directory sync and it was released in September 2014.
-
Azure AD Connect tool
which is under preview (released in April 2015) butit is the latest tool and Microsoft has decided to work on the improvement of only this tool. So this is the tool to go.Update: It was release on the next day of publishing this blog. The latest tool can be downloaded from here. http://www.microsoft.com/en-us/download/details.aspx?id=47594
Here you can find a comparison of these tools https://msdn.microsoft.com/library/azure/dn757582.aspx
I am using and recommending Azure AD connect
Before we start the Azure AD Connect setup and wizard. Run the following on your ADFS server.
-
Login to the ADFS server.
-
Open Windows PowerShell with Run As Administrator.
-
Run the following command
Enable-PSRemoting –force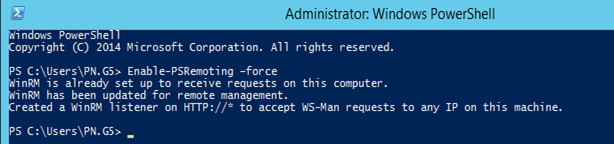
If you miss this step then you will see this error – https://msexchangeguru.com/2015/06/17/o365-aad-connect-preview-issue/
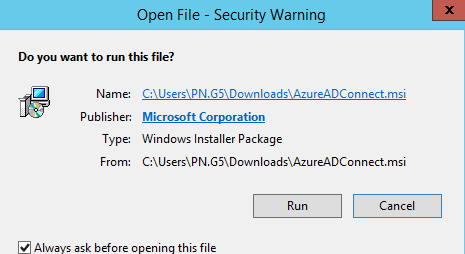
Click on run and it will install Azure AD connect.
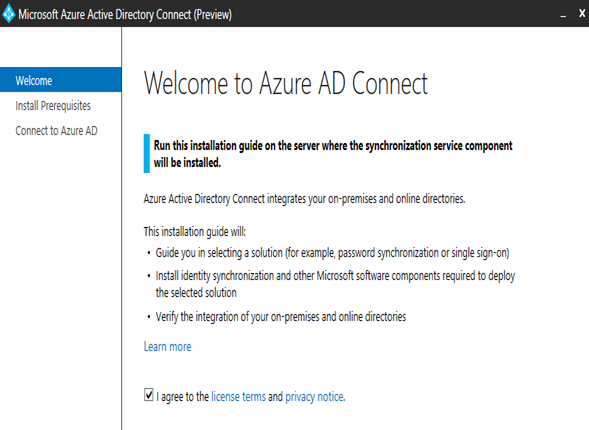
Now you will see the options which can be configured. Click install once ready.
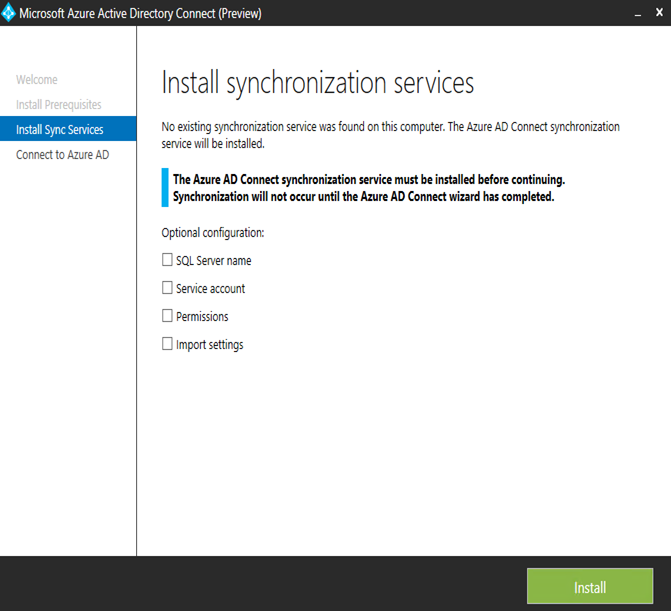

It will install Sql db where Metaverse will be stored.
Now it will install synchronization service.

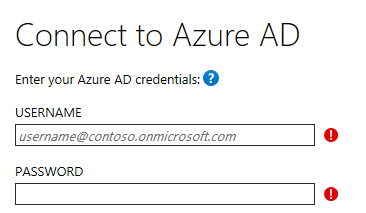
Now Provide Azure AD credentials and click next.
It is recommended you create a service account in Azure AD. This id should be a member of Global Administrator group. We should also set password never expires.
Run the below command to enable “Password Never Expires”
Set-MsolUser -UserPrincipalName alias@domain.com -PasswordNeverExpires $true
Now this is the most interesting screen. Especially if you have multiple forest.
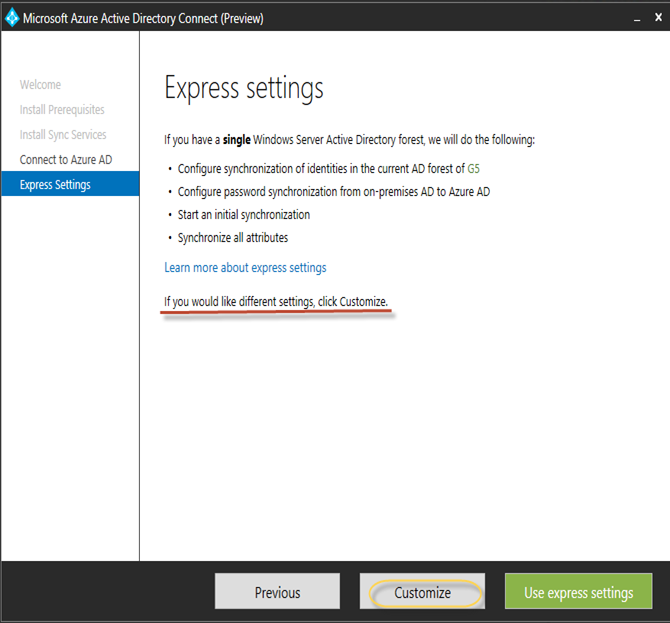
I don’t prefer express setting so I click on customize, I see the below screen with 3 options and for single sign we should use Federation with ADFS.
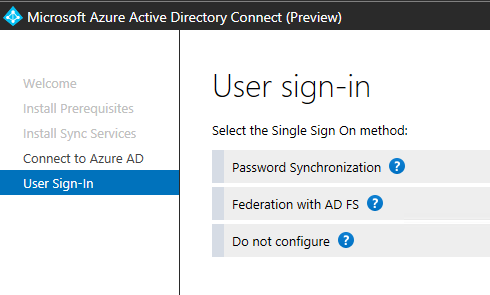
Select Federation with ADFS and click next.
Give the AD user id and passed to add this AD. Continues to add more AD.
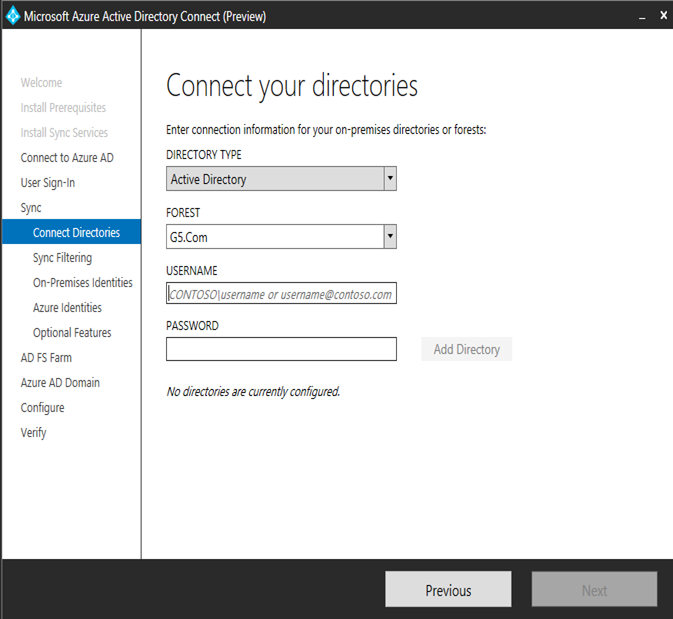
Directory will add like this

Now we have an option to sync either all users + groups or select a group and only its members will be synced. Click next.

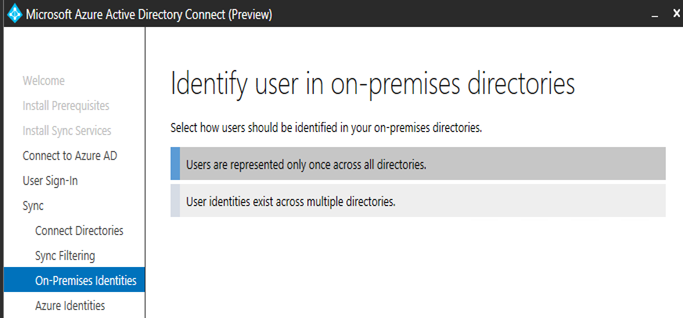
Select from the 2 options if the same user exist in multiple active directories or one. I have selected only one.
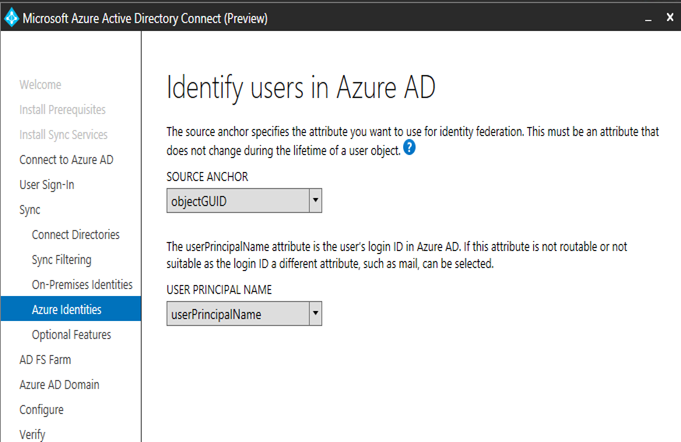
In a multiforest you might select some other attributes but mostly we use default attributes.
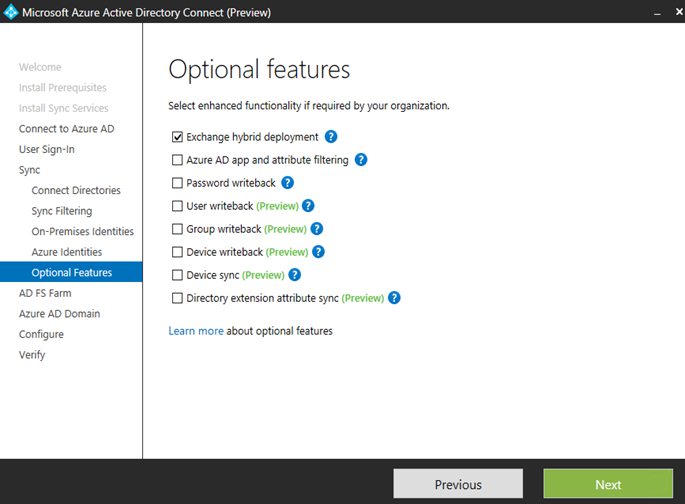
There are various options available. I have just selected “Exchange hybrid deployment”.
If you are deploying Active Directory synchronization with your Exchange 2013 organization then you should select this option because it grants the Windows Azure Active Directory Sync tool write access to your local Active Directory in support of hybrid deployment features specific to on-premises Exchange 2013 organizations.
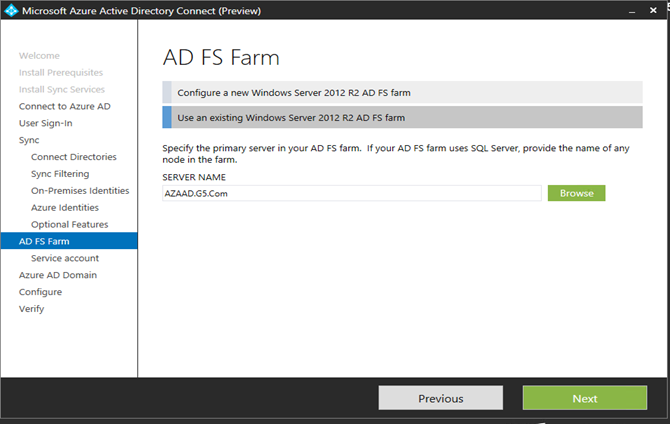
I have alredy created ADFS farm but if you have not created one, this wizard will create. Give the ADFS servername and click next.
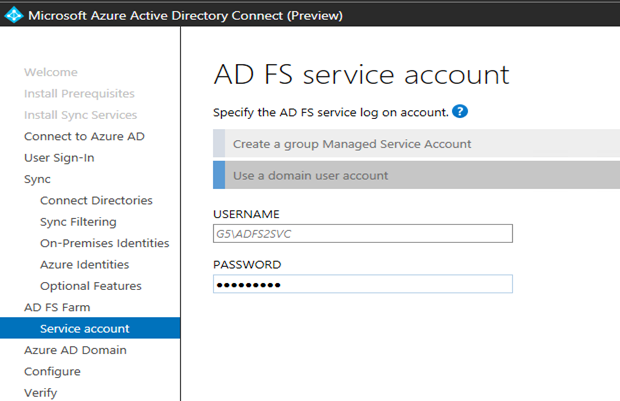
Give the ADFS service id and password and click next
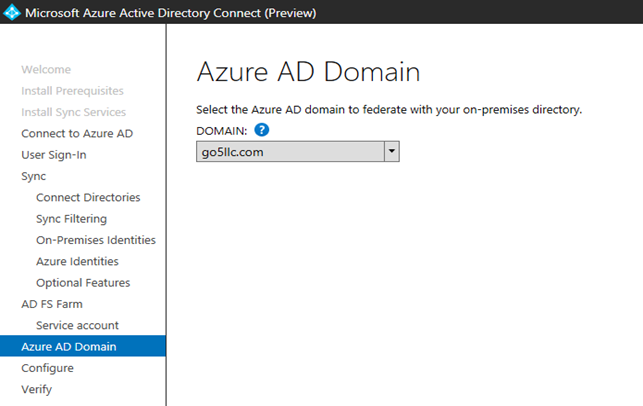
Select Azure AD domain and click next.
Here comes the summary of what it is going to run.
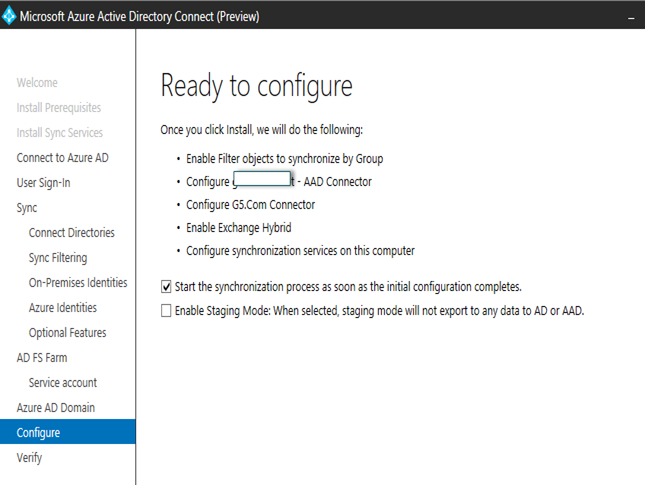
Now it will configure everything.
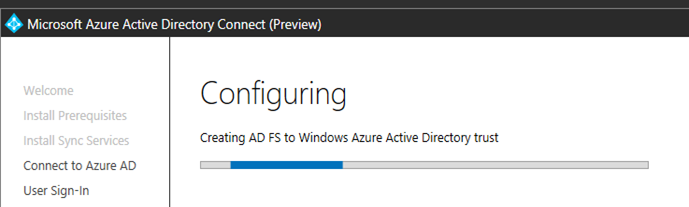
Installation Completed here.

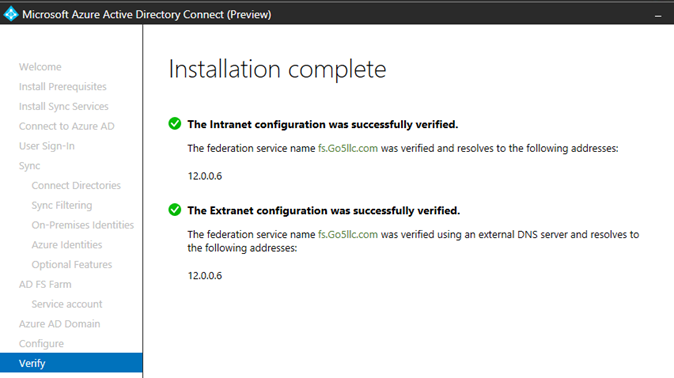
Exit from the setup.
DirSync Connectors configuration
Now we have configured the dirsync. Time to configure the connectors in MetaVerse.
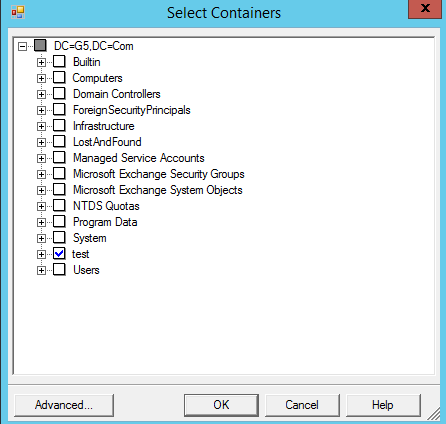
Open “Syncronization Service Manager” à Go to Connectors Tab à Go to the properties of On Premise AD Connector à Select “Configure Directory Partitions” à Click on Containers. 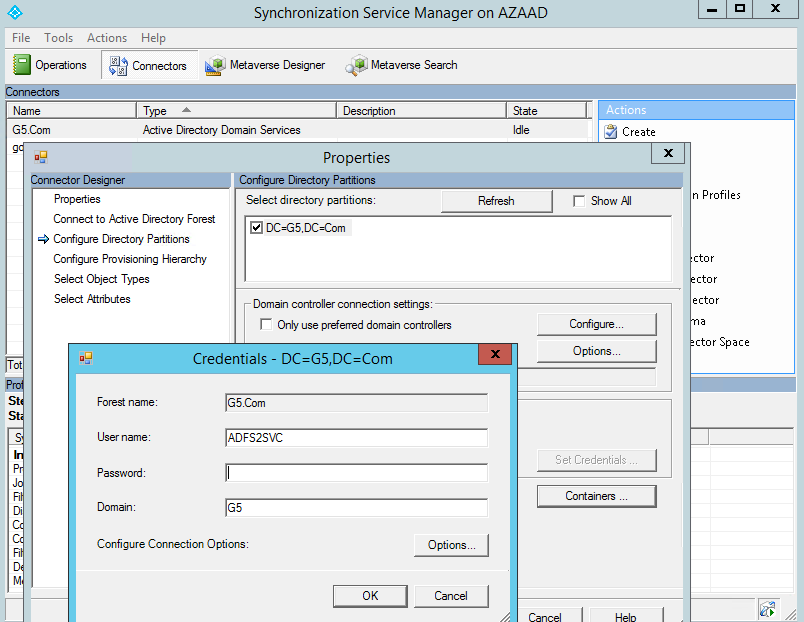
Type the password and click ok. Then select the OUs and click ok then ok.
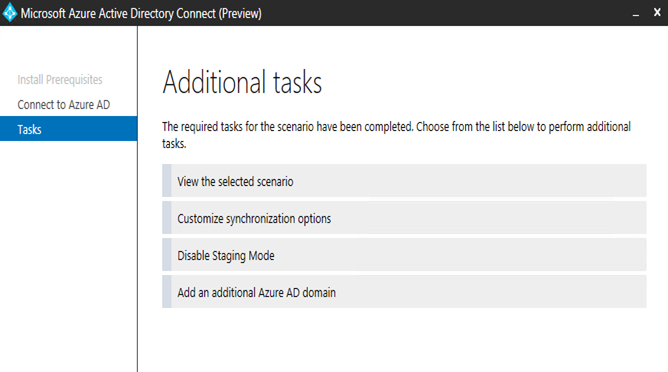
To avoid all sync I had configured staging which was preventing from syncing the AD objects to Azure AD.
If you had enabled staging earlier then it is the time to disable the staging mode so open AAD Connect and login. Then select “Disable Staging Mode” and click next
Uncheck the checkbox and click next
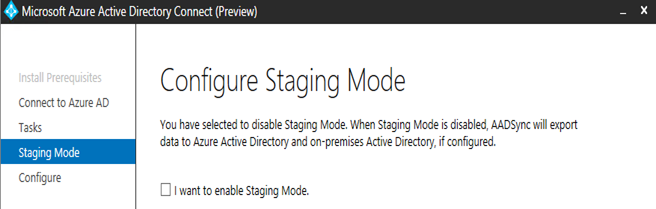
Click install on this screen

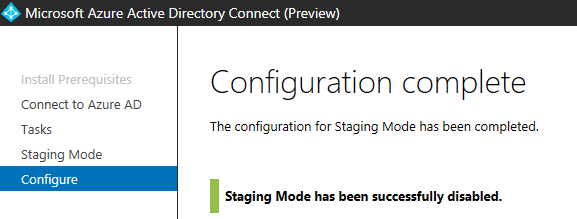
In few seconds you will see the below screen. Click exit.
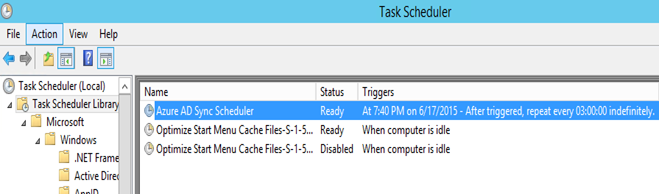
By default, directory synchronization occurs once every three hours as it is configured in Task Scheduler.
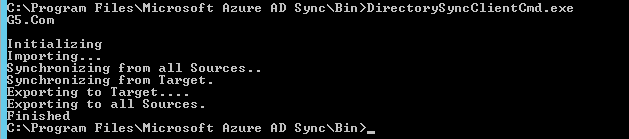
To force immediate directory synchronization, open a command prompt with elevated privileges and start the DirectorySyncClientCmd tool from C:Program FilesMicrosoft Azure AD SyncBin:
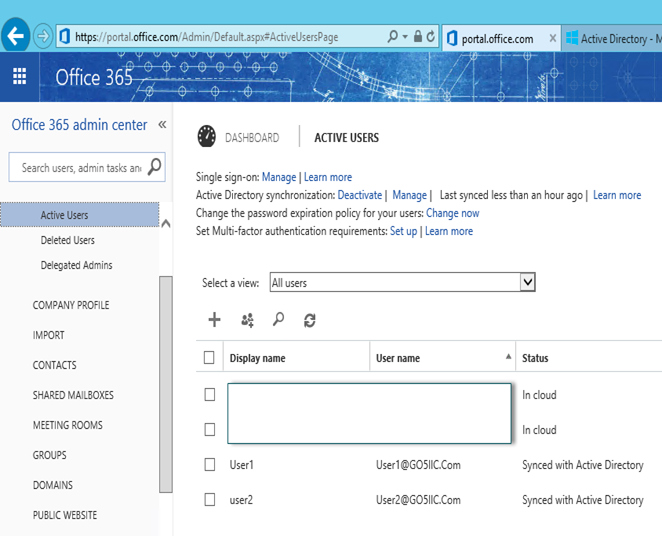
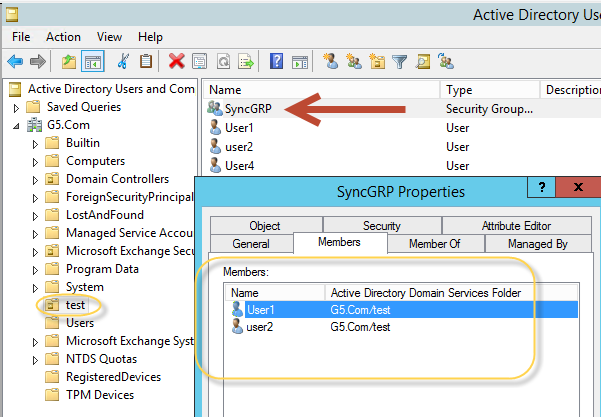
Login to Office 365 and check the active users and you will see users synced their status will show “Synced with Active Directory”
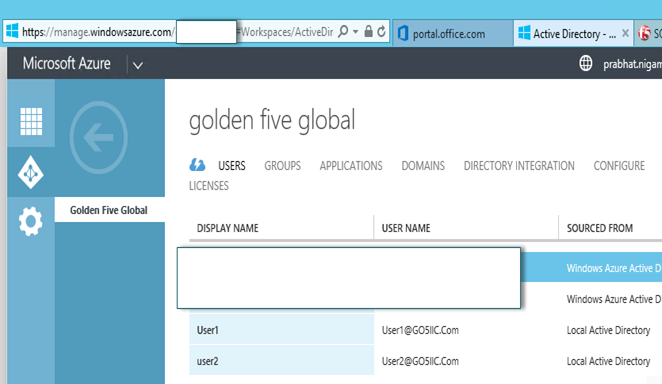
Same in Azure AD
The question might come why only 2 users got synced when we have 3 in the Test OU which is the scope. Answer is group membership. So only member of the group will sync as we configured in the beginning.
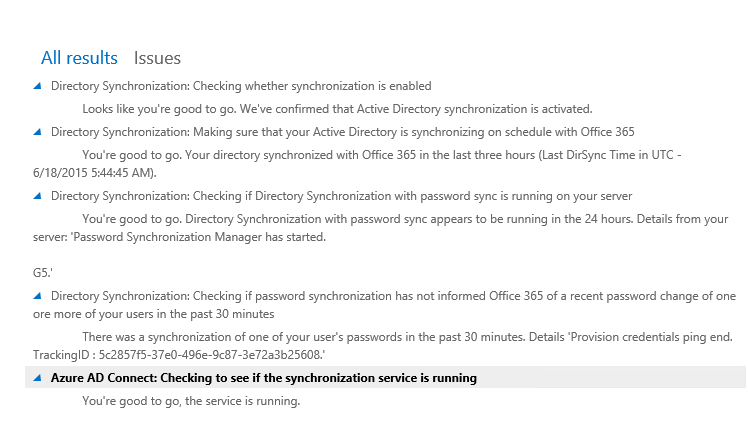
If you run into a Dirsync issue then try this tool – https://configure.office.com/scenario.aspx?sid=18&uid=534f4349414c
This tool will run the following tests.
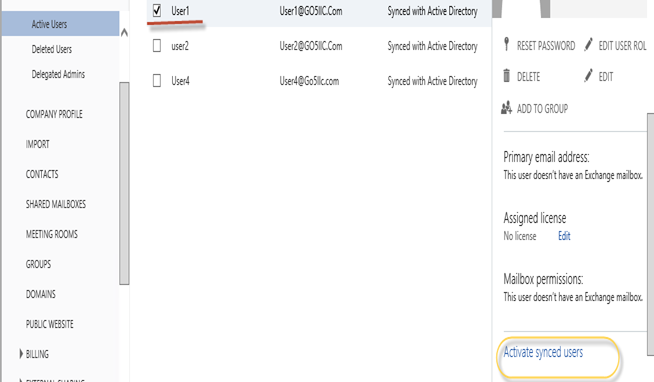
Activate Synced User:
Select the user and on the extreme right corner click on “Activate synced users”
Assign the applications and click on activate to enable licenses.
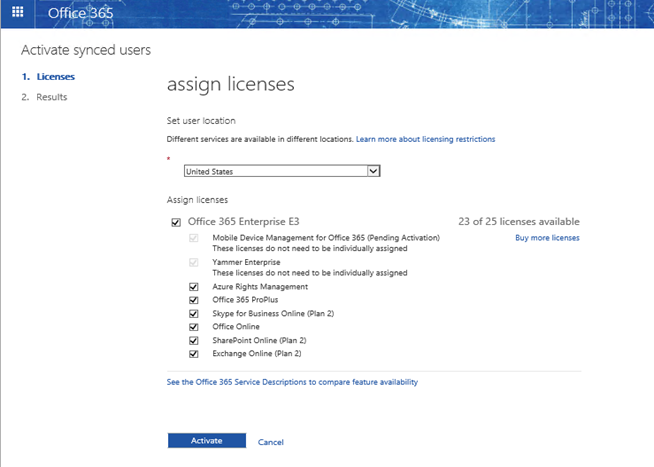
Click on Finish here.

Update 09/28/2016:
If you have old tool then you can use it as mentioned above but if you have deployed new tool then you will see few changes in the wizard.
I would like to update the major changes.
There is no task in the Task Scheduler. It is in the ADSync process. you check the schedule by running the following command in the elevated powershell
Get-ADSyncScheduler
you will see the following output
PS C:\Windows\system32> Get-ADSyncScheduler
AllowedSyncCycleInterval : 00:30:00
CurrentlyEffectiveSyncCycleInterval : 03:00:00
CustomizedSyncCycleInterval : 03:00:00
NextSyncCyclePolicyType : Delta
NextSyncCycleStartTimeInUTC : 9/29/2016 7:34:54 AM
PurgeRunHistoryInterval : 7.00:00:00
SyncCycleEnabled : True
MaintenanceEnabled : True
StagingModeEnabled : False
SchedulerSuspended : False
There is no DirectorySyncClientCmd.exe tool. So you have to run the following command to force a sync.
Start-ADSyncSyncCycle
Result should say success and you will see the ADSync process started in the Synchronization Service Manager.
To change the scheduled sync time run the below command. I have changed it to 3 hrs from default 30 minutes. Remember next schedule will run at the scheduled time and then your changed time will be effective
Set-ADSyncScheduler -CustomizedSyncCycleInterval 03:00:00
To change the sync to be incremental run the following command
Set-ADSyncScheduler -NextSyncCyclePolicyType Delta
To change the sync to be full run the following command
Set-ADSyncScheduler -NextSyncCyclePolicyType Initial
DirSync Blog Ends here
In the Next blog we will see steps to enable and configure Hybrid in Exchange 2013.
Prabhat Nigam
Microsoft MVP | Exchange Server
Team@MSExchangeGuru
Tweet me @PrabhatNigamXHG
")


June 19th, 2015 at 6:30 am
[…] « Exchange 2013: Hybrid Part 3 […]
June 22nd, 2015 at 3:02 am
[…] Exchange 2013: Hybrid Part 3 […]
June 30th, 2015 at 5:48 pm
[…] Exchange 2013: Hybrid Part 3 […]
June 30th, 2015 at 5:51 pm
[…] Exchange 2013: Hybrid Part 3 […]
June 30th, 2015 at 6:23 pm
[…] Exchange 2013: Hybrid Part 3 […]
September 28th, 2015 at 11:36 am
Hi Prabhat,
Thank you for this walk through. I am setting up Exchange hybrid. I am using Azure AD Connect for the first time, I have used DirSync and AADSync in the past. I chose AAD Connect so I can filter on group membership for user replication to Office 365. What I have noticed is that the users are filtered and replicated correctly but I see no groups or contacts in Office 365. It appears that chosing the group for user filtering, is also being applied as a filter for groups and contacts. Have you seen this? And, if so, do you know what the fix is to get all of my distribution groups and contacts replicated to Office 365?
Thank you for your help.
Kevin
September 28th, 2015 at 2:46 pm
Just keep OU based filtering. Remove the group based filtering else you need to add all AD objects to the group members which you want to sync.
September 28th, 2015 at 5:13 pm
Hi Prabhat,
Thanks for the reply. That is what I was thinking I had to do here. The customer wanted to use a group to control the migration of users but this is not going to work.
Thank you,
Kevin