Working with Groups in Exchange Server 2016
Similar to previous versions of Exchange server, Exchange server 2016 also has 3 types of groups like Distribution group, Security group and Dynamic Distribution Groups.
Let us discuss how to create each group, delegate the access and how to set restrictions for the groups:
Creating groups in Exchange 2016: Distribution Group
Using EAC:
Open EAC and Navigate to Recipients àSelect Groupsà Click on

and select Distribution Group:
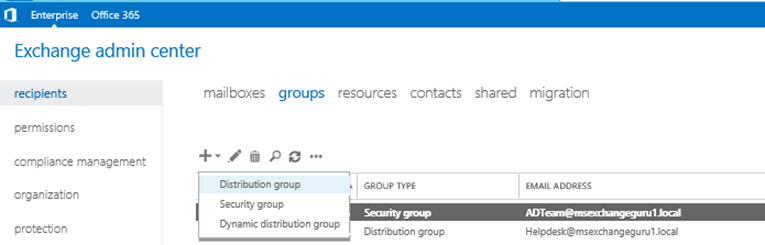
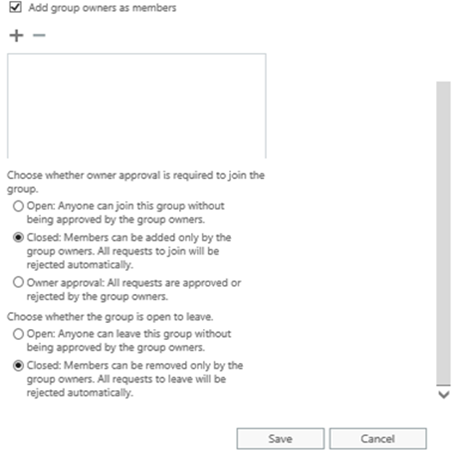
Once we select the Group Type, It will open the new windowà Provide the Group details like Name, Alias, Owner, OU, Members, approvals to join/disjoin to the group etc. and click on Save As shown below:

Using PS Commands:
New-DistributionGroup -Name ‘Exchange Team’ -OrganizationalUnit ‘MSExchangeGuru/Local/Groups’ -SamAccountName ‘Exchange Team’ -Alias ‘ExchangeTeam’ -ManagedBy ‘Ratish’

Creating groups in Exchange 2016: Security Group:
Using EAC:
Open EAC and Navigate to Recipients àSelect Groupsà Click on

and select Security Group:
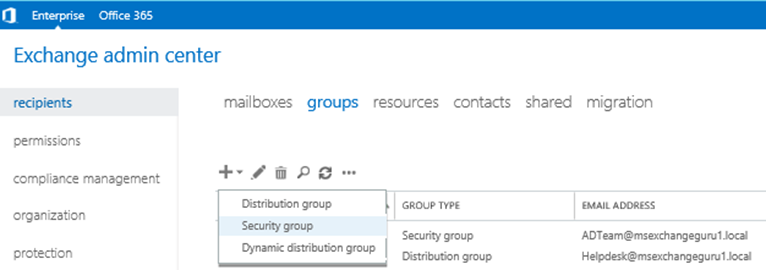
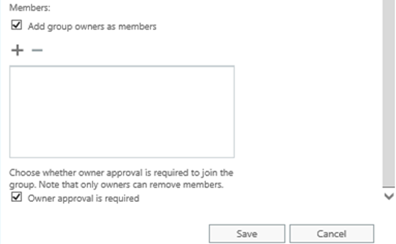
Once we select the Group Type, It will open the new windowà Provide the Group details like Name, Alias, Owner, OU, Members, approvals to join to the group etc. and click on Save As shown below:

Using PS Commands:
New-DistributionGroup -Name ‘DB Team’ –Type Security -OrganizationalUnit ‘MSExchangeGuru/Local/Groups’ -SamAccountName ‘DB Team’ -Alias ‘DBTeam’ -ManagedBy ‘Chandu’

NOTE: To create the Security group, just add the switch ‘–Type Security’ for the same command used to create the Distribution group.
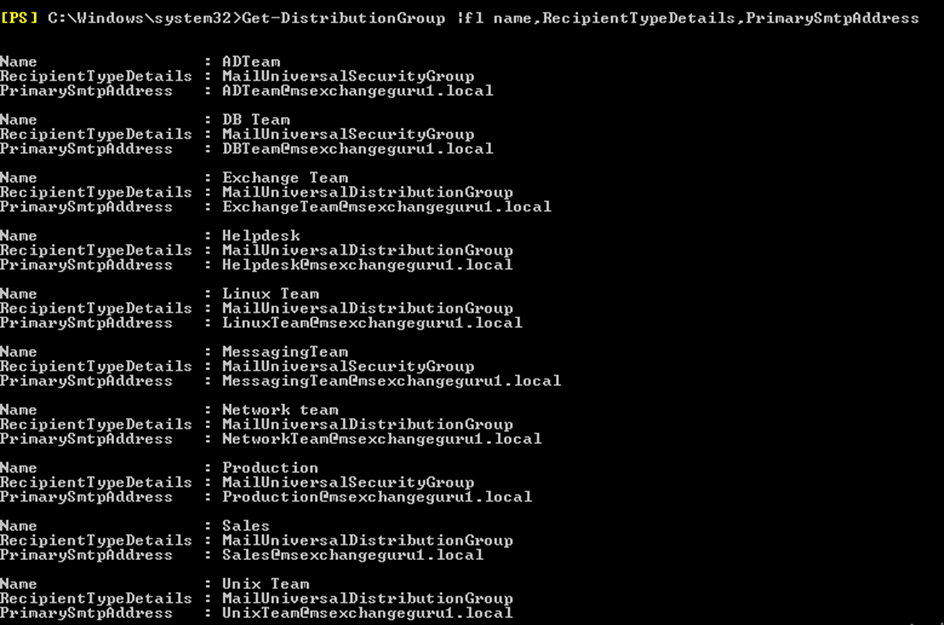
Check if the groups created and its type:
Creating groups in Exchange 2016: Dynamic Distribution Group:
Using EAC:
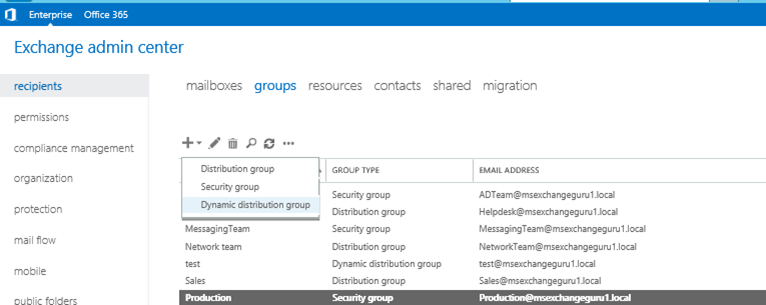
Open EAC and Navigate to Recipients àSelect Groupsà Click on

and select Dynamic Distribution Groups:
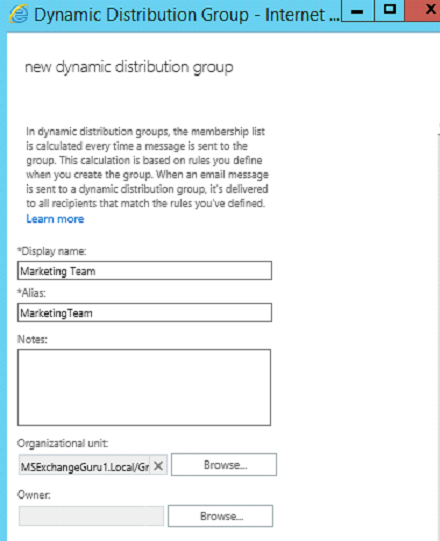
Once we select the Group Type, It will open the new windowà Provide the Group details like Name, Alias, Owner, OU, and Members as below:
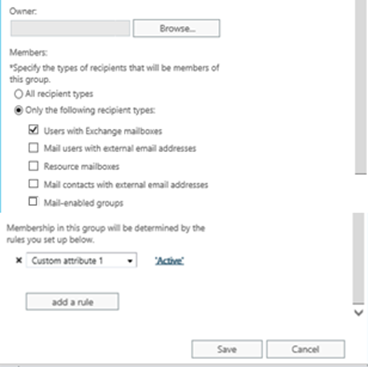
As you already know in Dynamic Distribution groups, the membership list is calculated based on the Rules that we define while creating the Group; hence Administrator has to set the Recipient types and rules as below:
In my test case I have selected:
Recipient types as: All Users with the Exchange Mailbox
Rule: Users properties with the word ‘Active’ under the ‘Custom Attribute 1’
Using PS Commands:
Dynamic Distribution group for the users under One Organizational unit:
New-DynamicDistributionGroup –Name “EX16 DDG1” –IncludeRecipients MailboxUsers –OrganizationaUnit Sales
Dynamic Distribution group for the users within a specific Server under one Organizational Unit:
New-DynamicDistributionGroup –Name “EX16 DDG2″–OrganizationaUnit Production –RecipientFilter {((RecipienTypeDetails –eq ‘UserMailbox’ and ServerName –eq ‘Exchange16’))}

Dynamic Distribution group with the specific rule:
New-DynamicDistributionGroup –Name “FTE DDG” –RecipientFilter {(RecipienTypeDetails –eq ‘UserMailbox’) -and (CustomAttribute10 –eq ‘FullTimeEmployees’)}

Verify if the creation is successful:
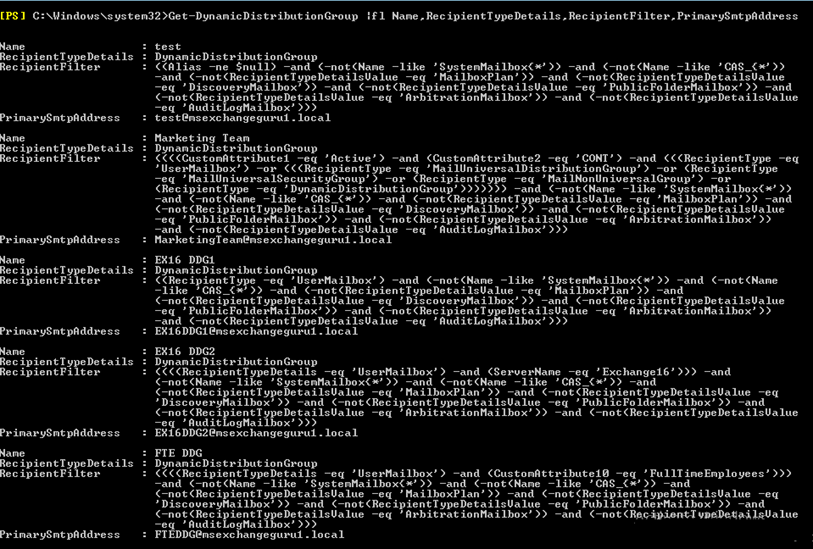
Group Properties:
Now we have the different groups created, let us go to properties of the group and see what all options we have:
Select the group which you want and click on Edit
 option to see the properties of the group as below:
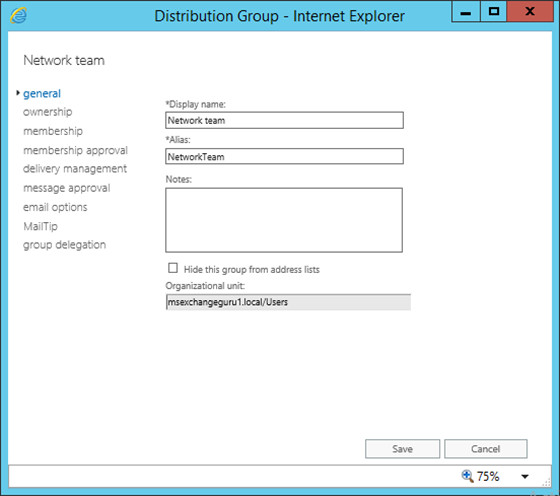
General: Under General Properties, Admin can change the Name, Alias, Add notes and also can hide/unhide the group from GAL.
Ownership:
Using Ownership, Admin can add/remove/change the owner for the group.
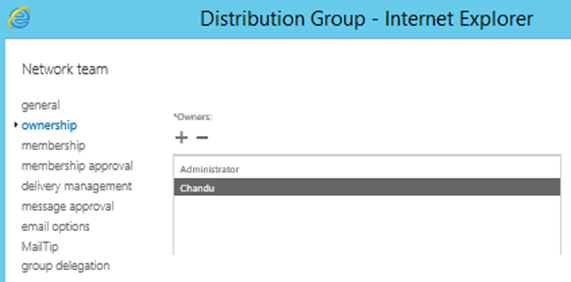
NOTE: There should be at least one owner for the group.
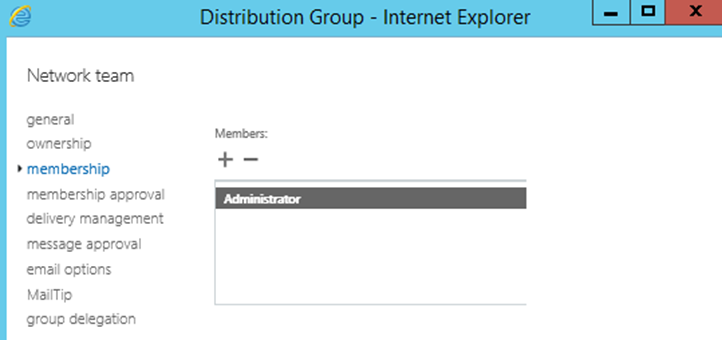
Membership:
Using Membership, Admin can Add/Remove the group members.
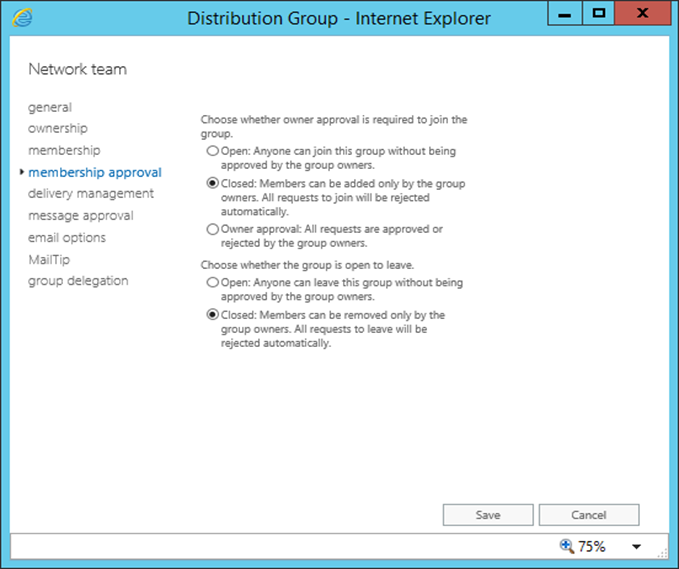
Membership Approval: Using This Membership Approval Tab, Administrator can set whether anyone can join/leave the group or it requires owner approval.
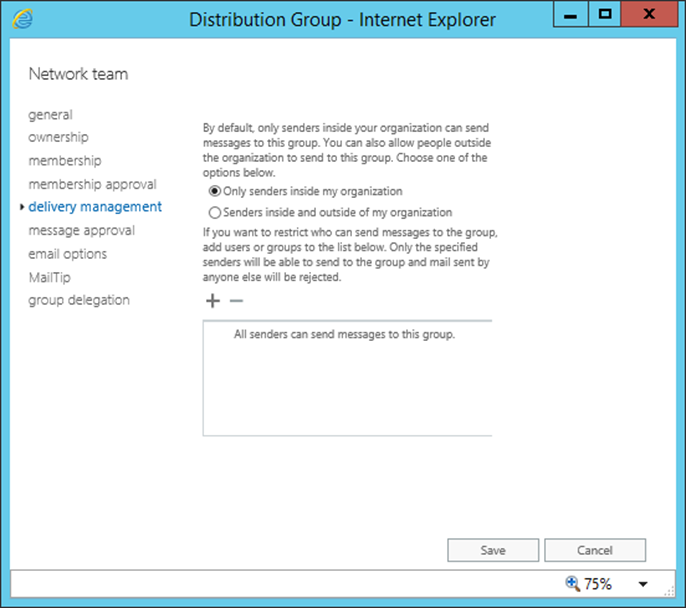
Delivery Management: Using this Option Admin Can set the below:
- This group can accept email only from the internal users (default setting)
- Group can accept emails from both internal and external users (Admin can even specify who can send emails to this group from both internal and external).
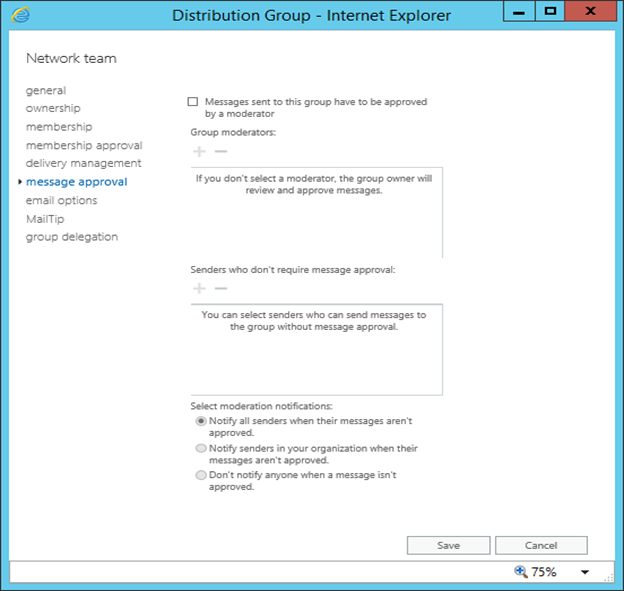
Message Approvals: Using this window, Admin can set:
- Specify a moderator for the group and set whether mail sent to this group has to be approved by a moderator or not
- Set moderation notifications to senders when their message is not approved.
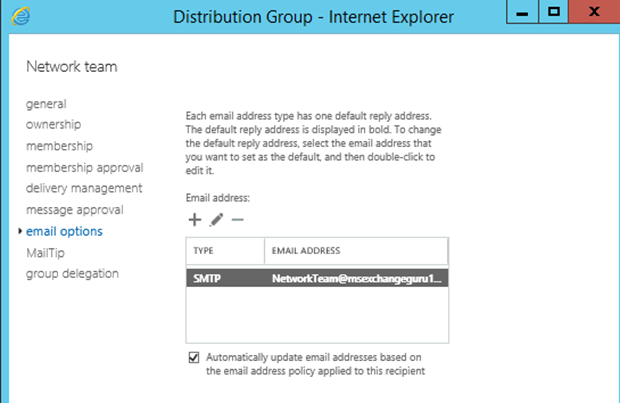
Email Options: Using this window Administrator can add/remove additional email ids for the group:
MailTip: Using this Administrator can create a MailTip to display when people send email to this group.
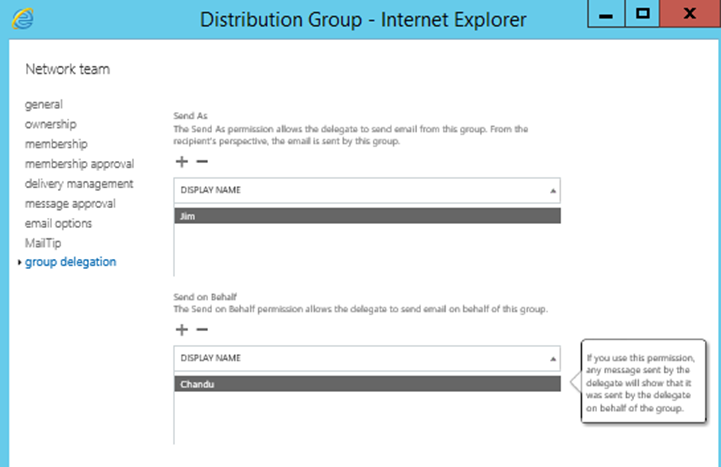
Group Delegation: Using this Administrator can delegate Send As and Send on Behalf Access to a user on this group.
Providing Delegations to a Mailbox on the Group:
Login to EACà
Recipientsà select the group you would like to grant user permissionsàClick on Pencil icon  to editàfrom the new window Click on Group Delegationàand provide delegations as per the requirements by clicking on Plus
  icon under each permission types
Using PS commands:
Provide Send-As Permissions:
Add-AdPermissions –Identity ‘DL name’ –User ‘user name’ –ExtendingRights ‘Send-As’
Remove Send-As Permissions:
Remove-AdPermissions –Identity ‘DL name’ –User User name (full path as MSExchnageGuru.Local/Users/Jim) –Extending Rights ‘Send-As’

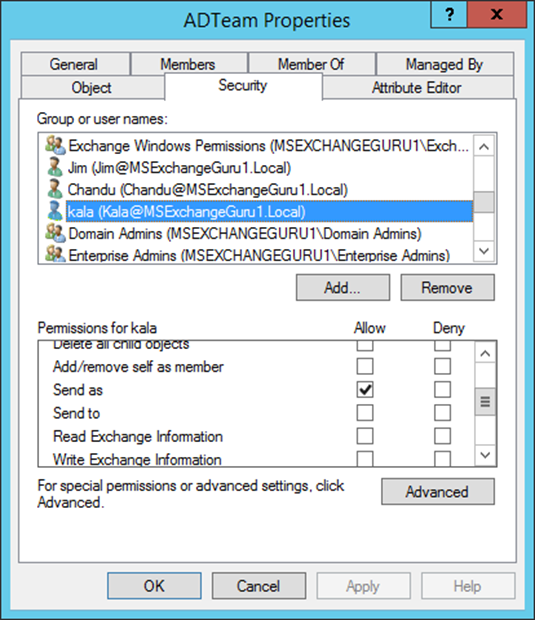
Using ADUC also we can provide Send-As permissions as below:
Provide SendonBehalf Permissions:
Set-DistributionGroup –Identity “Group name” –GrantSendOnBehalfTo “User”

Ratish Nair
Microsoft MVP | Exchange Server
Team @MSExchangeGuru
")


October 26th, 2015 at 12:05 am
[…] Working with Groups in Exchange Server 2016 […]
October 26th, 2015 at 12:08 am
[…] Working with Groups in Exchange Server 2016 […]
October 26th, 2015 at 12:09 am
[…] Working with Groups in Exchange Server 2016 […]