Migration Batch in Exchange Server 2016
Similar to Exchange 2013, Exchange 2016 mailbox movement also called as ‘Migration Batches’ and every mailbox move will have a batch name.
Either the mailbox move can be for a single user or for bunch of users; local move or remote move. Exchange 2016 move request uses “Migration.blahblahblah ″ arbitration mailbox to store the details such as batch information, migration user details etc.
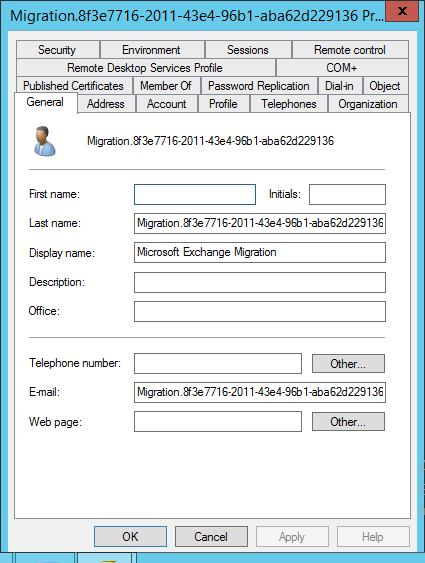
In Exchange 2010 and earlier version of Exchange servers, the transaction logs which generate while moving the mailboxes use to store under source /destination databases, but in Exchange 2016 transaction logs will store under the database where “Migration.6t4r620111-43e4-96b1-rga62d247327″ arbitration mailbox is located. By default transaction logs will generate more during the mailbox movement, manage the database during the mailbox movement we can use the below workaround:
-
Enable circular logging on the mailbox database where arbitration mailbox is hosted.
- Increase the volume size of the database and run the backup regularly to purge the logs files
- Use New-move request instead of batch move.
- Increase the volume size of the database and run the backup regularly to purge the logs files
NOTE:
Though the name says batch move, the number of mailboxes can be moved at a time is limited by the value mentioned in the file MSExchangeMailboxReplication.exe.config under the path ExchangeinstallationpathProgramfilesMicrosoftExchangeServerV15BinMSExchangeMailboxReplication.exe.config file on Mailbox server which is same as in Exchange2010.
We will see how to move the mailboxes in Exchange 2016:
Before we begin with the mailbox movement, we need to check if the mailbox is ready to move:
New-MoveRequest –Identity <username> –TargeDatabase <Databasename> –WhatIf

NOTE: WhatIf command will check the mailbox and will confirm if there any errors with the mailbox as shown:
Let us see how to create the batch migration in EAC:
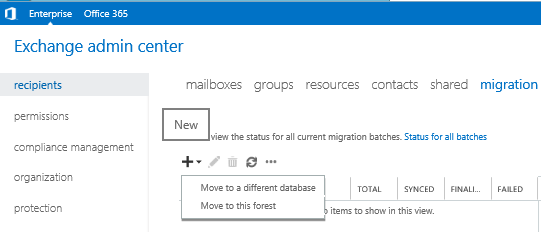
Go to Exchange Admin CenteràRecipientsàMigrationà Click on  and select Migration
You will find two options here one is to move to the different Database and another is move to this forest. Select the appropriate option to go to next window.
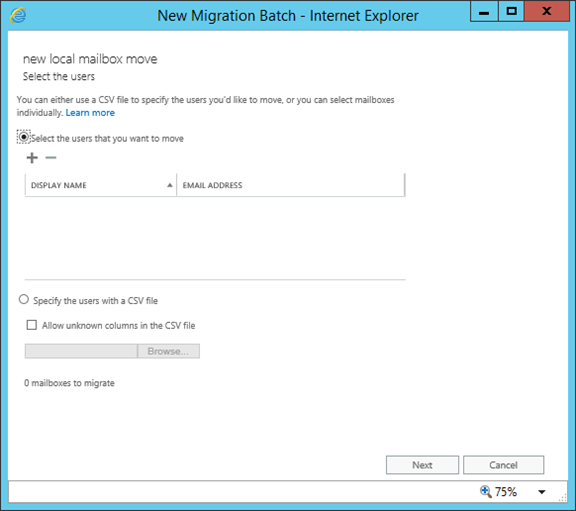
Select the users and click on Next:
NOTE: Either users can be selected from AD by clicking on  or can import from CSV file to specify the users list to be moved.
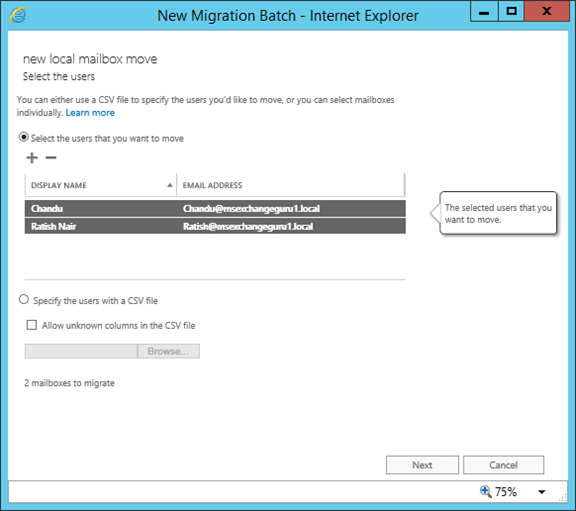
Here I have selected 2 users from AD and click on Next:
Provide the Batch name, Target database name for both Mailbox and Archive (if available) and bad item limit:
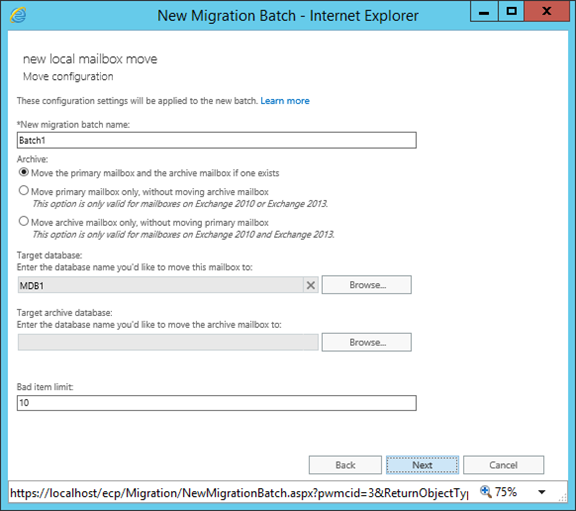
From this window we can select the below options:
- Both Primary mailbox and Archive mailbox to move
- Only Primary mailbox (applicable only for the mailboxes on Exchange 2010 and 2013)
- Only Archive Mailbox (applicable only for the mailboxes on Exchange 2010 and 2013)
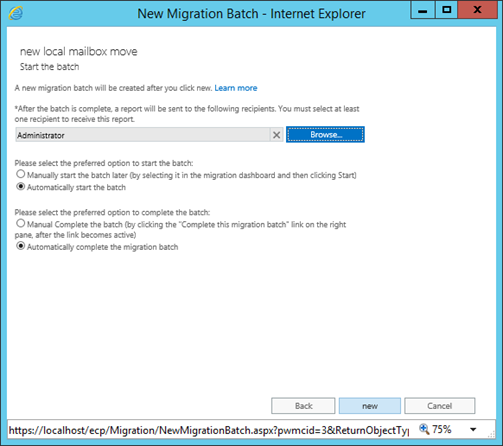
Select the user account which needs to receive the report of the migration batch, by default it will be selected as Administrator:
Select the appropriate options to start and complete the batch and Click on New:

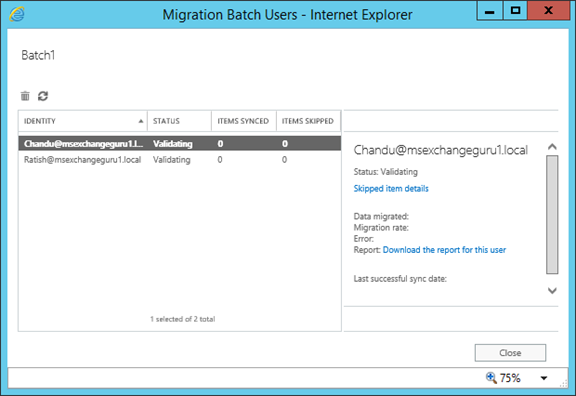
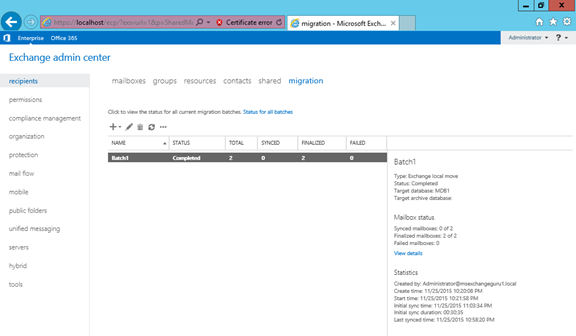
Under EAC you can find the details as below and can find the details by clicking on View Details:
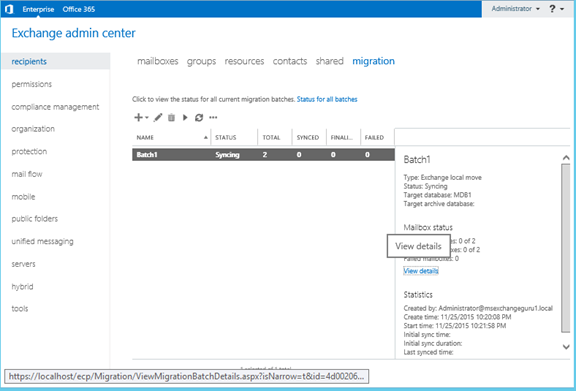
Now the mailbox movement is completed and you can find the details as below:
Below are the PowerShell commands for batch migration:
Move the entire users in one Database to another:
Get-Mailbox –Database <Databasename> | New-MoveRequest –BatchName <LocalMove2> –SuspendWhenReadyToComplete
Get-MoveRequest “batchname” | Set-MoveRequest –SuspendWhenReadyToComplete $false
NOTE:
–SuspendWhenReadyToComplete switch will suspend the move at 95% and need to resume completing the backup
–SuspendWhenReadyToComplete $false switch will complete the backup without suspend
To Resume and complete the backup:
Get-MoveRequest “Batchname” | Resume-MoveRequest
Using CSV file to move the multiple mailboxes:
New-MigrationBatch –Local –Name <LocalMove2> CSVData ([System.IO.File]::ReadAllBytes(“C:UsersAdministrator.MSEXchangeGuruDesktopMigration.csv”)) –TargetDatabase <Databasename>
Start-MigrationBatch –Identity <LocalMove2>
Complete-MigrationBatch <LocalMove2>
Use the below command to start and complete the move automatically
New-MigrationBatch –Local –Name <LocalMove2> CSVData ([System.IO.File]::ReadAllBytes(“C:UsersAdministrator.MSEXchangeGuruDesktopMigration.csv”)) –TargetDatabase <Databasename> -Autostart -AutoComplete
NOTE: We can use the multiple switches as per the requirement.
Ratish Nair
Microsoft MVP | Exchange Server
Team @MSExchangeGuru
")

