Azure AD connect Installation and Configuration
Let’s take a look at Azure AD Connect installation and config steps
Why would you choose to use Azure AD connect:
- Users will be able to use single identity to access on-premises applications and cloud services such as Office 365.
- Azure AD connect provides an easy deployment experience for synchronization and sign-in of user objects.
- Azure AD connect provides newest features for your organizations, since Azure AD Connect replaces older versions of identity integration tools such as DirSync and Azure AD Sync.
Pre Requisites:
- The following are the list of requirements required to successfully deploy Azure AD Connect.
- Windows 2012 R2 sever with at least 100GB Hard Drive, 4GB of RAM and at least a 1.6GHz processor
- Unhindered Outbound internet connectivity on ports 443 and 80, bypassing the bluecoat proxy.
- A service account in the root forest – For this svr_msoldoma@domain.com was created with a non-expiring password and that the account cannot reset its own password.
-
This account needs also added into the local administrators group on the server “ABC” .
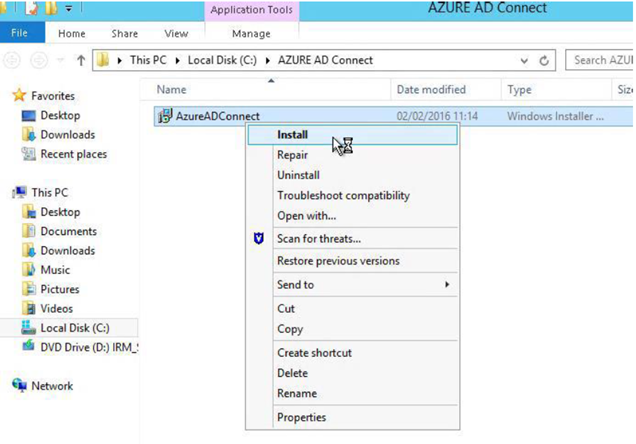
Installation of Azure AD Connect
Select the AzureADConnect package downloaded and choose install.
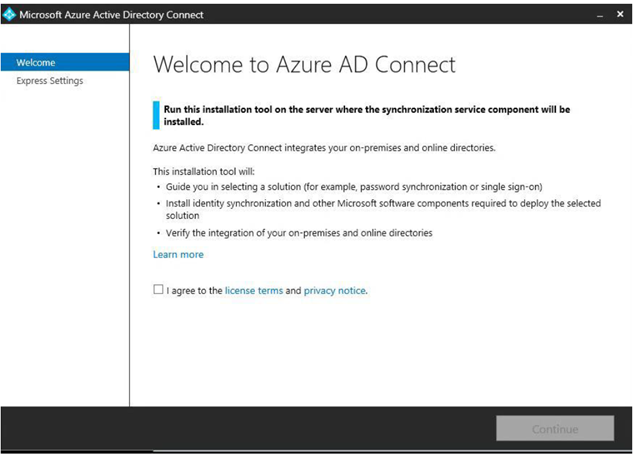
You will then be shown the Welcome Page. Choose “I agree to the license terms and privacy notice” then Continue.
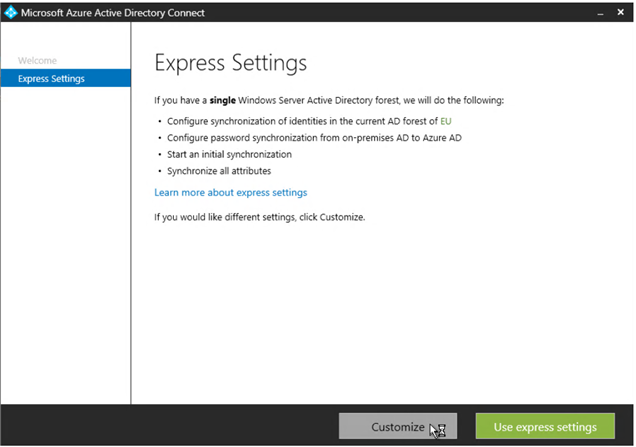
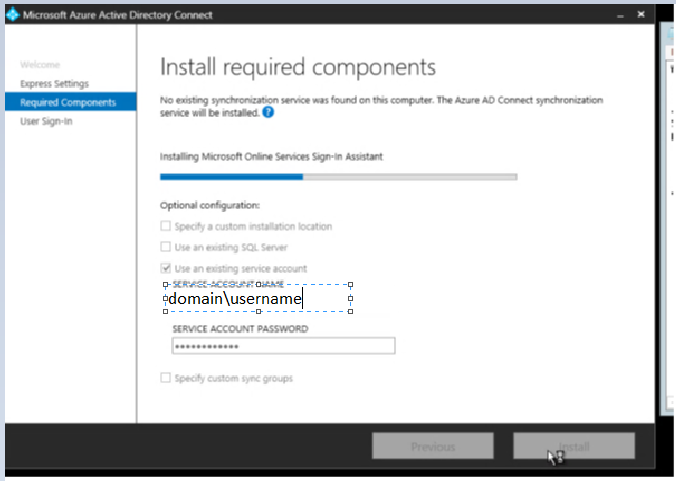
On the express settings page select “Customize”.
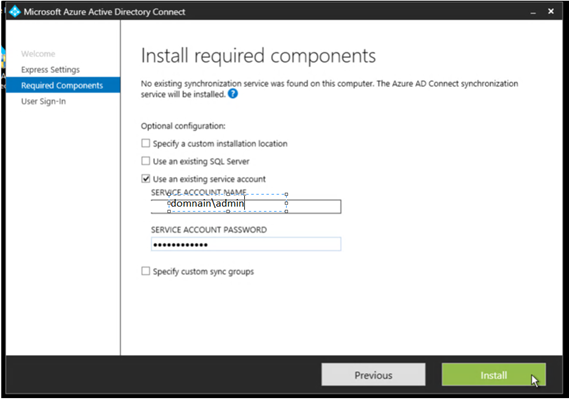
- Tick the box for “Use an existing service account” and enter the service account in the following format:
- domainsvr_msoldomain
-
Then select Install
This will then configure and install some of the requirements
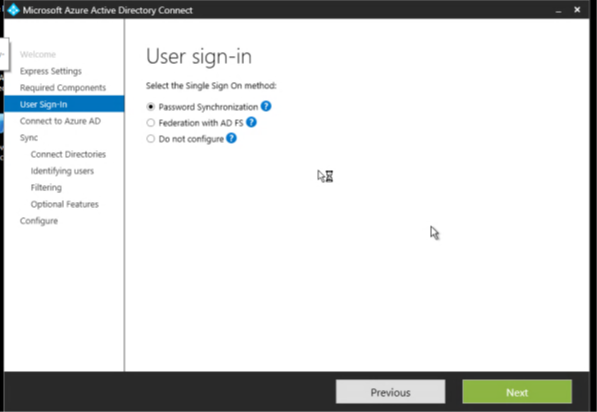
On the User Sign-in page select “Password Synchronization” and then Next
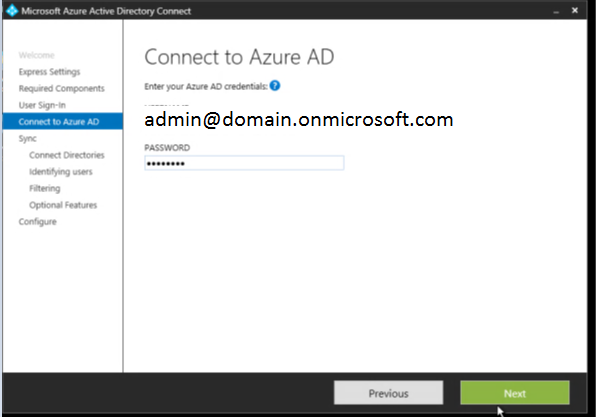
On the Connect to Azure AD page enter the following account
admin@domain.onmicrosoft.com with its password
Then select Next
On the Connect your directories page select the forest as hofplc.com and then enter an enterprise admin account.
Click add directory.
Then select next

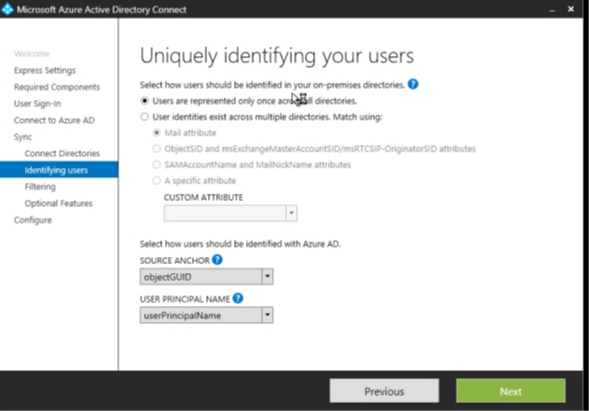
On the Uniquely identifying your users page leave all the defaults as shown below
Users are represented only once across all directories
Source Anchor = ObjectGUID
User Principal Name = userPrincipalName
Then select Next
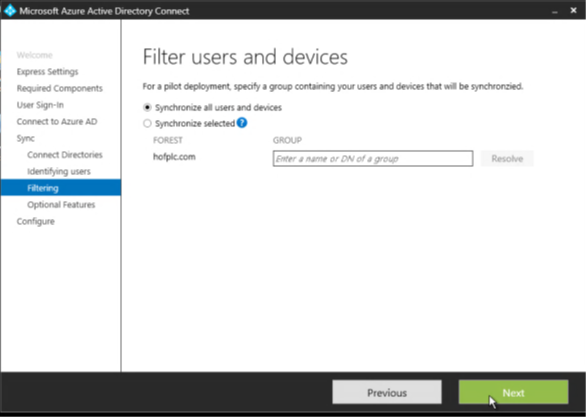
On the Filter user and devices page select synchronize all users and devices
Then next
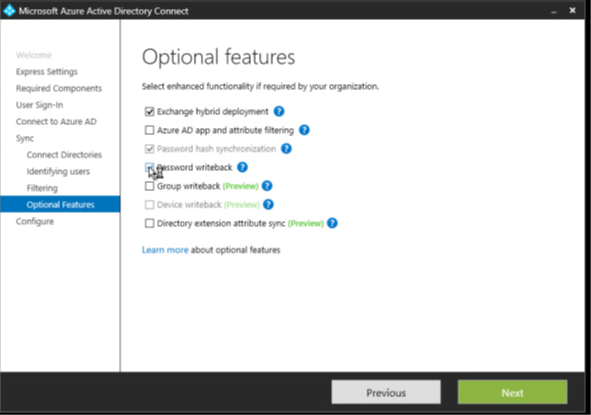
On Optional Features page select the following
- Exchange hybrid deployment
- Password hash synchronization – Which should be greyed out
- Password writeback
Then select Next
On the next page Ready to configure ensure all tick boxes are unchecked. Then select Install
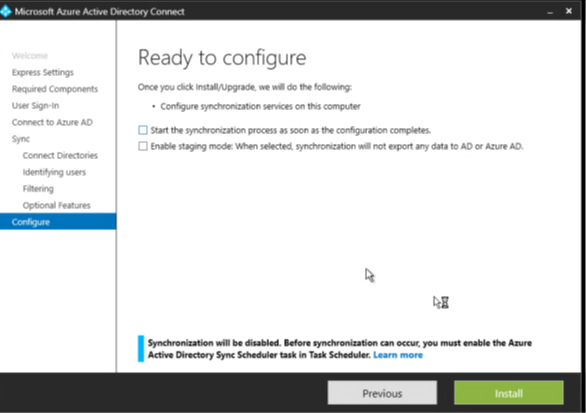
This will start the installation and configuration of Azure AD Connect.
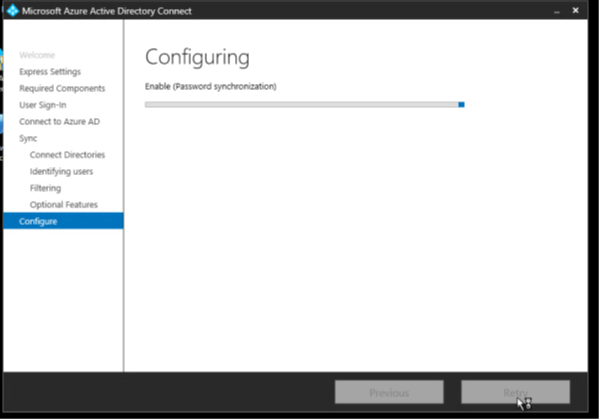
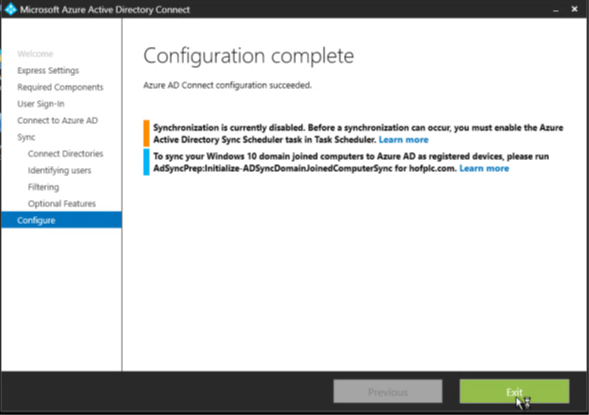
Once complete you will be shown the following:
Ratish Nair
Microsoft MVP | Office Servers and Services
Team @MSExchangeGuru.com
")


April 28th, 2017 at 3:45 pm
[…] « Azure AD connect Installation and Configuration […]