Installing and configuring Lync Server 2013
Lync is a reliable application for all real-time communications in an organization. It effectively reduces complexity and enables a path to a unified communications—on your timeline, following your blueprint.
Here, we shall see how to deploy and configure a Lync for an organization.
We begin by trying to understand how to deploy a new Lync environment using the Lync Server Topology Builder and the server role deployment process.
The first procedure we deal with in this article is, preparing Active Directory Domain Services (AD DS) for the new Lync and installing the Lync Topology Builder.
Our first task is to install the Front end server, for the site associated with our Lync Server, on a server. We begin by preparing a schema for the same.
- Open Windows Explorer.
- Navigate to C:\Labfiles]Lync2013\Setup\amd64.
- Open the Setup application.
- Choose the desired location and click Install.
- Accept the licence agreement and click OK.
- Once the copying is complete, the Lync Server Deployment Wizard opens up. In the wizard, choose Prepare Active Directory. During deployment certain steps are to be executed to process extends the schema for this Front End Server. In the first step, that is Prepare Schema, click Run.
- Click Next. Once the step is successfully completed, finish and close the window.
- Now we can verify the replication of the schema partition. Next, we prepare the current forest. This step creates the necessary global settings and objects as well as the universal service and administration groups. In step 3, click Run. Click Next. Specify the domain where the universal groups will be created, and click Next. When the step is successfully completed, click finish and close the window.
-
After you have verified the replication of the global catalog, the next step is to prepare the current domain. This step creates the necessary access control entries (ACEs) on the domain root. Begin by clicking Run button in step 5. Click Next. When the step is successfully completed, click finish and close the window.
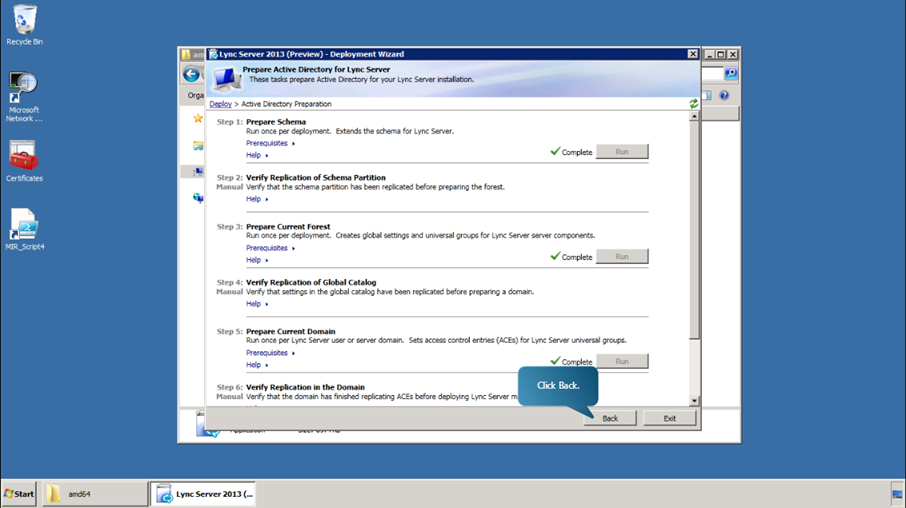
- Once all the steps are completed, navigate back to the Welcome screen of the Deployment Wizard.
-
Clicking Install Administrative Tools installs the Administrative Tools, including Lync Server Control Panel and Lync Server Topology Builder, to the current system.
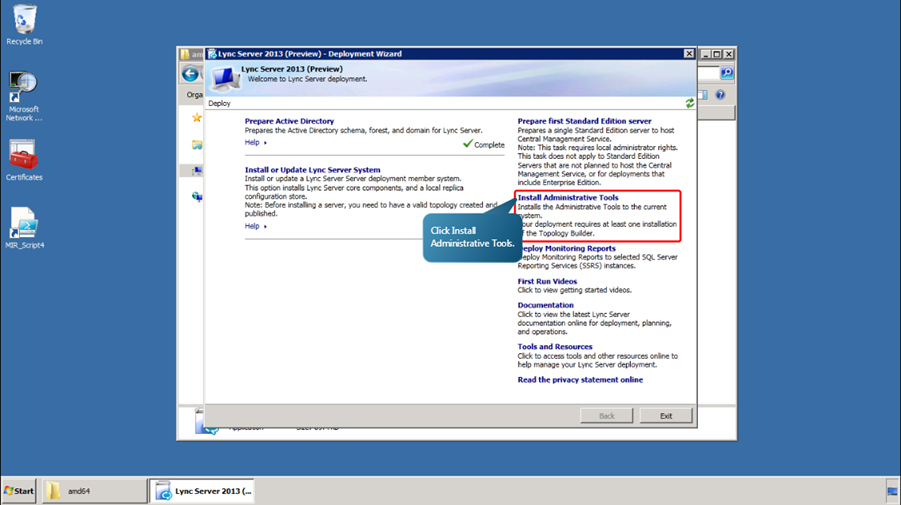
- Once this completes, we have successfully prepared the Active Directory Domain Services (AD DS) for the new Lync and installed the Lync Topology Builder.
In the next procedure, we will see how to use Topology Builder to add an additional site; how to define Lync Server Enterprise Edition Front End Pools; and how to define Front End Servers for those pools. We will also see how to define other Lync Server components and configurations.
-
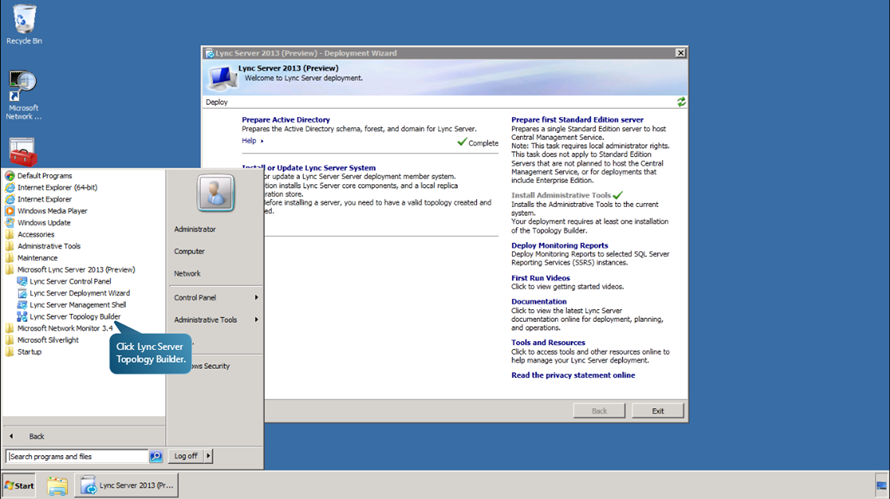
We begin by launching the Topology Builder and download the existing legacy topology from the front end server. Go to Start->All Programs->Microsoft Lync Server 2013 (Preview)->Lync Server Topology Builder.
-
Select the option Download Topology from existing deployment. This will retrieve a copy of the current topology from the Central Management store. Then click OK.
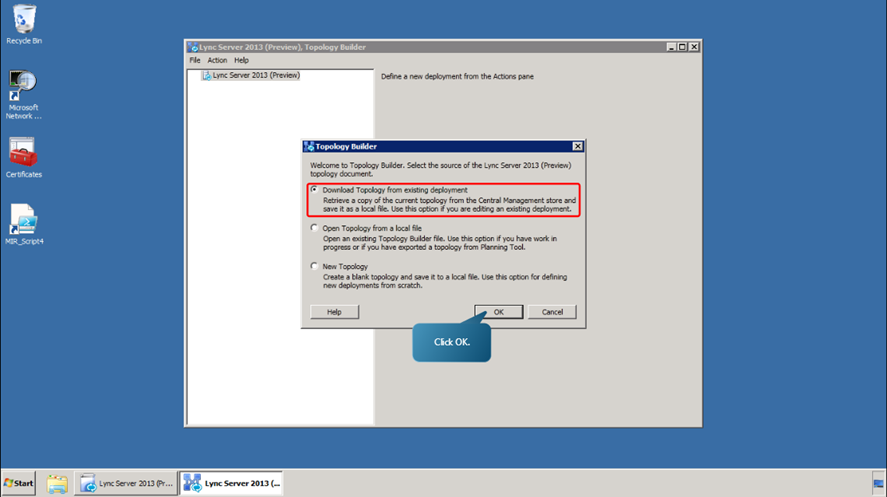
- Now save this copy as a local file, (We used C:\LabFiles\OnPremTopology).
- Now we define the Enterprise Edition Front End Pool for the Redmond site by creating a Lync 2013 Enterprise Edition Pool with two Front End Servers and then configuring the necessary components. In the topology builder window, expand Lync Server 2013(Preview)->OnPrem-> Lync Server 2013(Preview)
-
Right Click, Enterprise Edition Front End Pool and select New Front End Pool.
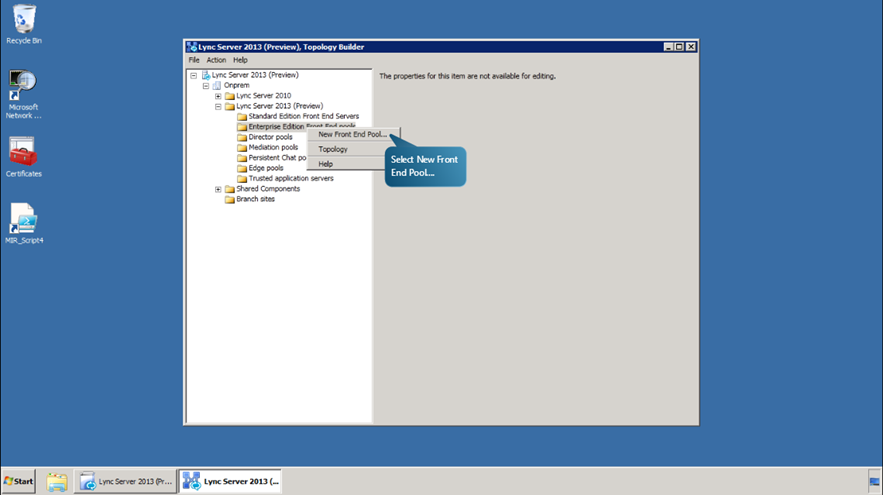
-
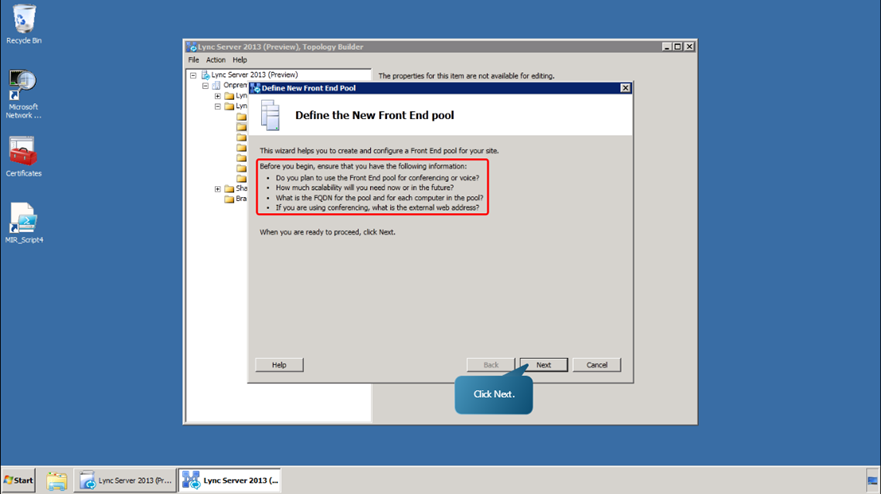
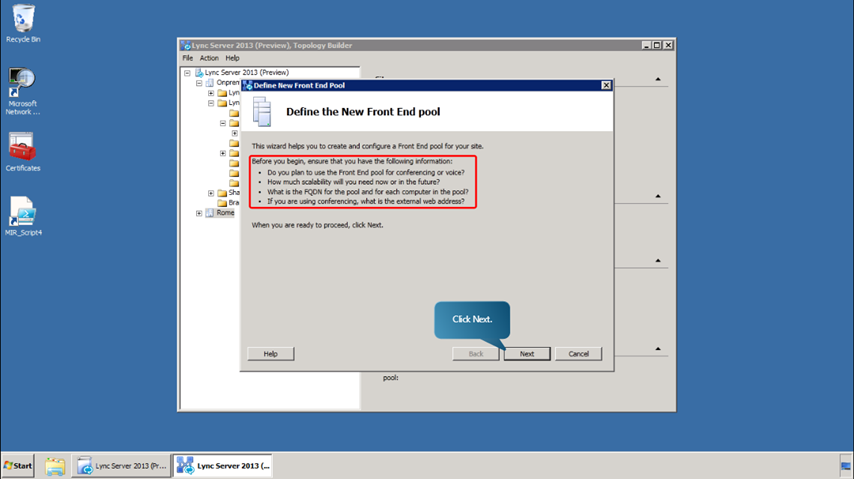
Make sure that you have all the information listed on the screen and click Next.
- In the Pool FQDN box, type in ‘redpool.onprem.local‘ and click next.
-
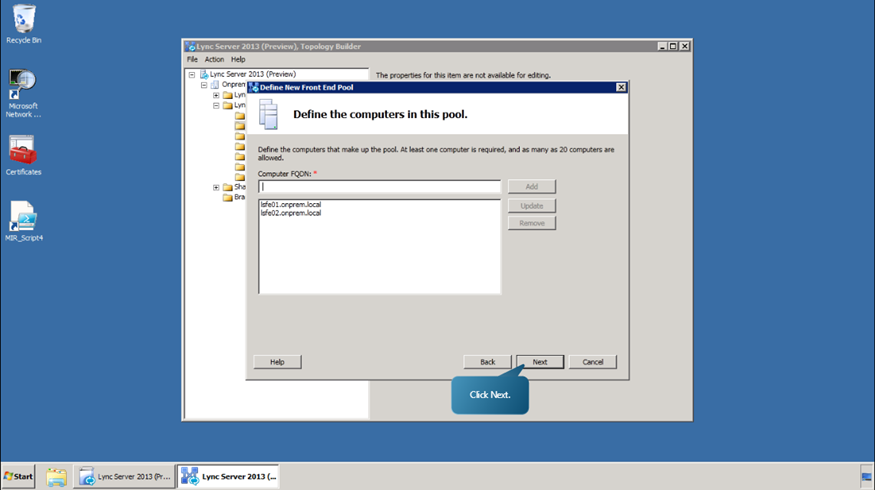
Next, define the computers that will make up the pool and click Next button.
- Select all the additional features that you want this new Front End pool to handle. (We have chosen Conferencing, Dial In(PSTN) conferencing and Enterprise Voice). Click Next to continue.
-
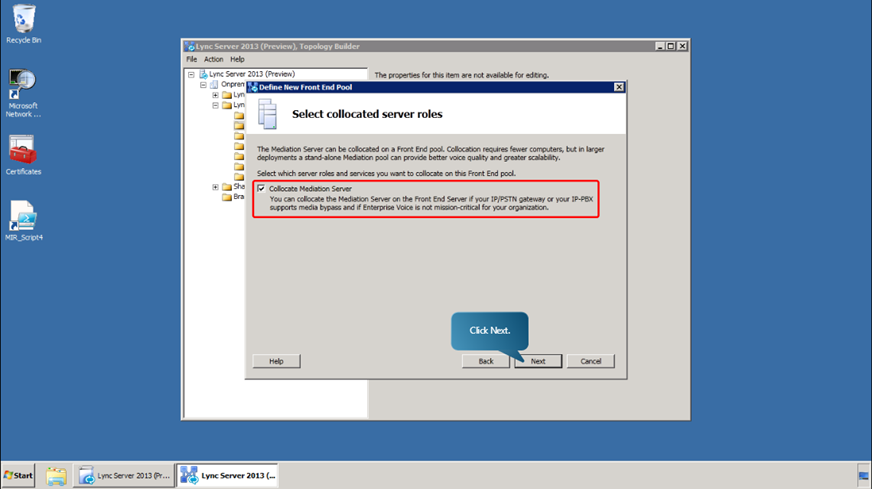
Specify which server roles and services you want to collocate on this Front End pool and click Next.
- Deselect the Enable an edge pool checkbox and click Next.
-
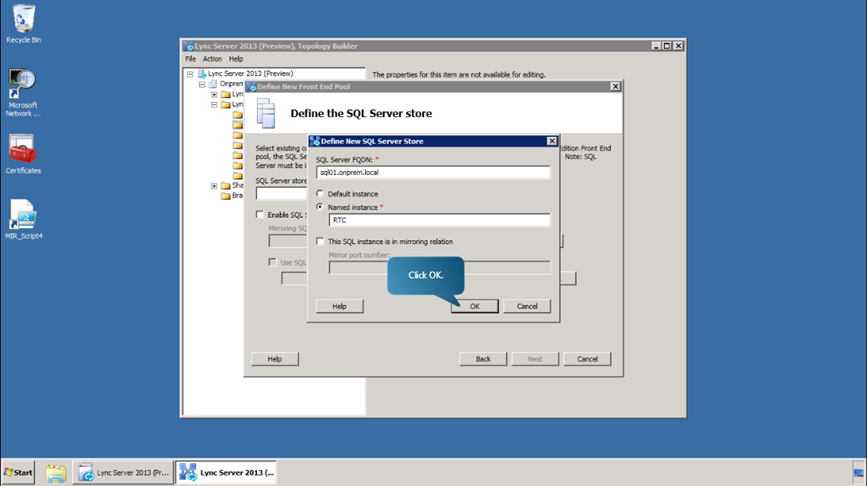
Next, define a new SQL Server instance to store user information by clicking on New. In the subsequent window, fill in the fields as shown in the figure, and click OK and Next.
-
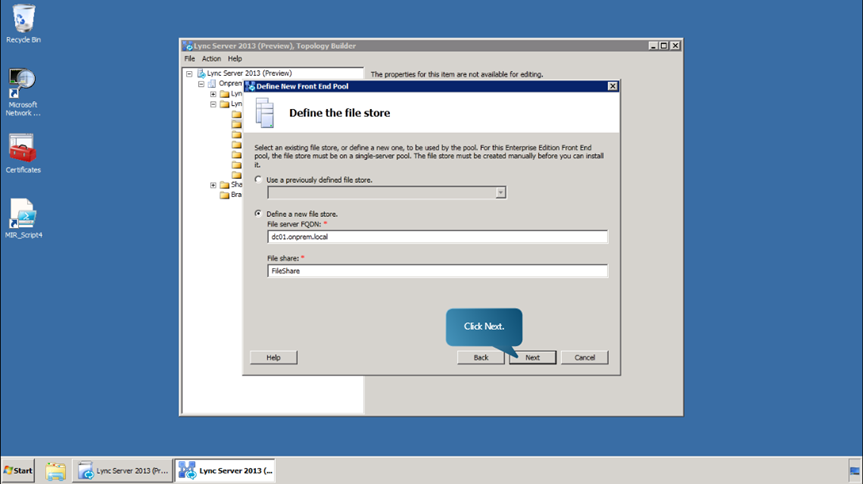
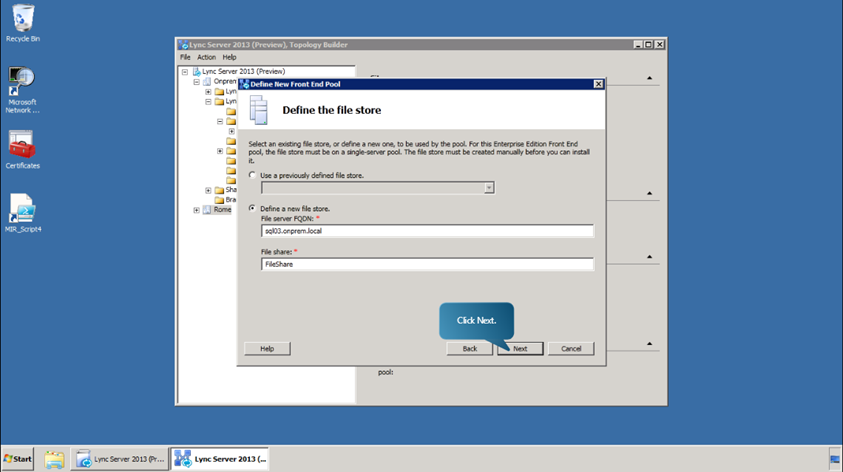
Now, we define a new file store. In the window, select the option Define a New File Store, fill in the fields as shown in figure and click Next.
- Specify the web service url. (We’ve used redext826.lyncignite.biz)
-
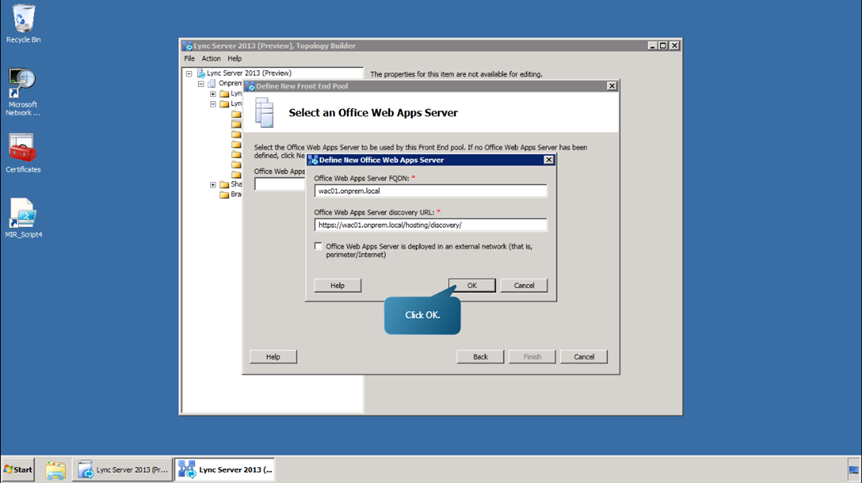
Define a new Office Web Apps Server to be used by this Front End pool. Begin by clicking New. Use the pre-populated discovery URL as well as the default settings in the window, and click OK.
- Finally click Finish.
Next, we define the Enterprise Edition Front End pool for Rome, the site to be added, using Topology Builder.
- In the topology builder, right click on Lync Server 2013 (Preview)
-
Select New Central Site. Type the site name and description and click Next.

- Provide the additional details and click next.
-
Click Finish.
-
Next, define the New Front End pool for the added site. .
- Define pool FQDN and click Next.
- Add the computers to the pool and click Next.
- Choose the necessart additional features as before and click next.
- Verify that Collocate Mediation Server is selected and click Next.
-
Enable the option and click next.

-
Define the new SQL Server store.

-
Click Next and define the File Store.
- Specify the Web Services URL. (We have used romeext826.lyncignite.biz)
- Finally click Finish.
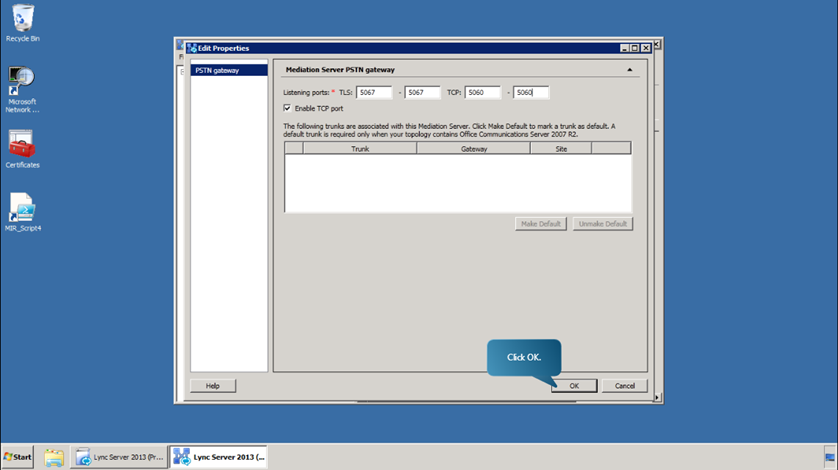
- Now, edit the on-premises Mediation pool default settings to use port 5060. Expand Mediation Pools, right click on ‘redpool.onprem.local’ and select edit properties.
-
Enable the TCP Port and define it as 5060. Click OK.
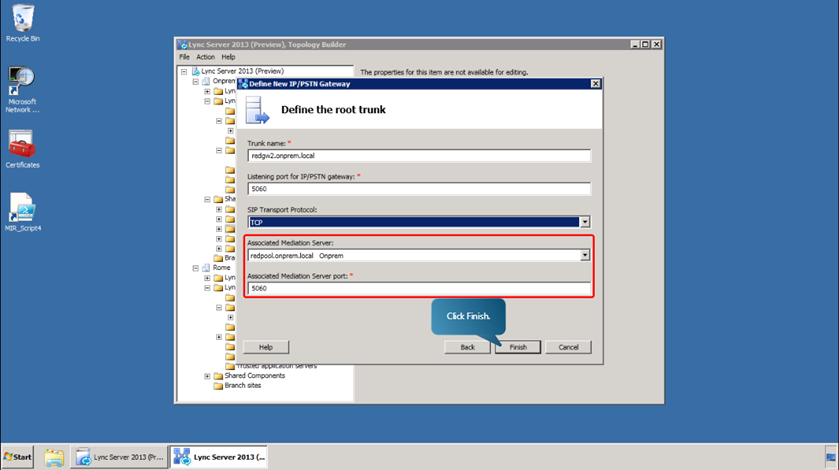
- Now, we will configure a PSTN Gateway for the Redmond pool that will resolve to a PSTN emulator on the domain controller, and then configure its listening ports. Expand Shared Components. Right click on PSTN gateways and choose New IP/PSTN Gateway.
- Define the FQDN (redgw2.onprem.local) and click Next.
- Enable IPv4 option and Use all configured IP adresses option and click Next.
-
Define the root trunk as shown in the figure and click Finish.
- Next, edit the default settings of the Rome Mediation pool to use port 5060 just as we did before.
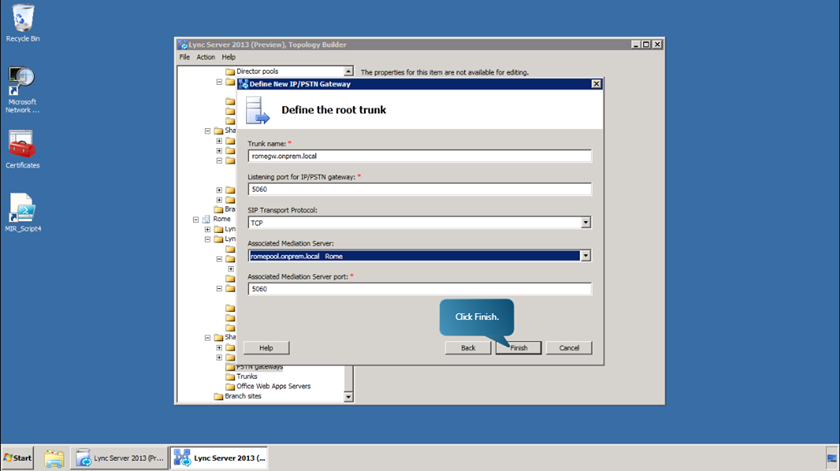
- Finally, we configure a PSTN gateway for the Rome pool that will resolve to a PSTN emulator on the domain controller and then configure its listening ports. Right click on PSTN Gateways and select New IP/PStN gateway. Define the FQDN (romegw.onprem.local) click Next.
- Choose enable IPV4 and Use all Configured IP Addresses options and click Next.
-
Fill in the root trunk as in figure and click Finish.
We will now see how to prepare the topology for the new Lync by creating the necessary Domain Name System (DNS) records and the steps required to publish and enable the topology.
We shall now create the DNS A records for Session Initiation Protocol (SIP) in the Assigned Child Domain DNS zone. Specifically, let’s create the SIP DNS records for the Redmond and Rome sites that are required for DNS load balancing.
-
We begin by selecting the DNS from the start menu from the domain controller.
-
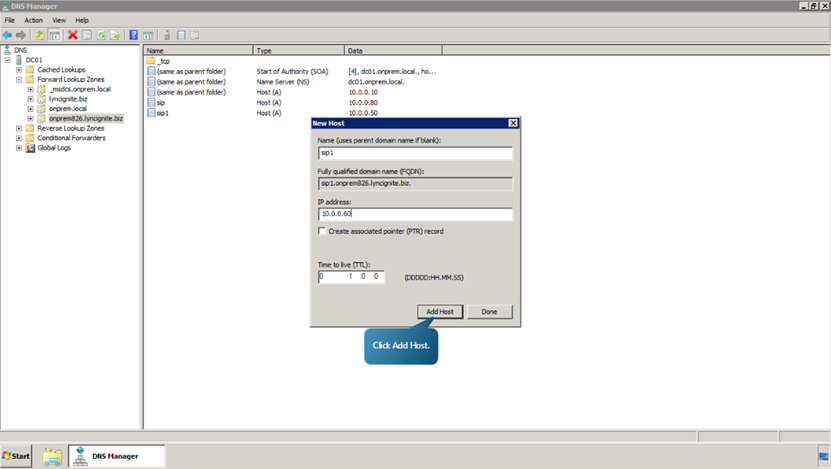
In the forward lookup zones tab, right click on onprem826.lyncignite.biz.Select New Host (A or AAA).

-
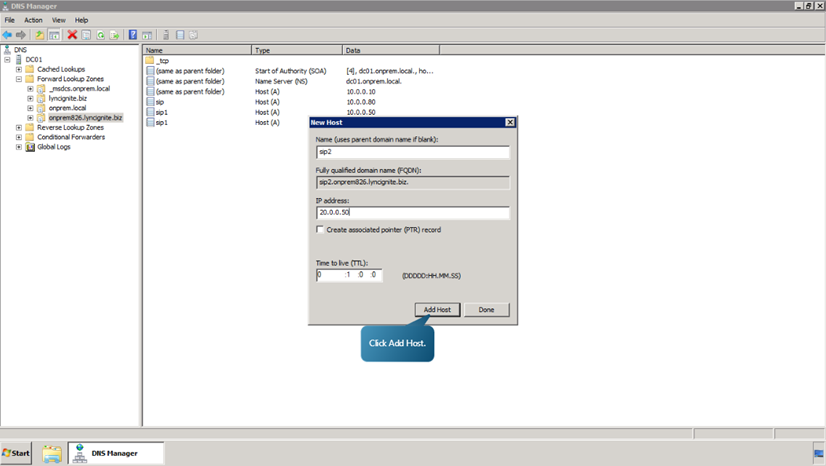
Add a host with parameters as given in the following figure.

-
Click Ok. Now let’s add some more hosts. The details of the hosts are given below.
Now, we will see how to create the DNS A records for your organization’s DNS zone.
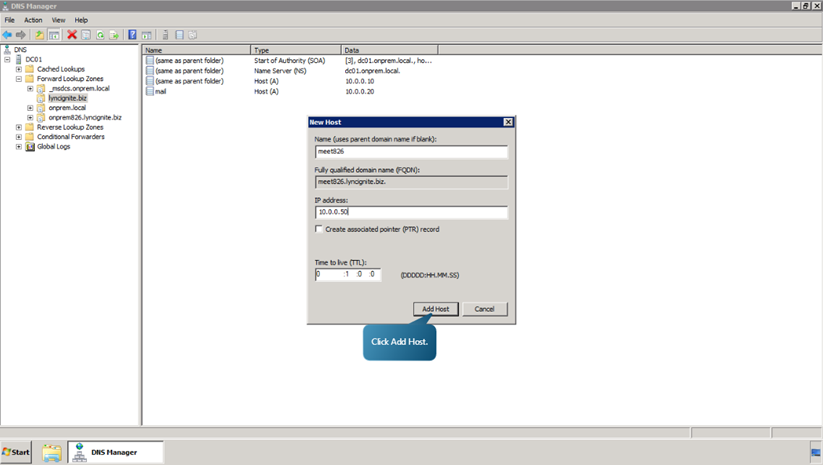
- In the forward lookup zones tab, right click on lyncignite.biz.Select New Host (A or AAA).
-
Repeat the procedures to add the following hosts.

-
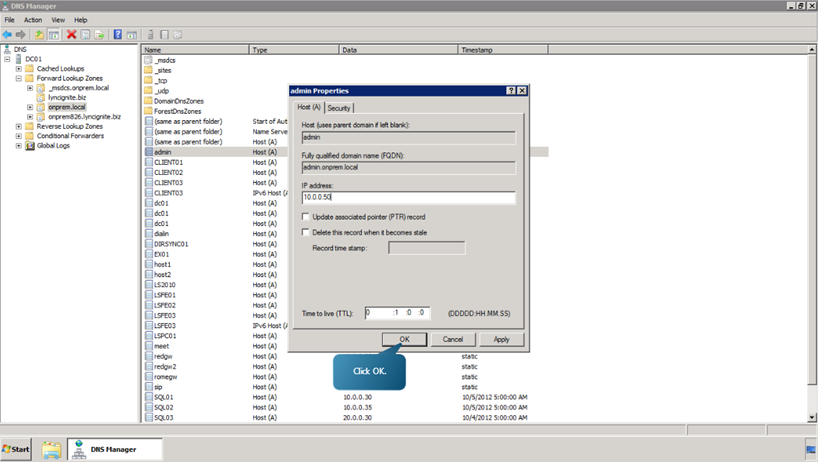
Next, edit and create the Redmond and Rome pool DNS records. To do that, select onprem.local right click on admin and select Properties. Specify the IP Address as 10.0.0.50 and click OK.
- In the forward lookup zones tab, right click on onprem.local. Select New Host (A or AAA).
-
Add the following hosts.


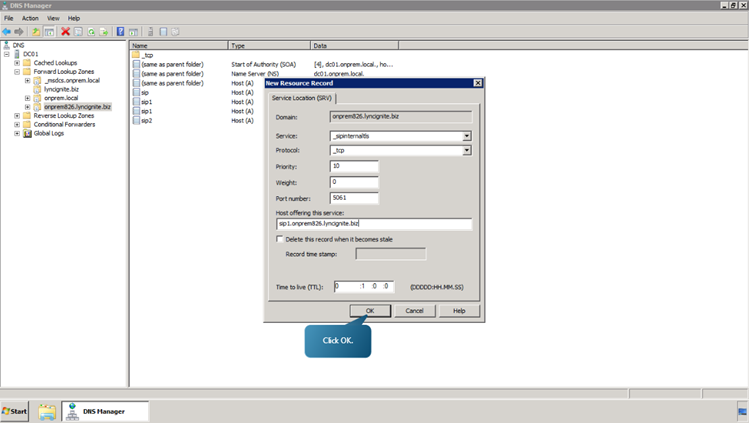
Now, we will see how to create the Service (SRV) records necessary for automatic client sign-in.
-
Right click on onprem826.lyncignite.biz. Select other New Records. Select Service Location (SRV). And click on create Record button. Enter the DNS A record we created for the Redmond site. i.e the Host is to be specified as sip1.onprem826.lyncignite.biz.

-
Now click on create record once again and specify the second host.
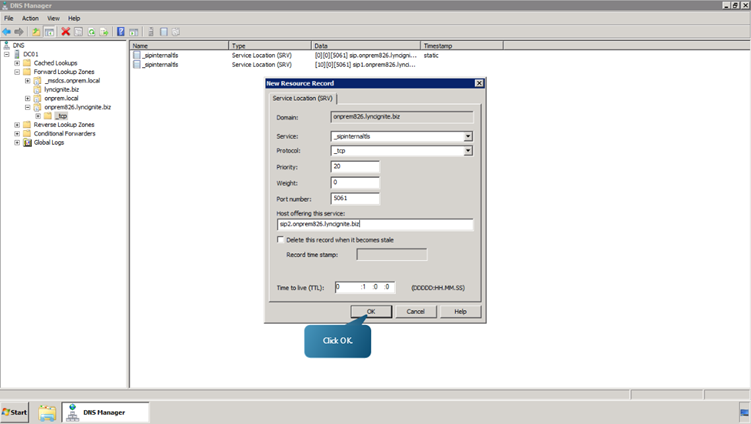
- Click Done.
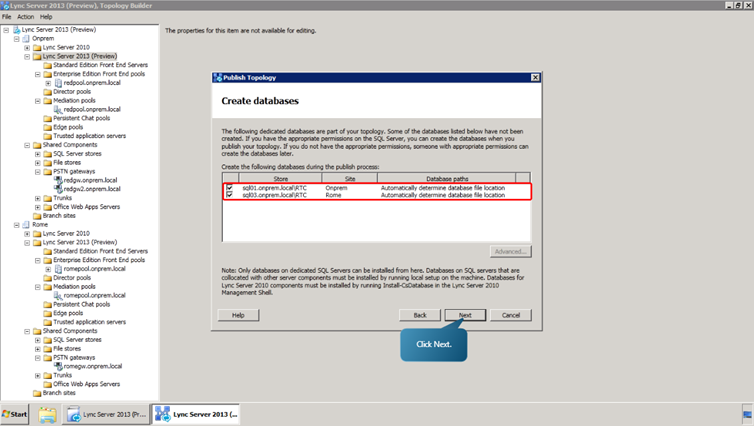
Next, switching to Topology Builder on the first Front End Server now associated with the Redmond site, let’s publish the topology to a database in the Central Management Store (CMS).
- Right click on the Lync Server 2013 (Preview) tab, select Topology -> Publish.
-
Click Next. Make sure that Both records are present, and click Next.
-
Next, select the ‘ Click here to open to do list’ link. Review the file and the instructions to run local setup on each server in the list. Then, close Notepad.
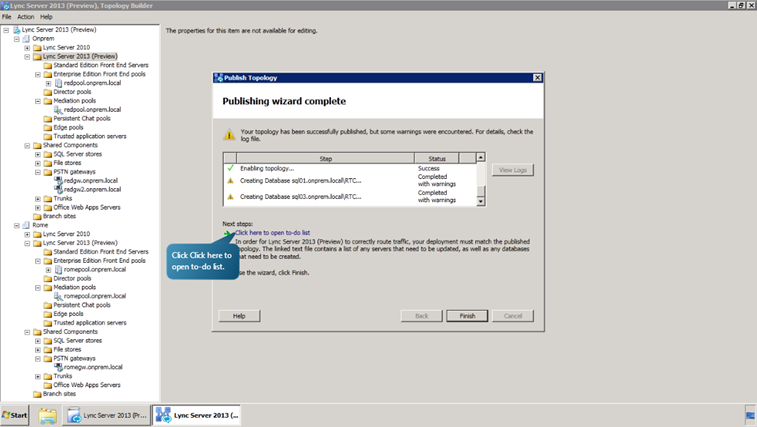
- Finish the Publish Topology Wizard and close Topology Builder.
-
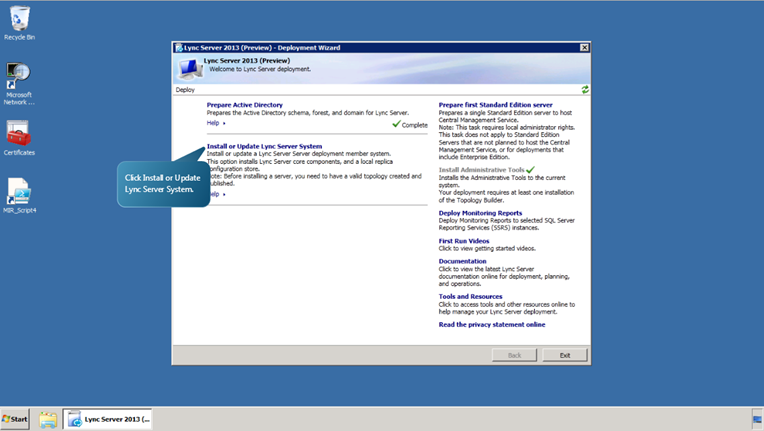
Now, we will deploy the new Lync Server on the three Front End Servers associated with the Redmond and Rome sites. Specifically, we shall use the Lync Server Deployment Wizard to install the Local Configuration Store, set up the Lync Server components, request and assign the necessary certificates, and then start the services.
On the first Front End Server associated with the Redmond site use the Lync Server Deployment Wizard to install the Local Configuration Store. The procedure for installing server roles is nearly the same for all roles. Any variations in the following steps will be noted.
-
Select Install or Update Lync Server System.
- Run the Step 1.
- Check the option ‘Retrieve directly from the Central Management Store’ and click Next.
-
Once this is finished, run the Step 2.
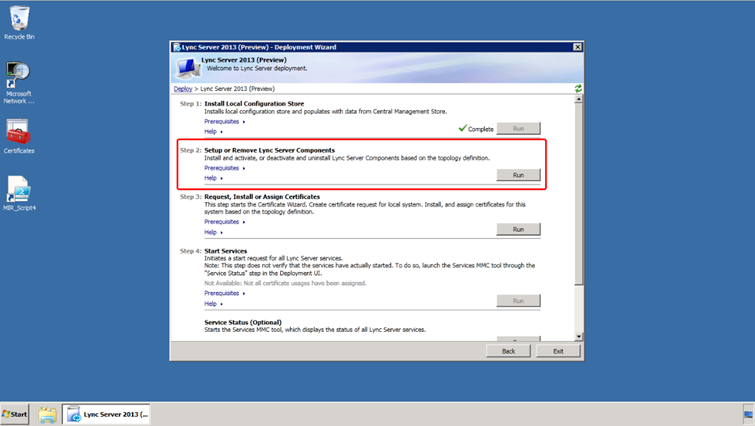
- Click Next and once this task is complete, run the step 3.
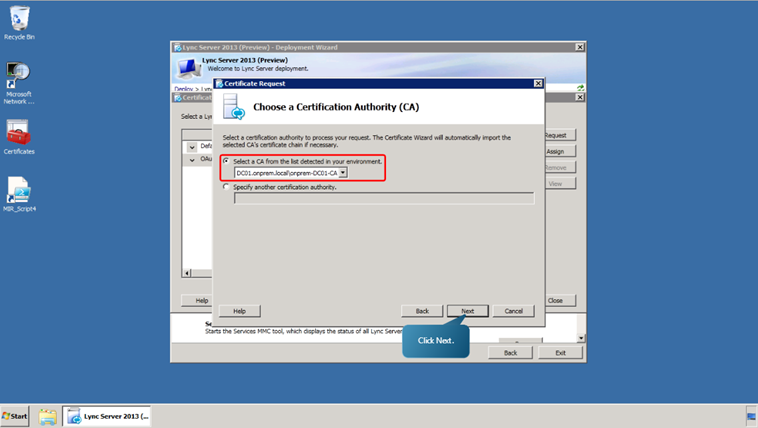
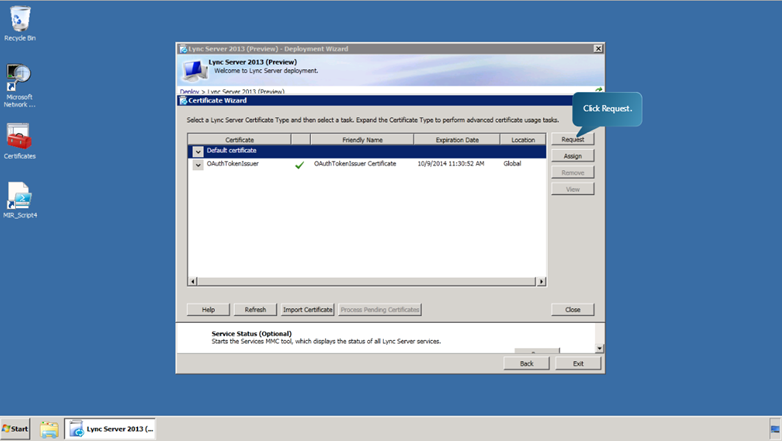
- Select OAuthTokenIssuer, and click Request.Click Next.
-
Once again click Next. Select the option ‘Select a CA from the list detected in your environment’ and choose DCO1.onprem.local\onprem-DC01-CA. Click Next.
- Click Next. Once again, click Next. Define the friendly name as OAuth token issuer certificate.
- Define the organization as OnPrem, and Organizational unit as IT. Click Next.
- Select the country as US and the state as Washington. Define the city as Redmond. Click Next.
- Click Next. Again click Next and once more click Next.
- Once this task is complete, click next, verify that the ‘Assign this certificate to Lync server certificate usages’ option is checked and click finish. If the certificate request fails, restart the Active Directory Certificate Services service on the domain controller and repeat these steps.
- Click Next twice and once the task is complete, click finish.
Next, we will request the certificates for the Front End Servers.
-
Select Default Certificates and click Request.
- Click Next. Check the ‘send the request immediately to an online certification authority’ option and click next.
- Select the CA ‘DC01.onprem.local\onprem-DC01-CA’ and click Next.
- Click Next twice and specify the friendly name as ‘Default Certificate’. Click Next.
- Review that the organization is the same and click next. For this front end there are no changes to be made in the location. For the third Front End Server, which is associated with the Rome site, ensure that the appropriate country, province, and locality are selected.
- Click Next and review the conditions on screen before continuing.
- On the first and second Front End Servers associated with the Redmond site, add the site sip1.onprem826.lyncignites.biz. On the third Front End Server associated with the added site, Rome, you would add the site sip2.YourChildDomain. We will only perform this task once.
- Click Next twice.
- Once the task is complete, click Next. Check the option ‘Assign this certificate to Lync server certificate usages’ . Click Finish.
- Click Next twice and once the task is complete, click Finish.
Now that the installation is complete, start the services by running step 4.Click Next and once the task is complete, click finish.
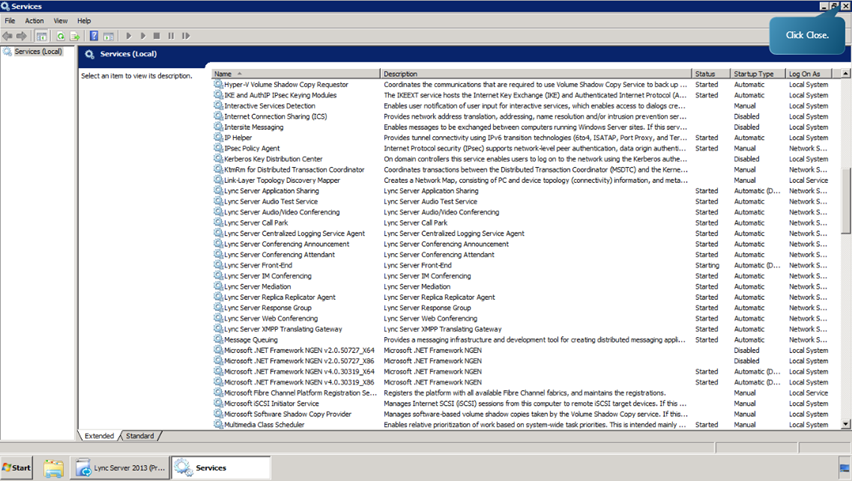
Finally run the service status. Verify that all of the new Lync services have started, and then close the Services console.
With that we have successfully deployed a new Lync environment using the Lync Server Topology Builder and learned about the server role deployment process.
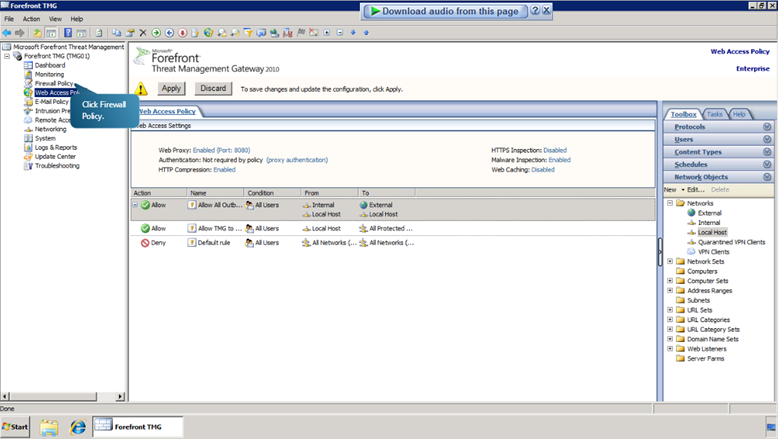
We will now see how to publish the External Lync Web URLs using Microsoft Forefront Threat Management Gateway 2010. Beginning from the server where Threat Management Gateway is located, let’s create the Lync Web URLs publishing rule.
- Launch Forefront TMG application.
- Right Click on the Firewall Policy tab.Select New->Web Site Publishning rule.
- In the new window, specify the rule name as ‘Redmond Lync Web Services’ and click Next.
- Check the allow option and click Next.
-
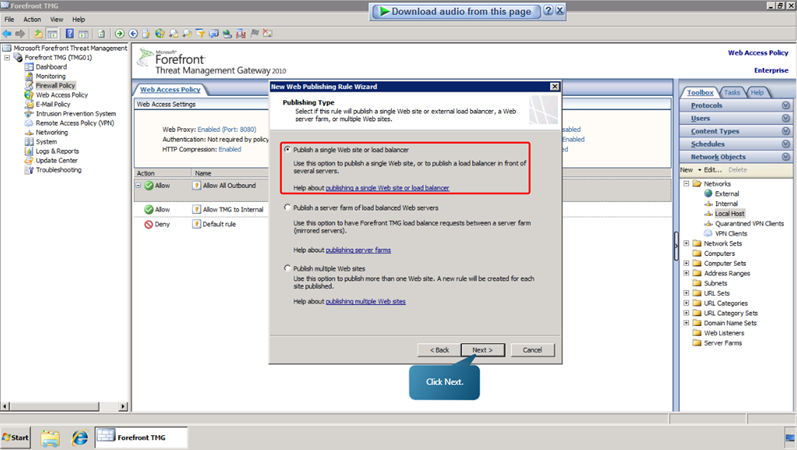
Select the option, ‘Publish a single website or load balancer’ and click next.
- Select the option, ‘Use SSL to connect to the published web server or server farms’, and click Next.
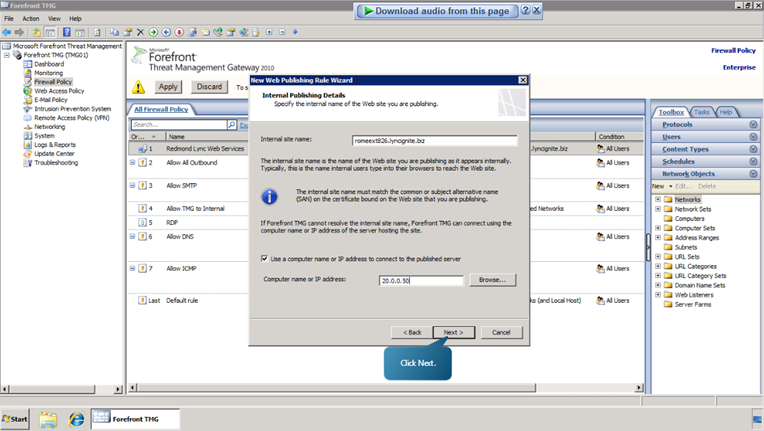
- Define the Internal site name as redext826.lyncignite.biz and check the option, ‘Use a computer name or IP address to connect to the published server’. Now define the IP adress as 10.0.0.50 and click Next.
- Define the Path as /* and click next.
- Define the public name as ‘redext826.lyncignite.biz’. Click Next.
- Click New, define the web listener name as ‘Wildcard Listener’. Click Next.
- Select the ‘Require SSL secured connections with clients’ option and click Next.Check the ‘External’ option and click Next.
- Click on select certificate and choose the ‘*.lyncignite.biz’ certificate and click select.
- Click Next. From the drop down list, choose ‘No Authentication’. Click Next twice and click finish.
-
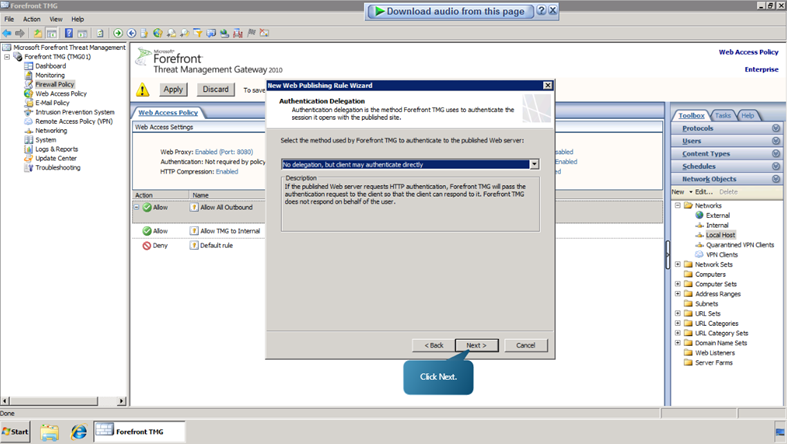
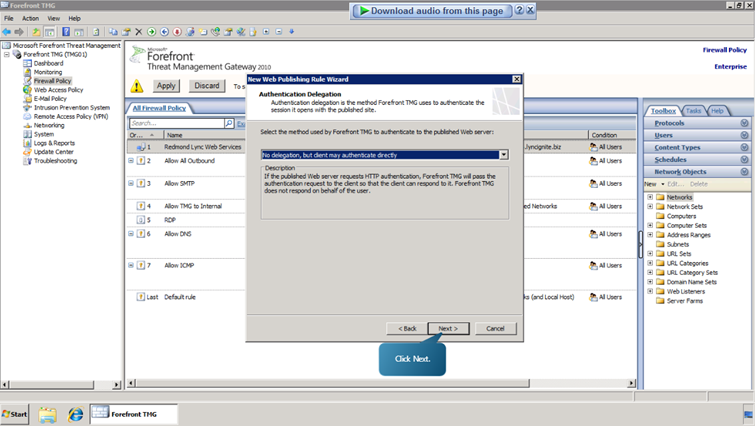
Click on Next.From the drop down list, choose ‘No delegation, but client may authenticate directly’ option and click next.
- Click Next followed by finish.
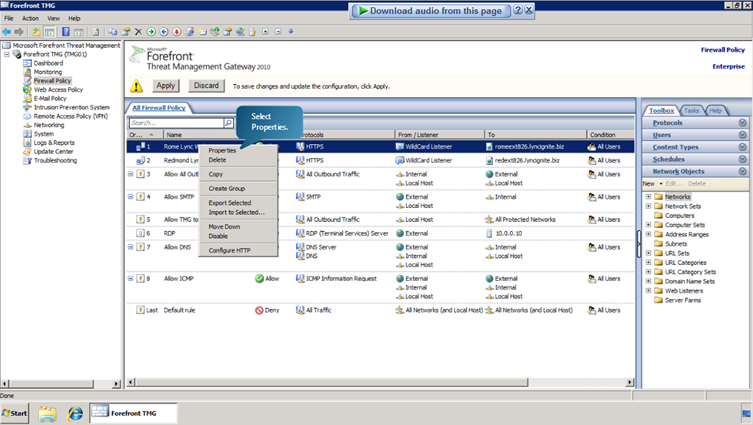
Now, we edit the Redmond Lync Web Services rule.
-
Click on ‘Firewall Policy’.
- Right click on Redmond Lync Web Services. Select properties. Select the Public Name tab. Click Add. Add the domain ‘dialin826.lyncignite.biz and press ok. Add another domain, ‘meet826.lyncignite.biz’.
- Now click Bridging. Specify the redirect request to ssl port as 4443.
-
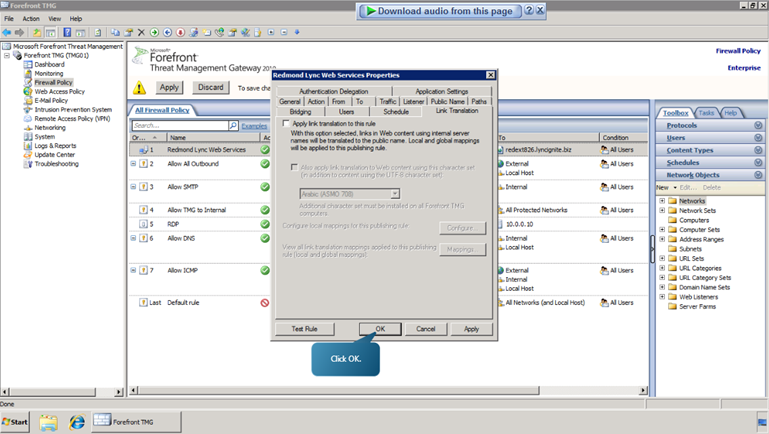
Navigate to Link translation tab and uncheck the ‘Apply link translation’ option. Click OK.
Next, create the Rome Lync Web Services rule.
- Begin by right clicking on firewall policy menu. Select New->Web site publishing rule.
- Define the name as Rome Lync Web Services, click next and check allow button.
- Click Next and check Publish a single website or load balancer option, click next.
-
Select the Use SSL option and click next. Define the internal site name as romeext826.lyncignite.biz and specify the ip address as 20.0.0.50.
- Define the path as /* and check the ‘Forward the original host header’ option.
- Click Next. Define the public name as romeext826.lyncignite.biz and click next.
- Select the web listener as wildcard listener and click next.
-
Select the ‘No delegation, but client may authenticate directly’ option and click next.
- Click Next and Finish.
- Now, edit the Rome Lync Web Services rule by right clicking on Rome Lync Web Services.
-
In the menu choose properties.
- Select Bridging tab. Define the ‘Redirect request to ssl port’ as 4443 and navigate to link translation tab. Clear the ‘Apply link translation to this rule’ option.
- Click OK.
-
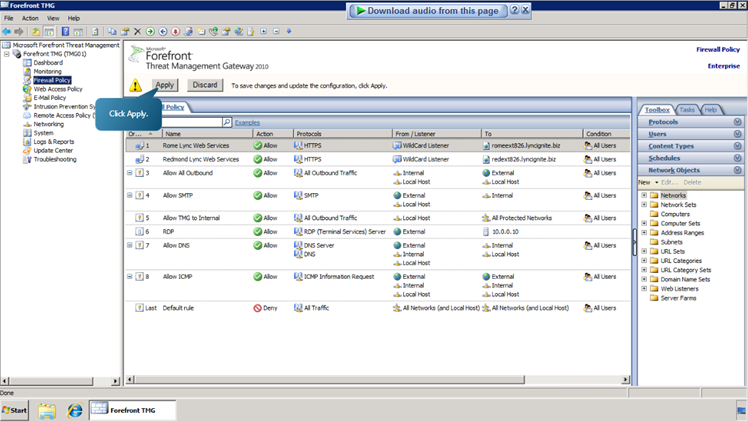
Click Apply.
-
Click Apply once more. And click OK.
With that we have published the External Lync Web URLs using Microsoft Forefront Threat Management Gateway 2010.
We will now see how to validate the deployment using the Lync Server Control Panel. We will then view some of the features and information displayed in the Topology Viewer.
- We now switch to the first Front End Server associated with the Redmond site and sign in to the Lync Server Control Panel.
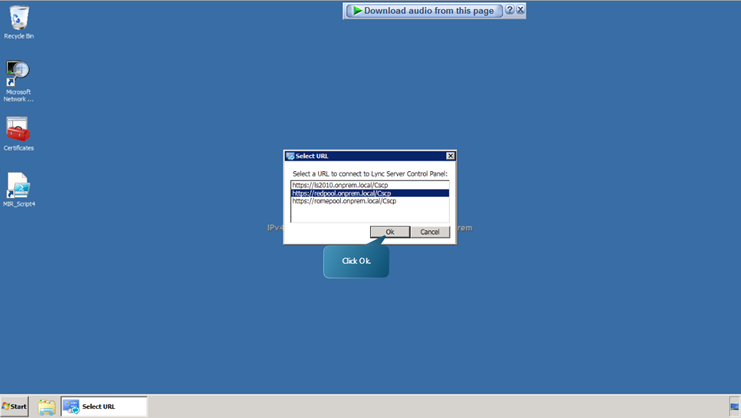
- Select the Lync Server Control Panel from Start-> All Programs-> Microsoft Lync Server 2013 (Preview).
-
Select the ‘https://redpool.onprem.local/Cscp’ url and click ok.
-
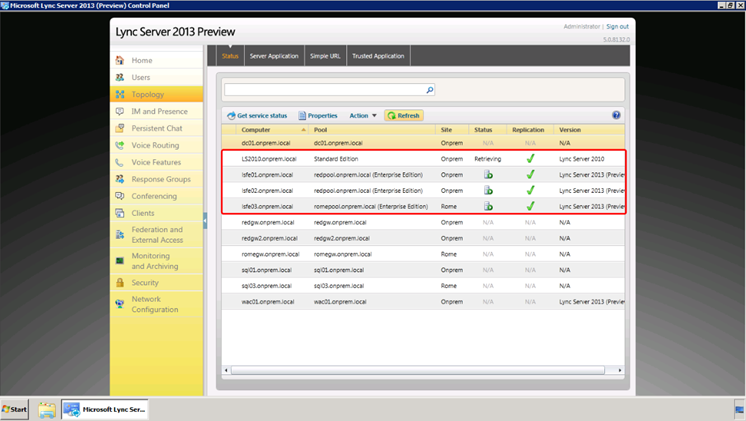
Sign in using administrator account. Select the topology tab. Verify that Lync Server 2010 and the three new Lync Server instances are listed and that their replication status is shown as successfully completed.
With that, we have successfully completed learning about Deploying the New Lync Server
Ratish Nair
MVP Exchange
Team @MSExchangeGuru.com
Keywords: how to install Lync server 2013, lync 2013 installation.
")


February 6th, 2013 at 7:31 am
informatiive
February 9th, 2013 at 12:11 pm
[…] Installing and configuring Lync Server 2013 – 5-Feb-2013 […]
May 20th, 2013 at 1:16 pm
So I have yet to find the actual “Lync 2013 Topology Builder” it DID NOT install as shown here an in other blogs. I get the Planning tool and I can download the planning tool but no Topology Builder.
Also, my only option was install Standard not Enterprise. Something is weird. IS there another ISO specifically for Enterprise? If so maybe my microsoft.com/licensing doesn’t allow me to get it.
I never messed with Lync 2010 either so I’m a newby with Lync.
Any help will be appreciated.
May 28th, 2014 at 1:09 pm
Superb