Exchange 2013 Database Auto Reseed
This is undoubtedly one of the best features in Exchange 2013 clearly because the fact that auto reseed is no less than artificial intelligence. Before you know you had an issue, it is fixed already.
Auto Reseed enables you to quickly restore database redundancy after disk failure. If a disk fails, the database copy stored on that disk is copied from the active database copy to a spare disk on the same server. If multiple database copies were stored on the failed disk, they all will be automatically re-seeded on a spare disk. This enables faster reseeds, as the active databases are likely to be on multiple servers and the data is copied in parallel. This will also avoid any manual intervention. We just need to ensure spare disk is reliable and of the same size.
As I previously said Microsoft is promoting automation thinking 8000 virtual machines in a Hyper-V host will be impossible to manage manually, this is another great feature of Microsoft in Exchange 2013 which promotes automation. Think about it, you woke up and you can see seeding operation has already 70 – 90 % completed and you just need to call your vendor to replace the fault hardware.
Microsoft uses spare disk and mountvol to execute the auto reseed operation.
The benefit of using Auto Reseed will be just not to have auto reseeding but it also means we can plan to reduce the number of copies of a database. As an example , in a DAG of 48 Databases with 6 copies, 4 in production data center and 2 in DR data center if I reduce 1 copy from production datacenter considering Auto Reseed, Then it will give me 48 Disks and I will keep 8-16 Disks in Spare so my total saving is minimum 32 disks.
This is a 11 step quick article on how to configure and test auto-reseed for Exchange 2013. I am positive that after reading this you will give it a shot !!!
Let us review the benefits of Auto Reseed:
- Automatic Reseeding just after the crash.
- Reduced number of DB copies means reduced network bandwidth.
- Reduced number of Disk means reduced cost on storage
- In some cases reduced number of servers.
- System Admin just need to fix the failed hardware.
- Reduced manual intervention.
- No more wake up calls in the night.
- No SCOM monitoring.
Auto Reseed uses the following work flow process:
- The Microsoft Exchange Replication service periodically scans for copies that have a status of FailedAndSuspended.
-
Once Microsoft Exchange Replication service finds a copy with FailedAndSuspended status, Microsoft Exchange Replication service run some prerequisite checks:
- Is this a single copy situation?
- Are spare disks available?
- Is any possible problem in performing an automatic reseeding?
- Once all check passes successfully, Microsoft Exchange Replication service allocates and remaps a spare.
- Then seeding will be performed.
-
Once seeding completes, the Microsoft Exchange Replication service verifies that the newly seeded copy is healthy.
That’s it, you are done!
Yes you read it correctly Microsoft Exchange Replication service allocates and remaps a spare.
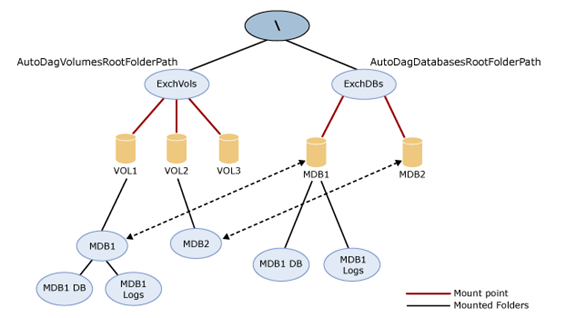
Below diagram explains the configuration:
In the below diagram vo1 and vol2 each has a DB but vol3 is spare so if vol1 or vol2 will crash Vol3 will auto reseed.
Auto Reseed uses Configuration Attributes:
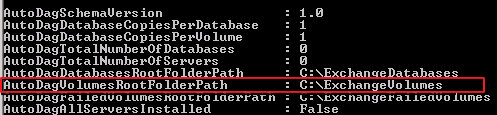
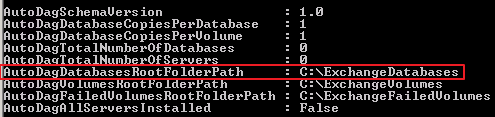
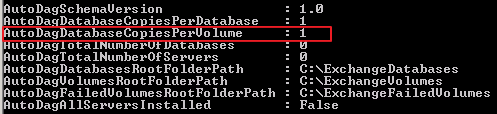
Auto Reseed is uses three DAG attributes to process. Two attributes refer to the two mount points that are in use. The below is the screenshot from my lab where these values got automatically configured. So DAG comes AutoReseed ready in Exchange 2013. The following three attributes it uses:
1. The AutoDagVolumesRootFolderPath attribute refers to the mount point that contains all of the available volumes. This includes volumes that host databases and spare volumes.
2. The AutoDagDatabasesRootFolderPath attribute refers to the mount point that contains the databases.
3. The AutoDagDatabaseCopiesPerVolume is used to configure the number of database copies per volume.
Now we know how does “auto reseed” works and what are the attributes it uses for “auto reseed” processing.
Let me explain the configuration steps to make it simple and clear. I hope this will clear any confusion.
AutoReseed Workflow:
1. Detect a copy in Failed and Suspended state for 15 minutes
2. Exchange tries to resume copy 3 times with a gap of 5 minutes. When all 3 attempts fail, then it moves to step 3
3. Exchange tries to assign a spare volume for 5 times with a gap of 1 hour.
4. Exchange tries InPlaceSeed with SafeDeleteExistingFiles 5 times with a gap of 1 hour.
5. Once all retries are completed with no success then workflow stop or with success it completes the reseeding.
6. In case of no success Exchange will wait for 3 days and see if copy is still in Failed and Suspended state then starts the workflow from step 1.
Configuration Steps:
1. Configure the root paths for databases and volumes
Open the EMS and rung the following cmdlet
Set-DatabaseAvailabilityGroup DAG01 -AutoDagDatabasesRootFolderPath “C:EDBs”
Set-DatabaseAvailabilityGroup DAG01 -AutoDagVolumesRootFolderPath “C:EVols”

2. Configure the number of databases per volume
Open the EMS and rung the following cmdlet
Set-DatabaseAvailabilityGroup DAG01 -AutoDagDatabaseCopiesPerVolume 1

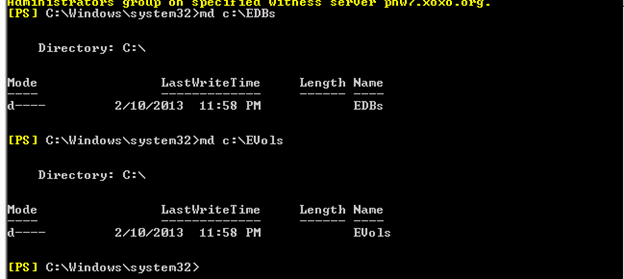
3. Create the root directories for databases and volumes
Open command prompt and run the following command on all servers of the DAG
md C:EDBs
md C:EVols
4. Mount the volume folders
On all servers of DAG, mount the disks.
- Open Diskmgmt.msc
- Bring the disks online
- Initialize the disk
- Then select every disk one by one and right click à Select new simple volume
- Select nextàgive the partition size. (all of the volume size should be same) then click next
- On drive letter and path window assign the mount path as per the screen
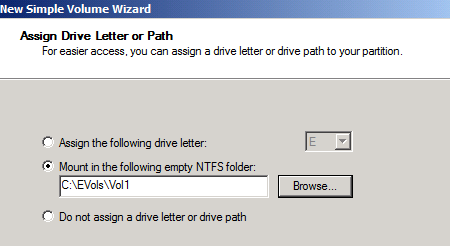
7. Click Next –> Click Next –> Click Finish
In lab we have 2 volumes with databases and 1 spare volume which will be mounted to the folders mentioned below:
- C:EVolsVol1
- C:EVolsVol2
- C:EVolsVol3
The names of the mounted folders can be any folder name, as long as the folders are mounted under the root volume’s path.
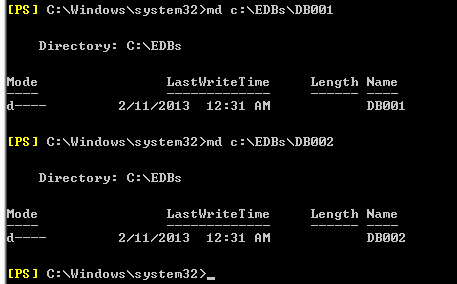
5. Create the database folders
In my lab I am creating 2 databases so we will configure 2 database folders on all servers as mentioned below:
md c:EDBsdb001
md c:EDBsdb002
6. Create the mount points for the databases
To check the guid open cmd and run mountvol
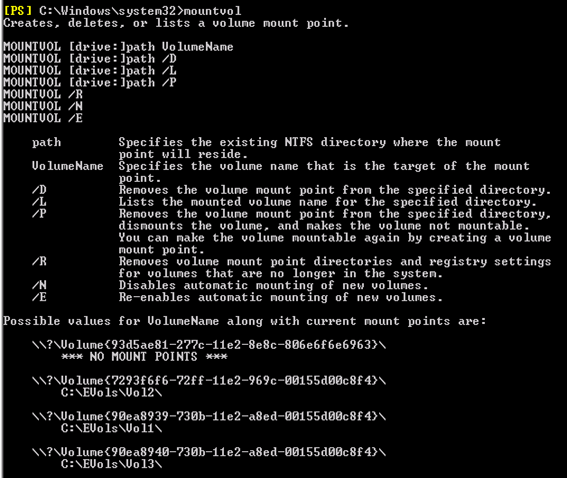
This is the most important step where we have to mount the volume to the dB location.
We will use the following syntax:
Mountvol dB path Volume guid
In lab I am running the following commands on all the servers:
This will only work in the command prompt and not in EMS.
Mountvol.exe c:EDBsdb001 ?Volume{GUID}
Mountvol.exe c:EDBsdb002 ?Volume{GUID}

To verify, run the following command.
Mountvol
You will find DB path has added to the below volume path.
7. Create the database directory structure
In LAB I am using 2 databases for 2 Volumes so run the following cmds only on primary server:
md c:EDBsDB001db001.db
md c:EDBsDB001db001.log
md c:EDBsDB002db002.db
md c:EDBsDB002db002.log
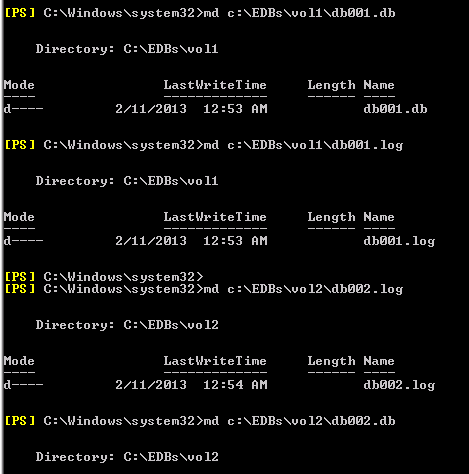
Repeat the preceding commands for databases on every volume.
Create databases with log and database paths configured with the appropriate folders as per the cmdlet below on the primary server.
New-MailboxDatabase -Name db001 -Server servername -LogFolderPath C:EDBsdb001db001.log -EdbFilePath C:EDBsdb001db001.dbdb001.edb
 New-MailboxDatabase -Name db002 -Server servername -LogFolderPath C:EDBsdb002db002.log -EdbFilePath C:EDBsdb002db002.dbdb002.edb

9. Mount the Databases
Run the following cmdlet
Mount-database db001
Mount-database db002

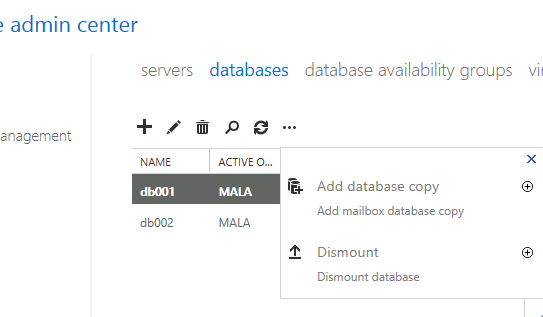
From EAC –> Go to Server –> Databases –> click on … and select add database copy –> give the second server name then click save. This will create second DB copy on the other server.
Or
Run the cmdlet: This will seed the DB to the second server
Add-Mailboxdatabasecopy DBname –MailboxServer servername

Wait for the database copies to become healthy.
Go to disk management and take passive copy disk offline. Vol3 should become passive drive and auto reseed should start for the failed vol2.
Caution: In lab, if you delete the partition then the repair operation will not work.
Now I have taken the vol2 offline which had DB002.

Within 5 minutes status changed. Based on the DB size Seeding will take time but most importing is when seeding is starting.

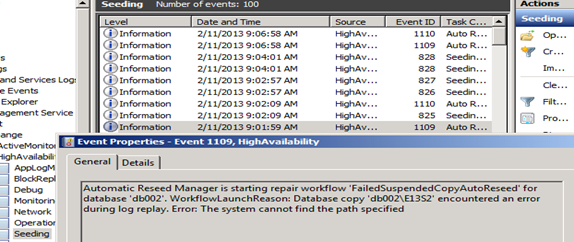
Now let us check the event to know what happened in the backend. When you will wake up, you will see these events to know where is your seeding at the moment.
Event number 1109
Event id 825: DB Seeding begins here.

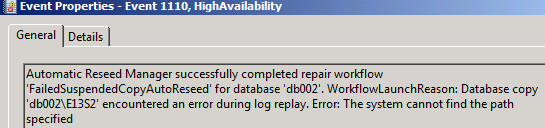
Event id 1110
Event id 826: DB seeding completed here

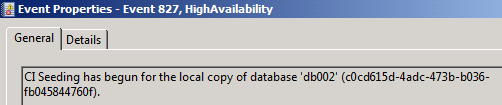
Event id 827 : Catalog seeding begins here
Event id 828
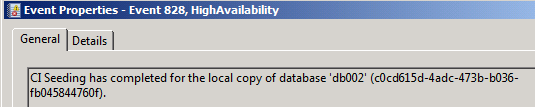
Event id 828: Catalog seeding completed here

Event id 1109: A repair process started post seeding to check the health of DB before declaring healthy

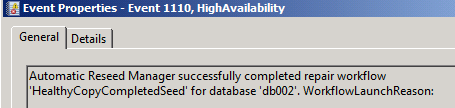
Event id 1110: Seeding process completes are declares DB healthy
That’s it! Auto Reseed is done.
Prabhat Nigam (WizKid)
Team @MSExchangeGuru
Keywords: Exchange 2013, Exchange 2013 auto reseed, Exchange 2013 DAG, Exchange 2013 databases.
")


February 12th, 2013 at 11:10 pm
Very Good Article ..Thanks 🙂
February 12th, 2013 at 11:39 pm
As always, wonderful info which I can’t find anywhere…great work guys…Exchangeguru rocks!!
April 16th, 2013 at 11:29 pm
Nice Article. Do you need to configure the following attributes ?
AutoDagDatabaseCopiesPerDatabase
AutoDagTotalNumberOfDatabases
AutoDagVolumesRootFolderPath
April 16th, 2013 at 11:41 pm
Thank you Guys!
@Julian – All the steps mentioned in the articles. No step beyond the article.
April 17th, 2013 at 7:01 pm
@Wizkid. Thanks. They are configured. I meant the following which were not configured.
AutoDagDatabaseCopiesPerDatabase
AutoDagTotalNumberOfDatabases
AutoDagTotalNumberofServers
April 17th, 2013 at 7:27 pm
Hi Julian,
It is not a requirement for the Auto Reseed configuration.
Apart from “Auto Reseed” you can configure if they are not accurate as per your environment
April 30th, 2013 at 7:51 pm
In your diagram up the top you have extra folders called ‘MDB1’ and ‘MDB2’ under the volumes that then appear to be mounted under the databases. This doesn’t seem to be right…?
April 30th, 2013 at 8:12 pm
@Roland – Thank you for pointing it but this diagram was used to explain the process. Please go ahead with the steps, I am sure you will be able to configure Auto Reseed and test it.
May 16th, 2013 at 10:37 pm
Sooo im a little confused, if i have my config like this
D:DB001\db001.db path for database
L:DB001\ path drive for logs
Do i still use these commands?
md c:\EDBs\DB001\db001.db
md c:\EDBs\DB001\db001.log
Thanks in advance.
May 16th, 2013 at 11:10 pm
@Raymond – You can change the drive letter and path and use the same in further steps.
I think you wanted to type:
Path for database – D:\DB001\db001.db
path for Logs – L:\DB001\db001.log
July 1st, 2013 at 11:20 pm
the auto reseed worked for the first time round…
when I brought the failed drive back online, and then failed the 2nd drive (which auto reseed had used),
the auto reseed didn’t manage to reseed it back to the 1st drive
the error i got was event 1111
Automatic Reseed Manager failed to execute repair workflow ‘FailedSuspendedCopyAutoReseed’ for database ‘DB04’. Error: The Automatic Reseed Manager encountered an error: The automatic repair operation for database copy ‘DB04\exsvr02′ will not be run because it has been throttled by the throttling interval of ’01:00:00’. [WorkflowLaunchReason: The database file wasn’t found after log replay. The copy will be set to failed. Database: ‘DB04\EXSVR02’. File Path: ‘C:\ExDBs\DB04\DB04.db\DB04.edb’.
any idea what went wrong the 2nd time?
July 2nd, 2013 at 12:39 am
@Uzi
There seems some mis-configuration.
Where is this throttling interval coming. Have you configured any registry key or some other customization.
I would suggest to do proper cleanup and try again. It should work unless you have customize something.
July 2nd, 2013 at 1:09 am
it’s a vanilla install, following the DAG setup instructions to the letter
i am hoping it’s a bug on my setup; am going to try to update to CU1 to see if this problem goes away
July 2nd, 2013 at 1:36 am
@Uzi
Let me know how does it go
October 24th, 2013 at 8:21 am
Nice article.
Rating :*****
Madhavraj
October 24th, 2013 at 8:27 am
Awesome article.
Rating : *****
May 18th, 2014 at 8:58 am
Dear Prabhat,
Thanks awesome article..
Guys any update on Event ID 1111.. @UZI Are you able to resolve the same, If yes pl brief..
May 18th, 2014 at 3:28 pm
@Nazeef
1111 should not come if you have active DB up and runnind.
January 15th, 2015 at 5:10 am
[…] Exchangeserverguru Anleitung mit vielen Screenshots und auch Erklärung der Event Log […]
July 14th, 2015 at 10:10 pm
[…] AutoReseed with 1 or 2 hot spare […]
October 1st, 2015 at 2:54 am
[…] reseeding which automatically reseed if same size spare disk is available. Have a look on my blog here. So if a disk fails in the mid night, you don’t need to wake up, continue sleeping and […]
October 4th, 2016 at 9:04 am
I have one doubt about AutoReseed , indeed it is the best option in Exchange 2013 but I would like to address here one scenario,
Suppose one Database goes to failed and suspend status, here sometime we do it in exchange 2010 just resume-mailboxdatabase and it gets in healthy status,
What about in Exchange 2013/2016 will it give me any option do first Resume-maiboxdatbase if it is not working then do Autoreseed,
October 4th, 2016 at 9:20 am
Sorry, I was going through your article and got to know that below is the steps that will take
AutoReseed Workflow:
1. Detect a copy in Failed and Suspended state for 15 minutes
2. Exchange tries to resume copy 3 times with a gap of 5 minutes. When all 3 attempts fail, then it moves to step 3
3. Exchange tries to assign a spare volume for 5 times with a gap of 1 hour.
Can we increase resume copy 3 time with a gap of 5 min to 10 min or 15 min,
Thanks
Bharat
October 4th, 2016 at 3:13 pm
Exchange 2010 does not have auto-reseed feature. Ask your 2010 question below Exchange 2010 DR blogs.
October 4th, 2016 at 3:13 pm
No.