jetNEXUS Load Balancer for Exchange 2010 – Operational Review
The jetNEXUS Accelerating Load Balancer Extreme (ALB-X) is an easily deployable Load Balancer with an advanced feature set. It’s available for Exchange 2010 and exchange 2013 as a hardware solution, a virtual solution and a pure software solution and is easy to manage and maintain. Importantly, the ALB-X integrates simplicity and user friendliness with high performance and functionality.
This article reviews the jetNEXUS ALB–X and its suitability for Microsoft Exchange deployments. I also provide a walk though of the ALB-X going through a full set up and configuration for Exchange services.
More info: http://www.jetnexus.com/load-balance-microsoft-exchange.html
Download jetNEXUS : http://www.jetnexus.com/download-jetnexus-albx-va.html
jetNEXUS ALB-X is loaded with features that satisfy the needs of a very broad range of users as well as possessing an extra edge over other products of its type. The ALB-X comes with a custom Linux kernel operating system integrated with the ALB-X software. It supports a wide range of virtual platforms including VMware Workstation and ESX, Citrix XenServer, Windows Hyper-V (2008 and 2012). Easy to use and manage it comes with a highly user-friendly, intuitive interface.
The user can configure the load balancer using the web admin application of the jetNEXUS ALB X.
It’s clear to see that the developers have focussed on proper traffic management functionality within the ALB-X and this is evident in the final outcome of the product. The flightPATH rule engine allows clients to manipulate traffic requests from simple redirects through to complex rule set ups. This gives users accuracy and intelligence in service delivery management.
jetNEXUS ALB-X includes layer 7 load balancing; operating at the application layer is pivotal for enhanced load balancing capabilities. With layer 7 operation, functionalities like URL switching, cookie based persistence and request scanning are available to the client. It also incorporates Content Caching to reduce load on the real web servers and accelerate applications for excellent end user experience. Multiple caching profiles can be configured to suit individual requirements. Optimised TCP/IP performance and reduced stress on real web servers are some more benefits of layer 7 applications. Another performance enhancing feature of the ALB-X is SSL offload to remove CPU intensive encryption from back-end web servers.
Also worth mentioning are the jetPACK configuration templates available for the product. These get you up and running with the right settings for business applications like Lync and Exchange in minutes, removing difficulties and timely mistakes at the deployment stage. More on this to follow.
In summary, the key features of the ALB-X are:
- High availability failover operations.
- Multiple options for session persistence to ensure the integrity of user sessions.
- Full application layer server health checks to detect problems with back-end web servers.
- Plug-in architecture to write custom health checks.
- Real time statistics for monitoring and analysis.
- SNMP agent for historical graphing.
- No restriction on throughput on all appliances.
- Integration with key business applications such as Microsoft Exchange, Lync, SharePoint.
Deployment Guide
Next, we shall go through the deployment and manual configuration of ALB-X for Microsoft Exchange 2010. First up, download the Virtual Appliance at http://www.jetnexus.com/download-jetnexus-albx-va.html . We begin configuring ALB-X by adding a load balanced service.
Navigate to the IP Service by selecting Setup Tab and then IP Services. We now need an IP with a listening port to setup the load balanced service. In the channel details screen, click on ADD IP button to add an IP.
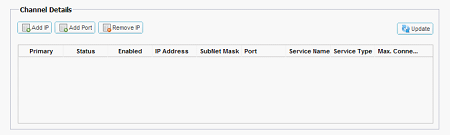

Now we can Input the Port and IP Address required and configure the new Channel for OWA in layer 4.
We use the following Steps:
- Change the IP Address to: 192.168.1.247
- Change the Subnet Mask to: 255.255.255.0
- Change the Port to: 443
- Rename the Service Name as: Exchange 2010 OWA
- Change the Service Type to: Layer 4
Now in the content server group specify the name and press the update button.
Next, we navigate to Action Tab where we configure the following details:
- Set the Monitoring option to TCP Connection
- Set the Load Balancing Policy as IP-Bound
- Set the Connectivity as Managed
- Set the Cache to Off
- Set both SSL and Content SSL to No SSL
Next we configure the RPC channel required for load balancing. We follow the same procedure. When you click the add button, the IP and Subnet Mask fields are automatically generated. The PORT is set here as 135. We name the service as Exchange 2010 RPC and change the service type to Layer 4.
The same content servers are added with the port specified as 135. The action details are updated as follows:
- Monitoring: TCP Connection
- LB Policy: IP-Bound
- Connectivity: Managed
- Cache: Off
- SSL: No SSL
- Content SSL: No SSL
We repeat the above procedures to add two more static RPC services, namely the RPC Address Book Service and the RPC Public Folders. The port for RPC address book service will be 59534 and for RPC Public Folders will be 59535. Make sure that the server group names of all the channels are updated and named properly.
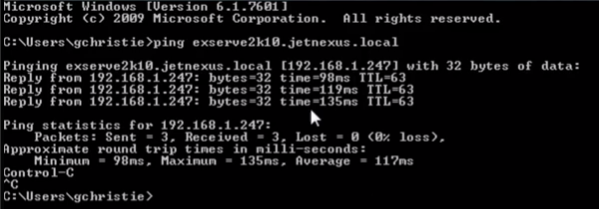
To check if the exchange server is pointing to the ALB listening address specified, use the following cmdlet
Ping exserve2k10.jetnexus.local
Adding an Additional CAS server
- To add a new CAS server, we begin by clicking on Add New button on the content server menu.
- We can now add a secondary content server with port address 443.
- To finish adding the CAS, click on Update.

Configuring TCP Time Out Changes
The default timeout value for ALB X is 600 seconds for TCP Connections. This can be changed as per the requirement of the organization by modifying the configuration file. This can be done by:
- Create a new text file named tcptimeout.txt
- Add the line #!update [jetnexusdaemon] ConnectionTimeout=x, where x is the new timeout in milliseconds.
- Go to Advanced->Update Software->Browse for this file(Top Configuration Section)->Upload
- After the browser window has gone blank, hit the reload button.
Content Server Monitoring
With ALB X Interface, we can also create a layer 7 server monitor.
- Navigate to Configure->Content-Server Monitoring
- Click on Add Record Button
-
Update the Fields as per the following specification:
- Name: Monitoring OWA
- Description: Exchange 2010 Outlook Web App Monitor
- Monitoring Method: HTTP 200 OK
- Page Location: /owa/auth/login.aspx
- Name: Monitoring OWA

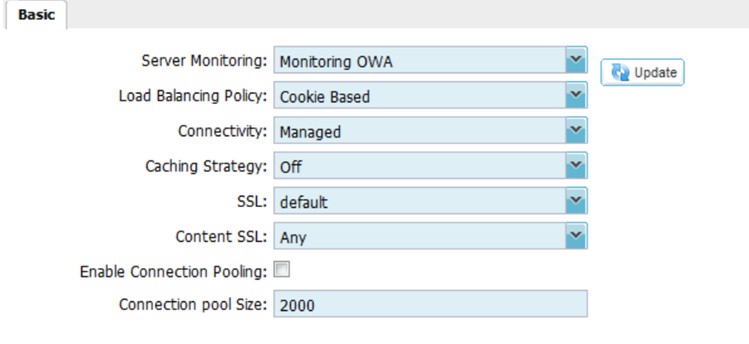
We can now see “Monitoring OWA” listed in the server monitoring tab located at IP Services. It can be accessed by navigating to IP Services->Actions->Basic->Server Monitoring.
Configuring SSL Certificates
ALB X Requires proper certificate when OWA is configured as a layer 7 service. You can choose either to create or import a certificate.
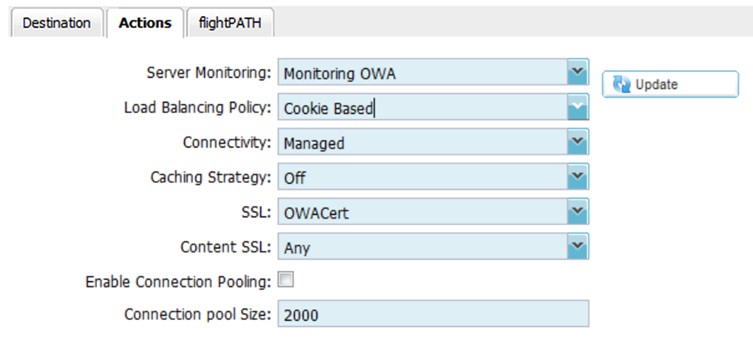
Once the certificate has been added to ALB X, it can be accessed from the Basic Section in the IP Services Action tab.
Navigate to IP Services->Actions->SSL.
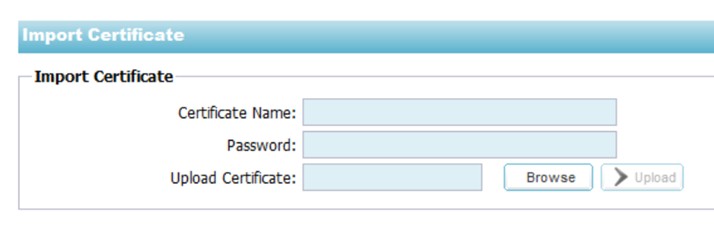
Importing Certificate
- To Import certificate to ALB X, navigate to Configure-> SSL.
- Select the Import Certificate Button to open Import Certificate tab
- The imported certificate should be a PKCS#12 file and should include an exported private key.
Creating Certificate
- To create a new certificate in ALB X, navigate to Configure-> SSL.
- Select the Create Certificate Button to open Create Certificate tab.
- Fill in the details of the certificate file.
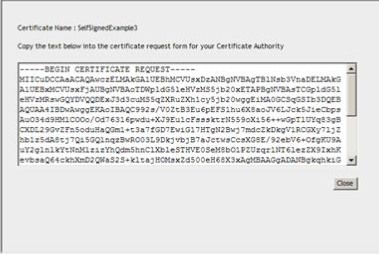
- Click on Create Certificate Request button.
- The certificate request is displayed in a popup window. It can be copied into the Certificate Authority Request form
Installing Trusted Certificates
- To install a certificate in ALB X, navigate to Configure-> SSL.
- Select the Manage Certificate Button to open Manage Certificate tab.
- Select the corresponding certificate request.
- Copy and paste the certificate supplied by the Certificate Authority into the certificate text box on the right hand side of the screen.
- Click on Install Button
Auto configuration
Manually configuring the appliance for Exchange is simple enough but jetNEXUS make it even easier for you with their pre-configured templates called jetPACK. The support team can provide these and they come with all the specific settings needed to deploy the ALB-X for Exchange in minutes. The advantage here is that it saves time and avoids any mistakes in the configuration stage. The jetPACK feature is available for other applications.
Conclusion
The jetNEXUS load balancer is simple to set up, easy to configure and a great load balancing option for Exchange deployments.
More info: http://www.jetnexus.com/load-balance-microsoft-exchange.html
Download jetNEXUS : http://www.jetnexus.com/download-jetnexus-albx-va.html
Ratish Nair
Microsoft MVP | Exchange Server
Team @MSExchangeGuru.com
")


February 6th, 2017 at 12:14 am
[…] msexchangeguru.com/2013/07/10/jetnexus/ […]