ADRMS: Calendaring Items Protection
Microsoft Active Directory Right Management Services can only protect emails. So how will we protect Calendaring items!!!
At this point of time, our test shows a sucess of this using outlook but failure using OWA. So if you have OWA blocked then it might be useful for you. Stay tuned for the update on it to block in Owa.
This becomes a challenge for the administrator to block the forwarding of calendaring Items from the server end.
I found a very easy way through custom forms. Let us see the steps below:
Enable Developer Ribbon and commands
-
Open outlook
-
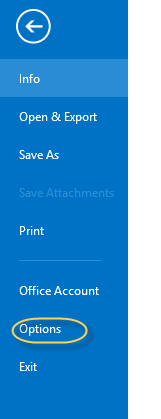
Click File à Options
-
Select Customize Ribbon and Check the checkbox in front of Developer
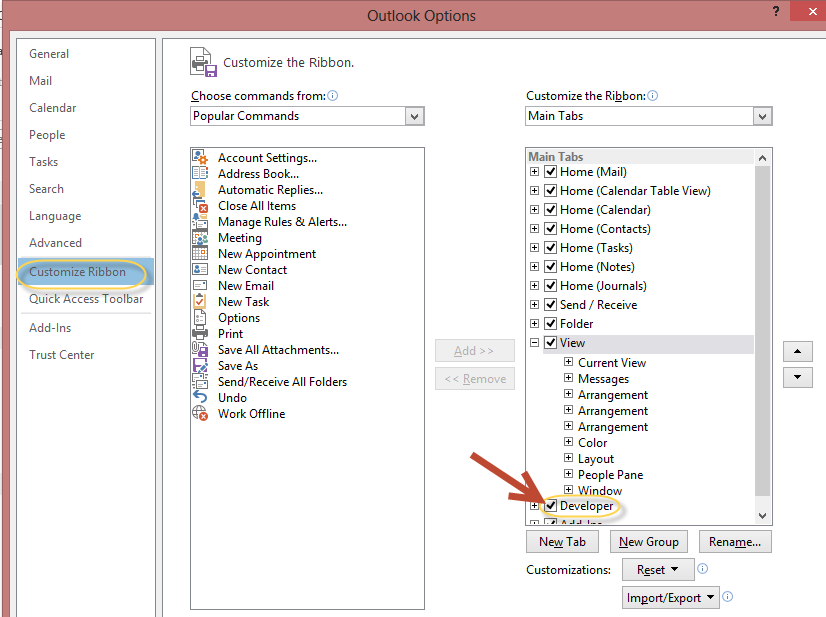
- Click ok to close options
-
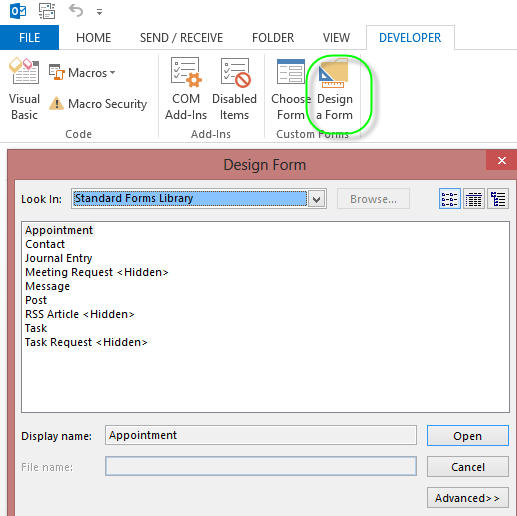
Now you will see a new tab in your outlook – Developer. Click on it
Create Organizational Forms System Folder
- Login to the exchange server
- Open EMC then click Toolbox.
- Double Click Public Folder Management Console.
- In the Public Folder Management Console, expand System Public Folders, and then click EFORMS REGISTRY.
- In the action pane, click New Public Folder.
-
At the Introduction page, configure the following fields:
- Name:
Organizational Forms Library.
- Path: Non_IPM_SUBTREEEFORMS REGISTRY.
- Name:
- On the Completion page, review the following, and then click Finish. Make sure it indicates completed the task successfully.
Add the PR_URL_NAME property to the organizational forms library
-
Download Exfolders from the link below:
http://gallery.technet.microsoft.com/Exchange-2010-SP1-ExFolders-e6bfd405
- Run the registry file. Click yes to install the key. Copy the Exfolder.exe into Exchange ServerV14Bin Directory (Path will be change as per your installation but we have copy it in the bin directory).
- Run the Exfolders from Bin directory
- In the ExFolders management console, navigate to File > Connect.
- In Connect, click Public Folders.
- Next to the Global Catalog box, click Select, and then select a global catalog server you want to use.
- Next to the Database(s) box, click Select, select the public folder database you want to use, and then click OK. A public folder hierarchy will appear in the ExFolders console tree.
- Expand System Folders, expand EFORMS REGISTRY, right-click the public folder you created for the organizational forms library, and then click Property Editor.
- On the Property menu, click Add Property To View.
- In Add Property To View, type 0x6707001E, and then click OK.
- Sort the Name column to find the PR_URL_NAME property you just added.
- Right-click PR_URL_NAME, and then click Edit Value.
- In the Value box, type /NON_IPM_SUBTREE/EFORMS REGISTRY, and then click OK.
- Close the ExFolders tool.
Add the PR_EFORMS_LOCALE_ID property to the organizational forms library
- Login to a client machine like Windows 7 machine which has MS office installed with the Org Mgmt member user.
-
Download MFCMapi.exe from the link below:
- Create outlook profile for the admin user
- Open MFCMapi.exe, click on the Session menu, click Logon and Display Store Table.
- On the MDB menu, click Open Public Folder Store, and then click OK. The Public Folder Management Console appears.
- In the console tree, expand Public Root, expand NON_IPM_SUBTREE, expand EFORMS REGISTRY, and then click the public folder that you created for the organizational forms library.
- In the result pane, in the Property Name(s) column, click the PR_URL_NAME property.
- On the Property Pane menu, click Modify ‘Extra’ Properties.
- In Extra Properties, click Add.
- In Property Tag Editor, click Select Property Tag.
- In Property Selector, click PR_EFORMS_LOCALE_ID, and then click OK.
- Click OK to close Property Tag Editor, and then click OK to close Extra Properties.
- To verify that the property was added, in the Public Folder Management Console, locate the newly created PR_EFORMS_LOCALE_ID property in the Property Name(s) column. A red exclamation point (!) is displayed as its icon.
- Double-click PR_EFORMS_LOCALE_ID to open Property Editor.
- In the Unsigned Decimal box, type the desired locale ID, and then click OK. For example, type 1033 for English.
- Close MFCMAPI.
Now Organization Form System Folder will be available in your outlook but if will not be visible until you save a custom Form.
Create Custom form to disable the Meeting Forwarding:
- Click on Design a Form here then Select Meeting Request and click open
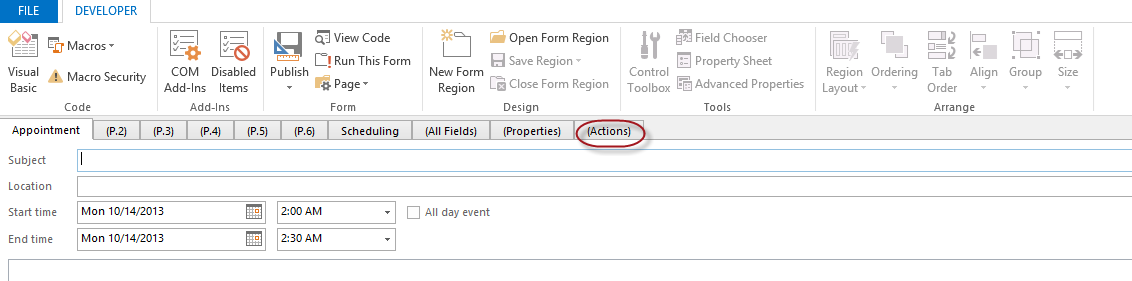
2. Click on Actions tab in the below screen
3. Double Click on the action name Forward and you will see the pop up window. Unchecked the Enabled checkbox. Click ok.
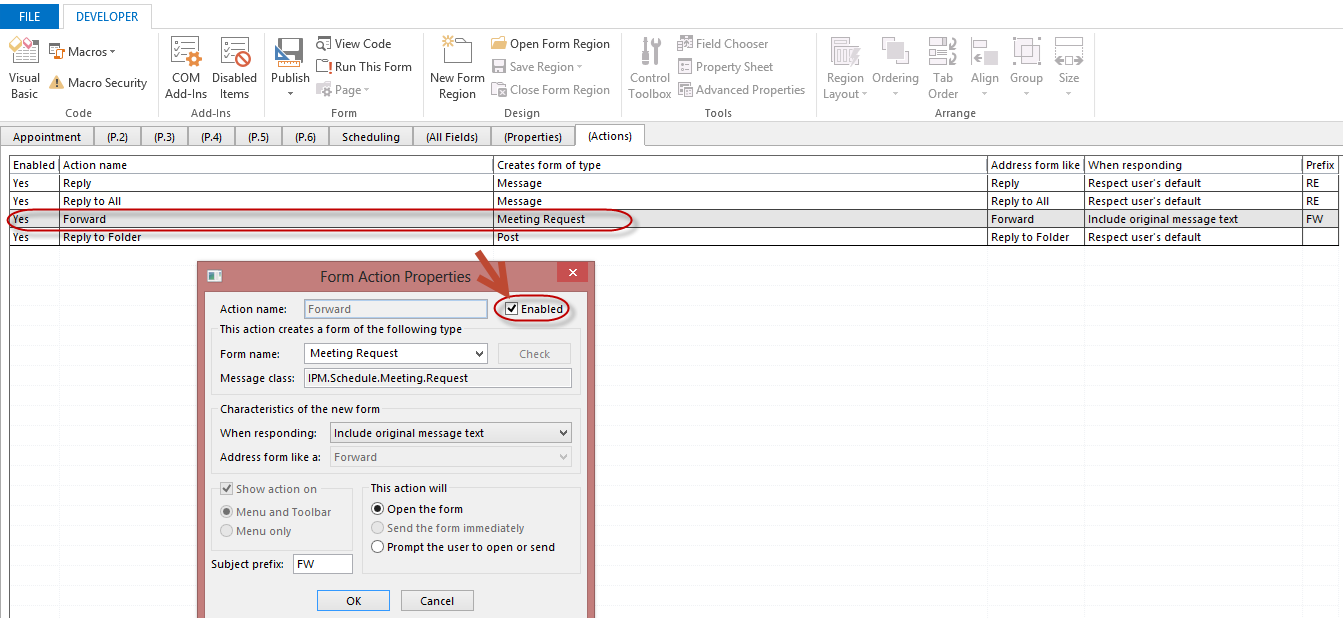
4. Now Forward has changed to No in the Enabled column.

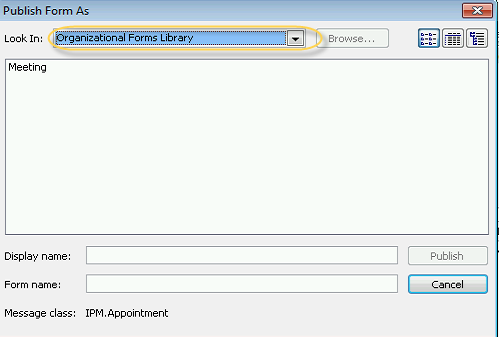
5. Click on Dropdown menu of Publish and Select Publish Form As. This will help for one user’s outlook
6. Publish the form to the Organizational Form Library Folder. This is the same system folder which we created in earlier steps. Give a name Like OrgName Do Not Forward Form and Click on Publish
7. Close the customize Form and do not save.
Now we are ready to test. When I tested I got the below message on a meeting which I had sent using this form
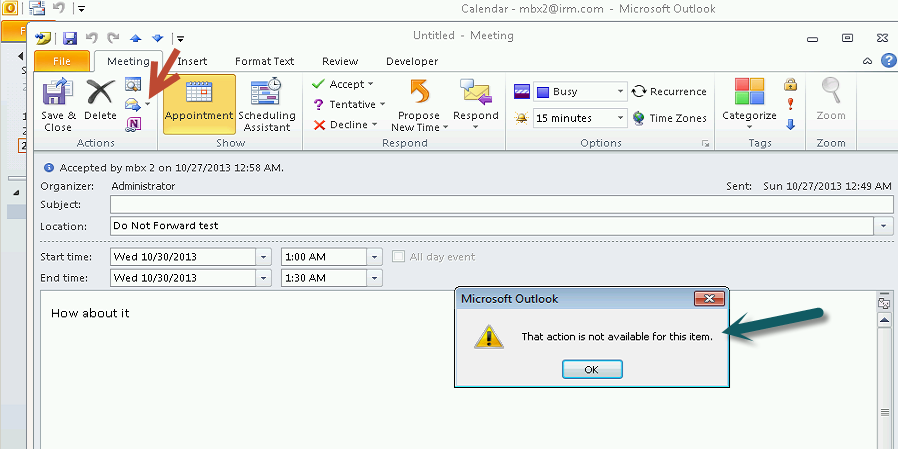
Our configuration is working.
Now I clicked on the dropdown menu next to forward icon and selected forward as Icalendar.
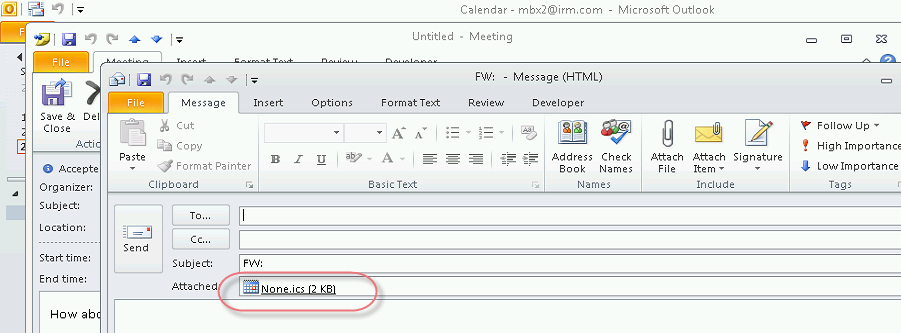
Means I was able to forward the meeting as an Icalendar. So Calendar forwarding was partically blocked. Now the next task is to block calendar forwarding as icalendar.
Blocking iCalendar Meeting forwarding
-
Login to the active directory Domain Controller and download the Adm files from the below link:
For Office 2010: http://www.microsoft.com/en-us/download/details.aspx?id=18968
- Create a New GPO and click on edit
- Extract the files from download and copy the adm files to C:windowsinfEn-Us directory
- Go to the User Configuration à Policiesà Administrative Template àRight click and select add/remove Templates.
- Browse to the definded path and select all of the adm files. This will import Office Administrative template.
-
Now you will see, the administrative template will show up as per the screen

-
Expand Microsoft Outlook 2010 à Expand “Disable Items in User Interface” à select custom
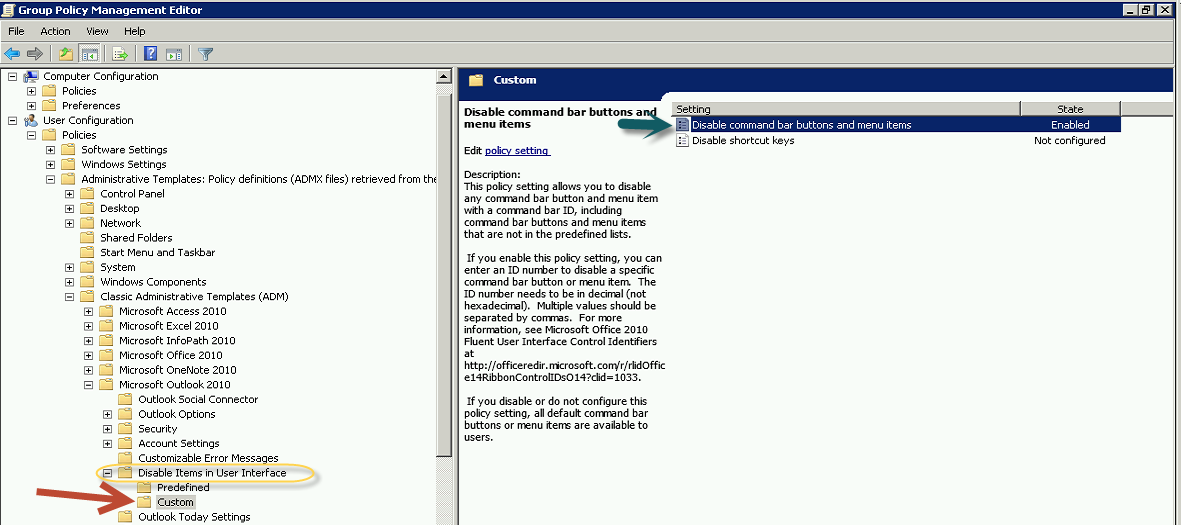
- Double click on “Disable command bar buttons and menu items” and Click on show contents then add value 5459.
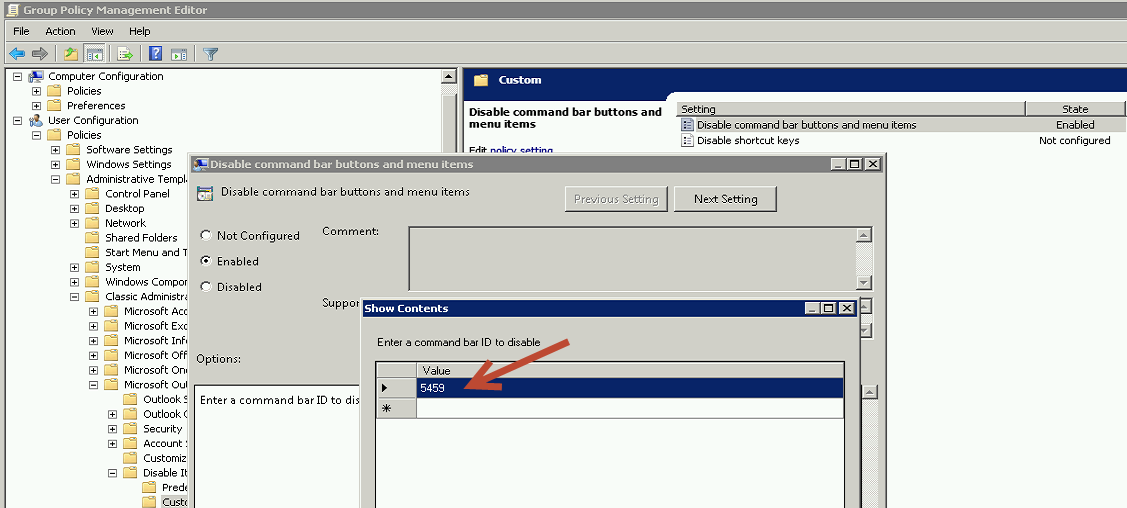
9. Click apply and ok, then close the GPO.
10. On the client side, run gpupdate /force.
11. Reopen outlook and same meeting has iCalendar grayed out
Bringing Organizational Form on the Meeting Ribbon
- Open outlook
- Go to File à Options àCustomize Ribbon
-
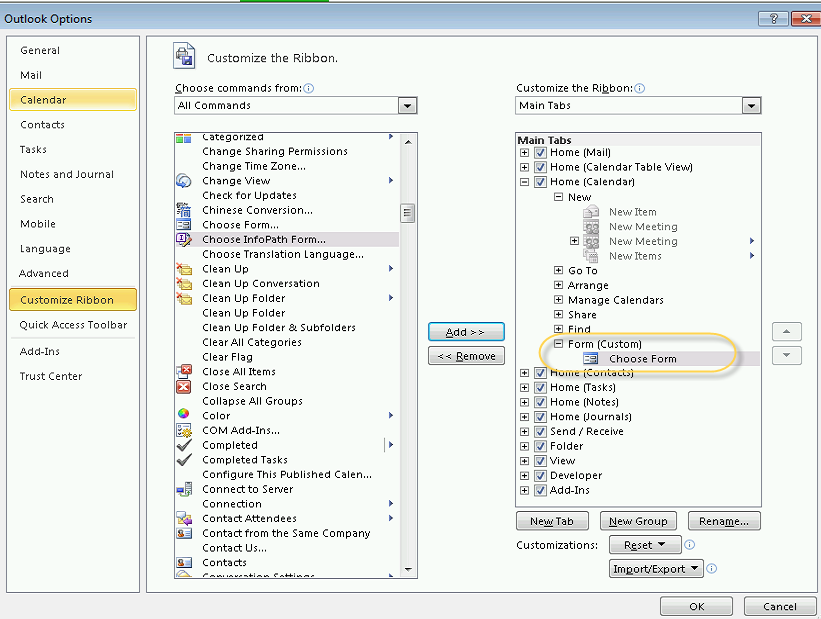
Select Home (Calendar) then click New Group.
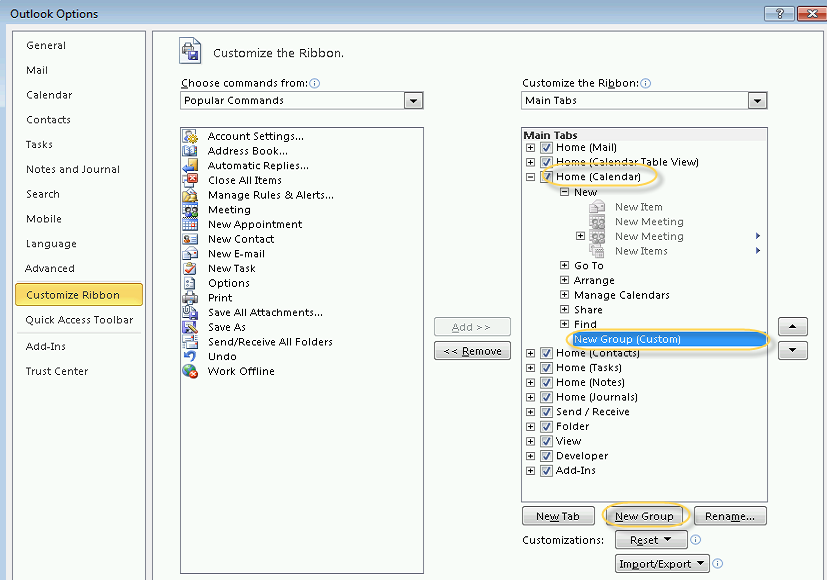
-
Rename this group to Forms
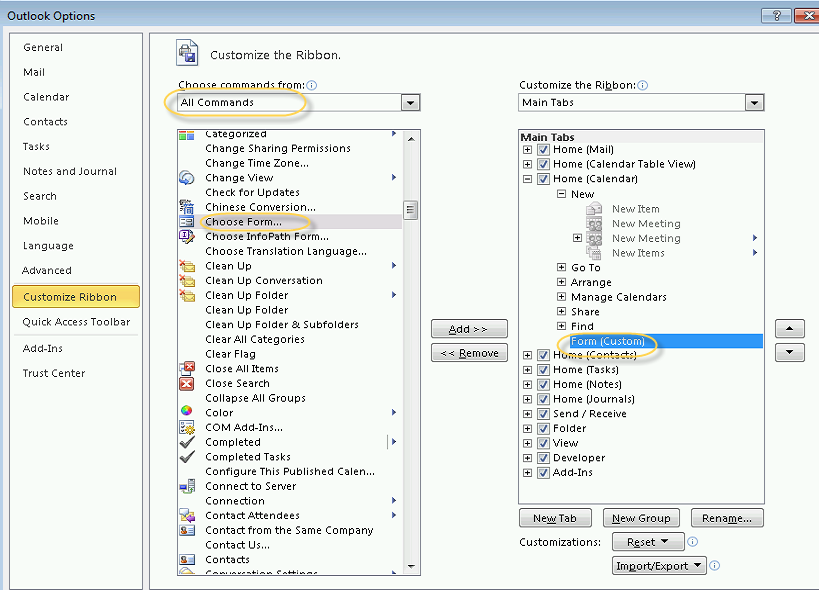
- On the left side select all commands and select choose Form as per above screenshot.
-
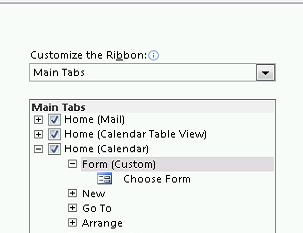
Now Select Form Group and click add. This should add Choose Form below Form Group as per below screenshot
-
Take Form Group up then Click ok.
-
Now click on Calendar then Home, You will see choose Form is showing up on your extreme left.

Known Issues and Fixes:
If you see the error “Form Load failed” then there are few solutions mentioned below:
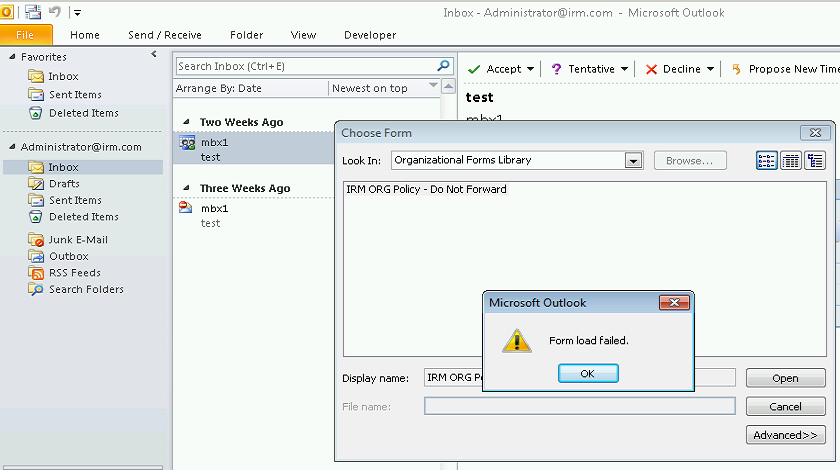
Solution:
There can be 3 issues:
-
You did not save the form with Publish As.
- To fix this issue – Delete and recreate the form with Publish As.
- To fix this issue – Delete and recreate the form with Publish As.
- Old form cache
-
Conflict with another form
-
To fix the 2nd and 3rd issue follow the steps below:
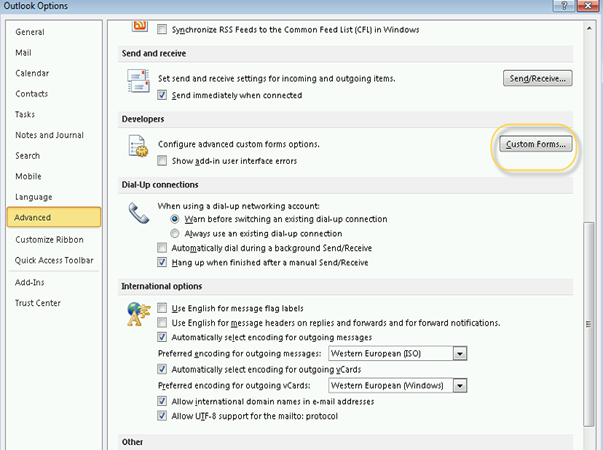
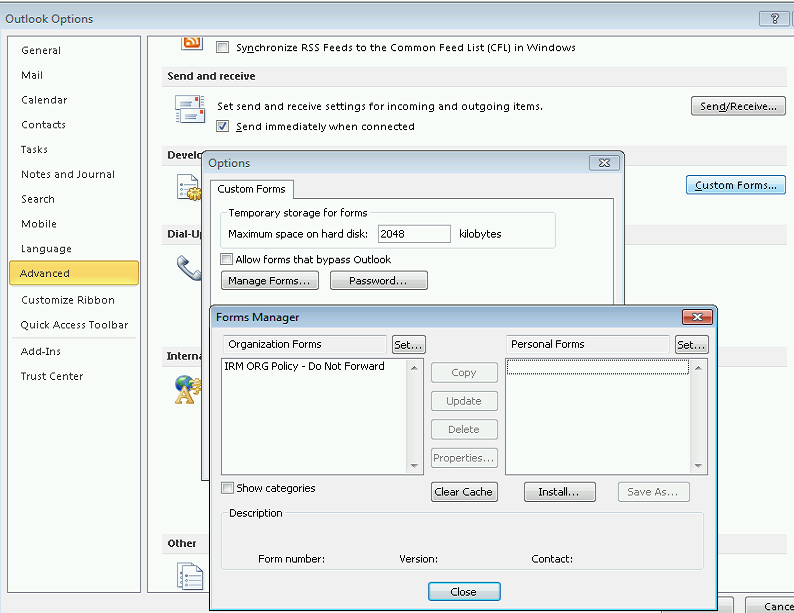
- Go to the File à Options à Advanced à Custom Forms à Manage Forms
- Go to the File à Options à Advanced à Custom Forms à Manage Forms
-
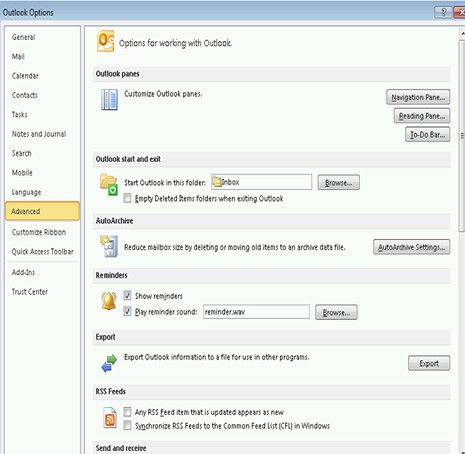
2. If you see multiple forms which you know are for the same purpose then remove them from here and clear cache here.
3. Close everything and outlook.
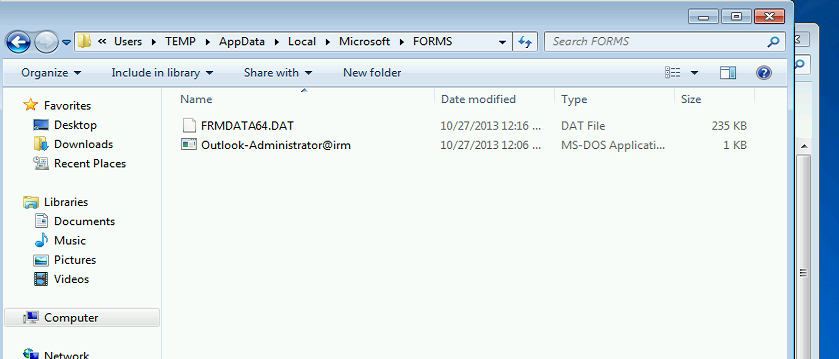
4. Now go to the below location and delete
%localappdata%microsoftFormsFRMDATA64.DAT
Above I have also covered how to delete the custom forms.
Prabhat Nigam
Microsoft MVP | Exchange Server
Team@MSExchangeGuru
")


November 23rd, 2013 at 12:53 pm
[…] Exchange: Calendaring Items Protection – 21-Nov-2013 […]
November 23rd, 2013 at 12:58 pm
[…] Exchange: Calendaring Items Protection – 21-Nov-2013 […]
December 2nd, 2013 at 7:00 am
[…] Exchange: Calendaring Items Protection […]