Exchange 2013 SP1: Installation and Upgrade
Microsoft released SP1 on Feb 25 2014 with many changes and the organization (has a policy to wait for SP1 before considering into production) will be looking to deploy Exchange 2013.
Warning: Please test in your lab with all the agents and configurations before trying to install and upgrade in Production.
You can’t upgrade Windows when Exchange is installed on the server. http://technet.microsoft.com/en-us/library/bb691354%28v=exchg.150%29.aspx
Warning: If you are running a 3rd party transport agent then you need to run the fixit script to run the transport Agent. The script can be download from here.
Many Organizations are expecting an increase in the migration projects. At this time we would like to guide the steps of the Exchange 2013 Service Pack 1 installation.
Exchange 2013 SP1 is the Cumulative Update 4 which is also full exchange 2013 means you can directly deploy Exchange 2013 SP 1 in your environment without previous versions.
Exchange 2013 SP1 will do the schema update so make sure we have healthy AD and Organization is aware about the change in schema with change approvals.
There has been a practice to stop replication on the schema master server and do the schema update. And once schema master tested a success, start the replication with other DCs throughout the Forest.
We can install Exchange 2013 SP1 in a windows 2012 R2 Active Directory. Check the exchange matrix here.
|
Operating system environment |
Exchange 2013 SP1 |
Exchange 2013 CU2 and CU3 |
Exchange 2010 SP3 RU5 or later |
Exchange 2010 SP2 |
Exchange 2007 SP3 RU13 or later |
Exchange 2003 SP2 |
|
Windows Server 2003 SP1 Active Directory servers |
|
|
|
|
X |
X |
|
Windows Server 2003 SP2 Active Directory servers |
X |
X |
X |
X |
X |
X |
|
Windows Server 2008 SP2 Active Directory servers |
X |
X |
X |
X |
X |
X |
|
Windows Server 2008 R2 SP1 Active Directory servers |
X |
X |
X |
X |
X |
X |
|
Windows Server 2012 Active Directory servers |
X |
X |
X |
X |
X |
|
|
Windows Server 2012 R2 Active Directory servers |
X |
X |
X |
|
X |
|
| Domain and forest functional level |
Exchange 2013 SP1 |
Exchange 2013 CU2 and CU3 |
Exchange 2010 SP3 RU5 or later |
Exchange 2010 SP2 |
Exchange 2007 SP3 RU13 or later |
Exchange 2003 SP2 |
| Windows Server 2003 interim domain functional level |
|
|
|
|
|
X |
| Windows Server 2003 domain functional level |
X |
X |
X |
X |
X |
X |
| Windows Server 2008 R2 SP1 domain functional level |
X |
X |
X |
X |
X |
X |
| Windows Server 2012 domain functional level |
X |
X |
X |
X |
X |
|
| Windows Server 2012 R2 domain functional level |
X |
|
X |
|
|
|
| Windows Server 2003 interim forest functional level |
|
|
|
|
|
X |
| Windows Server 2003 forest functional level |
X |
X |
X |
X |
X |
X |
| Windows Server 2008 R2 SP1 forest functional level |
X |
X |
X |
X |
X |
X |
| Windows Server 2012 forest functional level |
X |
X |
X |
X |
X |
|
| Windows Server 2012 R2 forest functional level |
X |
|
X |
|
|
|
Prerequisite:
- Exchange 2003 should be removed from the Active Directory.
- Every Active Directory site should have a Global catalog server.
- Every Active Directory site should have one Windows 2003 SP2 or higher domain controller with GC.
- Domain and Forest functionality should be Window 2003 or higher
- All outlook Clients should be minimum or higher then mentioned below.
- Outlook 2013 (15.0.4420.1017)
- Outlook 2010 Service Pack 1 with the Outlook 2010 November 2012 update (14.0.6126.5000).
- Outlook 2007 Service Pack 3 with the Outlook 2007 November 2012 update (12.0.6665.5000).
- Outlook for Mac 2011
Permissions required:
Your login id must have following group membership:
Domain Admins
Schema Admins
Enterprise Admins
Organization management if any (2010/2007) exchange org exist.
Preparing Exchange 2010/2007: If this is a coexistence then these steps will be required.
-
Install the hotfix 2550886 for DAG failover improvements on Exchange 2010/2007 DAG servers.
-
Login to the Exchange 2010/2007 server with Schema Admins, enterprise admins, domain admins and organization management group member id as SP 3 will extend the schema.
-
Install Exchange 2010/2007 SP3 on all the exchange 2010/2007 servers in CAS then HT then mailbox role order if they are not on the same server
SP3 can be downloaded from the below link:
http://www.microsoft.com/en-us/download/details.aspx?id=36768
-
Check the below link for SP3 installation steps
https://msexchangeguru.com/2013/04/03/exchange-2010/2007-sp3/
Pre-Exchange Installation preparation steps:
- Server Build Steps:
Install the following prerequisites
For Windows 2012:
-
Open Windows PowerShell.
-
Run the following command to install the required Windows components.
Install-WindowsFeature AS-HTTP-Activation, Desktop-Experience, NET-Framework-45-Features, RPC-over-HTTP-proxy, RSAT-Clustering, RSAT-Clustering-CmdInterface, RSAT-Clustering-Mgmt, RSAT-Clustering-PowerShell, Web-Mgmt-Console, WAS-Process-Model, Web-Asp-Net45, Web-Basic-Auth, Web-Client-Auth, Web-Digest-Auth, Web-Dir-Browsing, Web-Dyn-Compression, Web-Http-Errors, Web-Http-Logging, Web-Http-Redirect, Web-Http-Tracing, Web-ISAPI-Ext, Web-ISAPI-Filter, Web-Lgcy-Mgmt-Console, Web-Metabase, Web-Mgmt-Console, Web-Mgmt-Service, Web-Net-Ext45, Web-Request-Monitor, Web-Server, Web-Stat-Compression, Web-Static-Content, Web-Windows-Auth, Web-WMI, Windows-Identity-Foundation
-
Restart the server.
-
http://www.microsoft.com/en-us/download/details.aspx?id=34992
-
http://www.microsoft.com/en-us/download/details.aspx?id=17062
-
http://www.microsoft.com/en-us/download/details.aspx?id=26604
For Windows 2008:
1. Open Windows PowerShell.
2. Run the following command to load the Server Manager module.
Import-Module ServerManager
3. Run the following command to install the required Windows components.
Add-WindowsFeature Desktop-Experience, NET-Framework, NET-HTTP-Activation, RPC-over-HTTP-proxy, RSAT-Clustering, RSAT-Web-Server, WAS-Process-Model, Web-Asp-Net, Web-Basic-Auth, Web-Client-Auth, Web-Digest-Auth, Web-Dir-Browsing, Web-Dyn-Compression, Web-Http-Errors, Web-Http-Logging, Web-Http-Redirect, Web-Http-Tracing, Web-ISAPI-Ext, Web-ISAPI-Filter, Web-Lgcy-Mgmt-Console, Web-Metabase, Web-Mgmt-Console, Web-Mgmt-Service, Web-Net-Ext, Web-Request-Monitor, Web-Server, Web-Stat-Compression, Web-Static-Content, Web-Windows-Auth, Web-WMI
4. Restart the server
5. Microsoft .NET Framework 4.5
http://msdn.microsoft.com/en-us/library/5a4x27ek(VS.110).aspx
6. Windows Management Framework 3.0
http://www.microsoft.com/en-us/download/details.aspx?id=34595
7. Microsoft Unified Communications Managed API 4.0, Core Runtime 64-bit
http://www.microsoft.com/en-us/download/details.aspx?id=34992
8. Microsoft Office 2010 Filter Pack 64 bit
http://www.microsoft.com/en-us/download/details.aspx?id=17062
9. Microsoft Office 2010 Filter Pack SP1 64 bit
http://www.microsoft.com/en-us/download/details.aspx?id=26604
10. Microsoft Knowledge Base article KB974405 (Windows Identity Foundation)
http://support.microsoft.com/?kbid=974405&wa=wsignin1.0
http://support.microsoft.com/?kbid=2619234
12. Knowledge Base article KB2533623 (Insecure library loading could allow remote code execution)
http://support.microsoft.com/?kbid=2533623
-
repadmin /options serverhostname +DISABLE_OUTBOUND_REPL
-
repadmin /options serverhostname +DISABLE_INBOUND_REPL
b. Do the schema and domain update with the following steps
c. We need to install AD management tool to update schema so that it can read ldf files. Open powershell with run as administrator and run the below command.
On 2012: Install-WindowsFeature RSAT-ADDS
On 2008: Add-WindowsFeature RSAT-ADDS
d. There is no setup.com and it is only setup.exe so run the below command to update schema.
“Setup.exe /prepareschema /IAcceptExchangeServerLicenseTerms”

e. Run the below command to update Active Directory
Important: We will not be able install exchange 2010 after this step. See the warning.
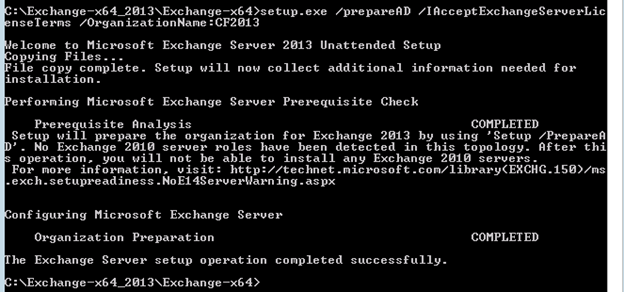
“setup.exe /PrepareAD /IAcceptExchangeServerLicenseTerms /OrganizationName:”GiveTheORGName””
f. Run the below command in every Exchange user domain
-If we have only one domain then this command is not required.
-If we have to multiple domain and some of the domain will not use exchange then run the below command in all the exchange domains.
“setup.exe /PrepareDomain /IAcceptExchangeServerLicenseTerms”
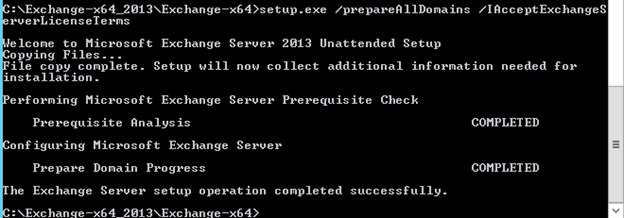
Else run the below command to prepare all domains.
“setup.exe /PrepareAllDomains /IAcceptExchangeServerLicenseTerms”
g. Post schema update checks
-
Run dcdiag and check for errors. Replication error will come as replication is disabled.
-
Open Active Directory Schema mmc and check it is working properly.
-
Open Active Directory users and computers then check working.
h. Enable the replication traffic by running the following commands
-
repadmin /options serverhostname -DISABLE_INBOUND_REPL
-
repadmin /options serverhostname -DISABLE_OUTBOUND_REPL
i. Go to cmd and run the command “repadmin /replsum” and check for error. Try doing manual replication from Active Directory Site and services.
j. We are done if the replication is working fine.
Installation Steps:
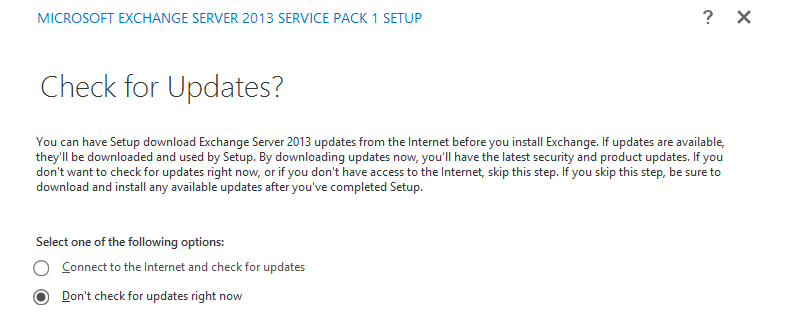
Run the setup.exe and you will see the below screen

On check for updates select “Don’t check for updates right now” and click next
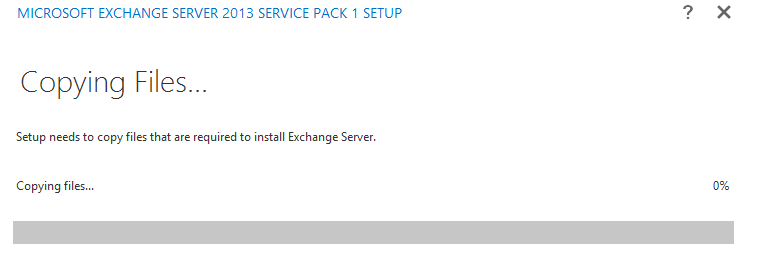
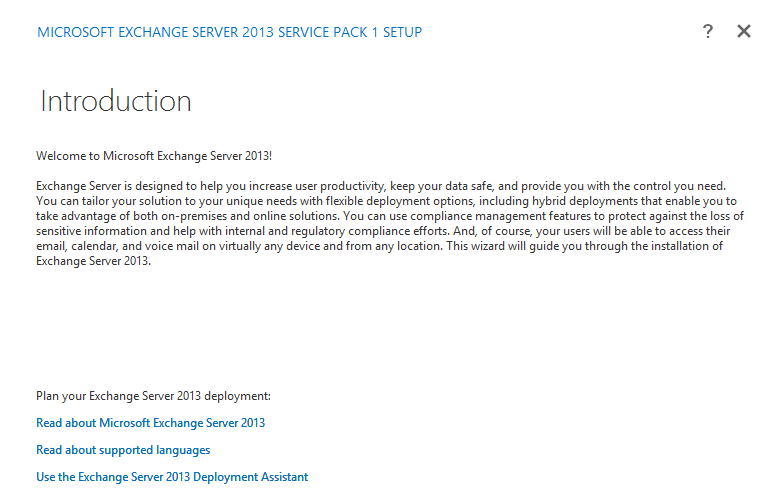
Now we will see the below screen
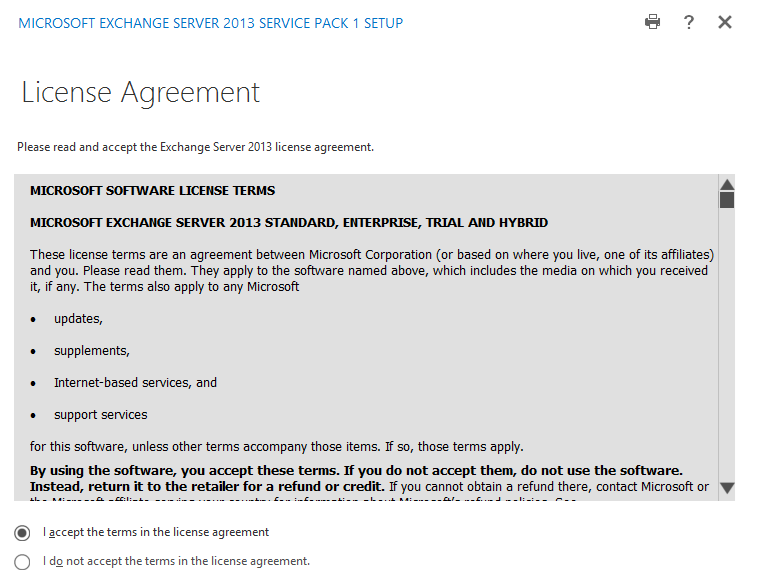
After some time we will see the below screen, click next here.
At the license page select I accept and click next
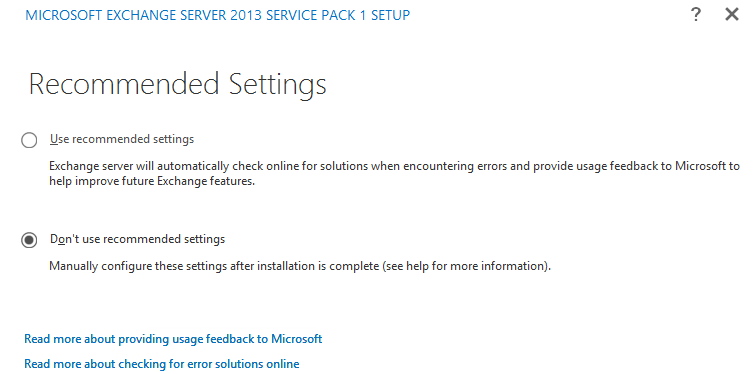
Select “Don’t use recommended settings” and click next
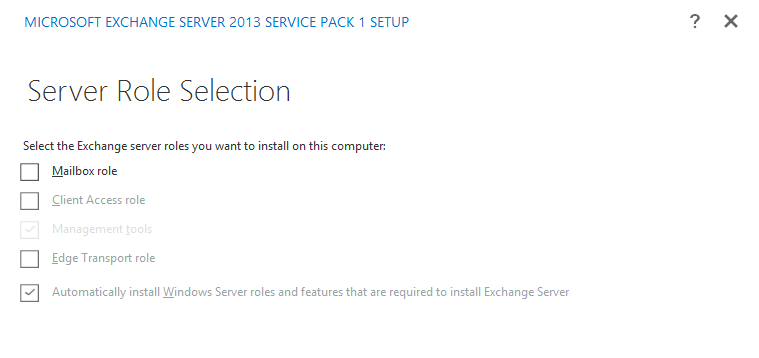
Select the Exchange server role you wanted to install and click next. You can install Mailbox and Client Access together but Edge Transport will be installed separately and can’t be merged with any other role. Edge transport role will be fully managed by powershell until we install an Edge Subscription.
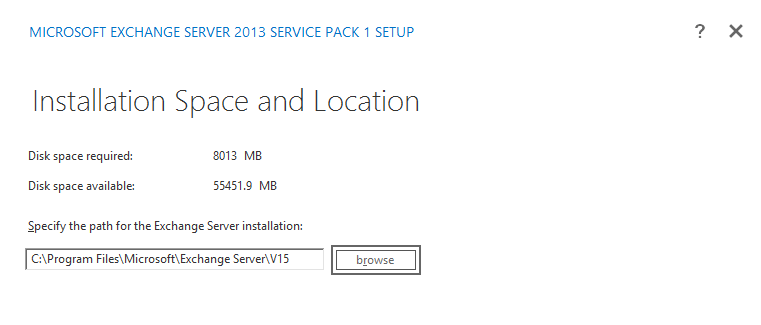
Select the installation path and click next.
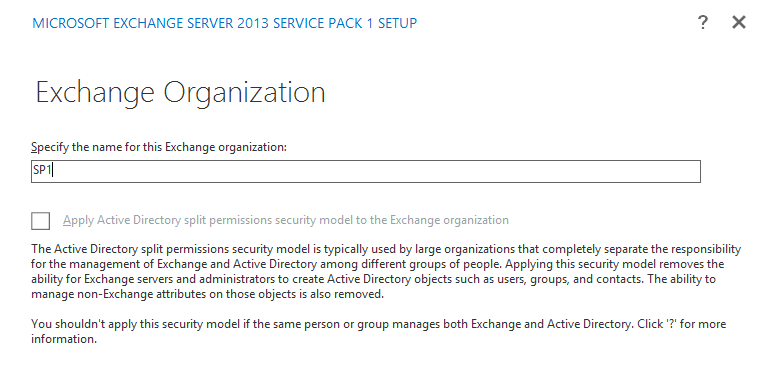
If this is a first exchange server installation and you have not run the schema update then you will see the below screen to add the Exchange ORG Name.
Give the Exchange ORG name and click next.
Go with default setting on Malware Protection setting and click next.

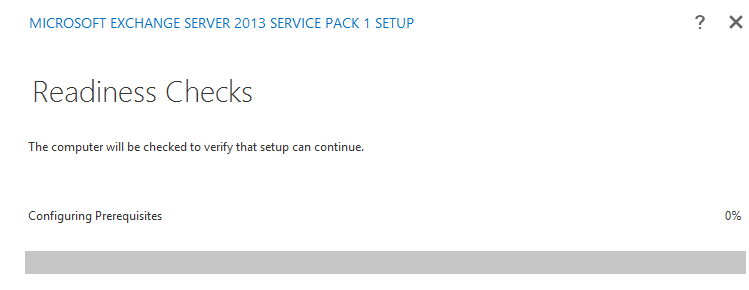
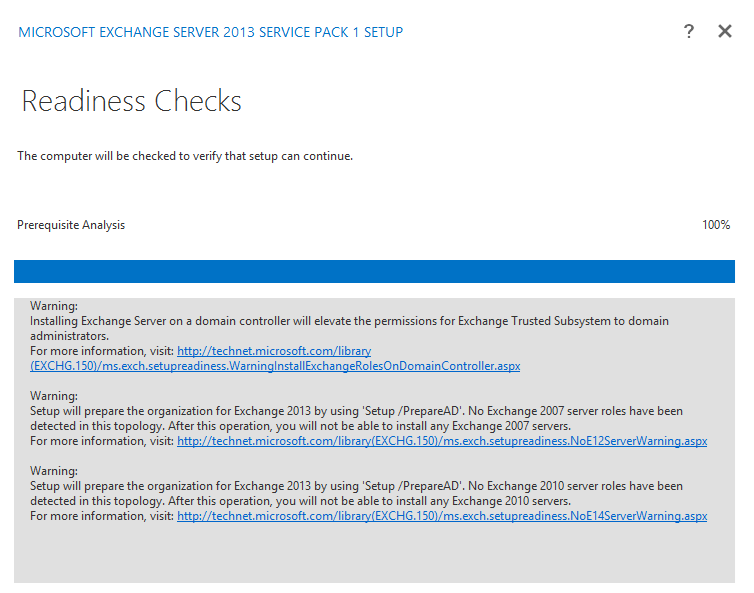
Now setup will run the Readiness Checks. If readiness comes clean then click Install. Else fix the missing update.
In my case this was the 1st exchange server in my lab on a domain controller so I got the warning. It is not recommended to install Exchange on a domain controller. This is just my lab. Click next here.
Now we will see the setup progress screen which is a 15 steps setup because I am installing mailbox and client access together. Number of steps will change as per your selection on role.
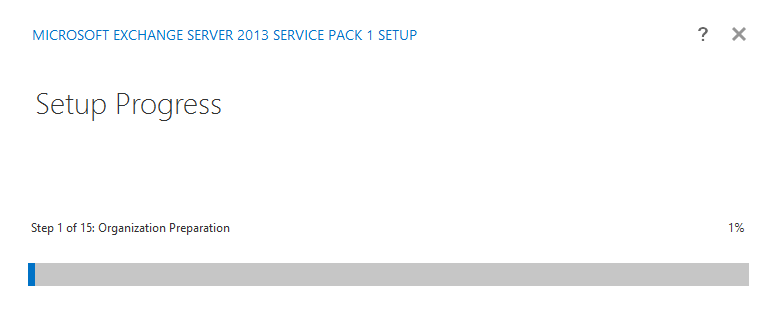
Take a break, it will take sometime depends on the hardware configuration. After some time you will see the below screen.
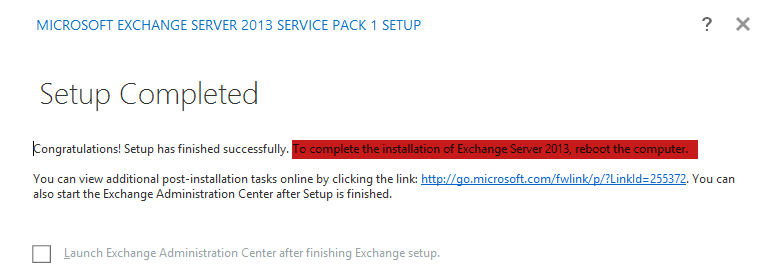
Read the highlighted text and make sure we restart the exchange server.
After restart create a send connector or add this server in the send connecter in a coexistence.
If you are running a 3rd party transport agent then you need to run the fixit script to run the transport Agent. The script can be download from here.
Prabhat Nigam
Microsoft MVP | Exchange Server
Team@MSExchangeGuru
")


October 6th, 2015 at 4:19 am
If you are going to install edge transport role on it then you don’t need to join the domain but if you are going to install CAS or mailbox role then it must join the domain membership.