PST Capture Tool: Discovery Walk Through
This blog focus on the steps of PST capture deployment and utilization. PST capture is a tool which search the PST files in the domain joined computers. We can merge the PST files to the archive or original mailbox.
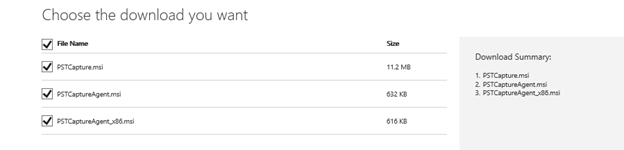
Download
This is a Microsoft software can be download from the link mentioned below.
https://www.microsoft.com/en-us/download/details.aspx?id=36789
Download all 3.
PST Capture tool Deployment
This part of the document covers PST Capture Deployment Steps.
Prerequisite
-
Windows PowerShell 3.0 is required.
If you are on windows 2012 R2 then you are already on windows PowerShell 3.0 but PST capture may not pick it so you need to do the following.
https://msexchangeguru.com/2016/01/28/pstcapture-powershell30-missing/
- Service account with local administrator and full access permission on all mailboxes is required
- Outlook 2010 or above is required.
-
Microsoft .NET Framework 4.5
Installation
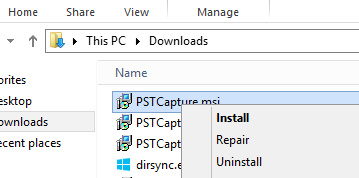
Go to the download location, select the msi file, right click and select Install.
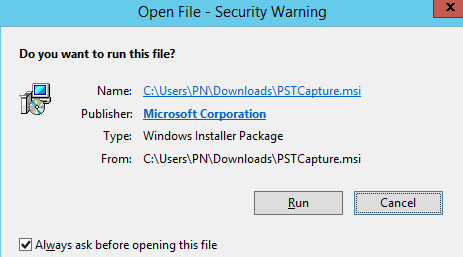
Click Run on the popup
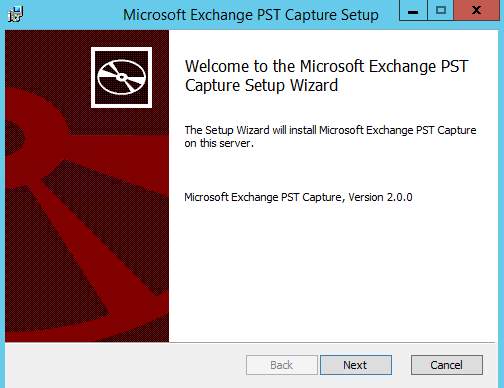
Click Next
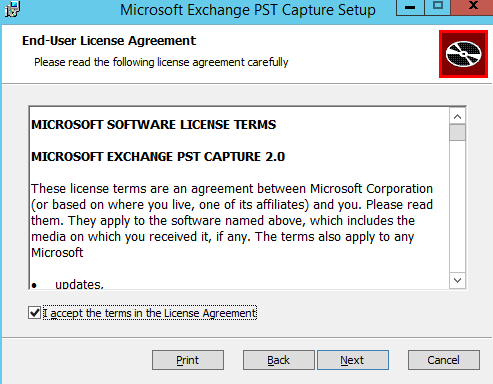
Check the checkbox and then click next.
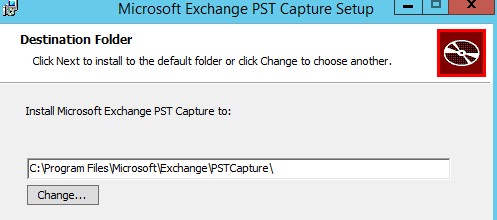
Click next on this screen.
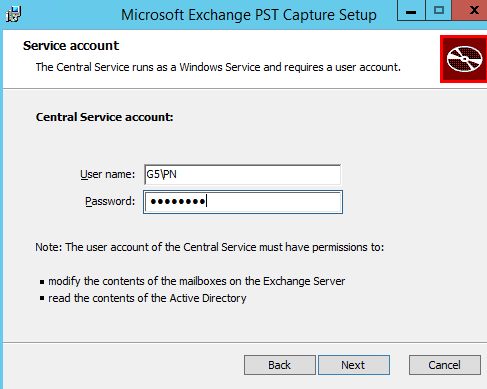
Configure central service account which has full access on all mailboxes. Then click next.
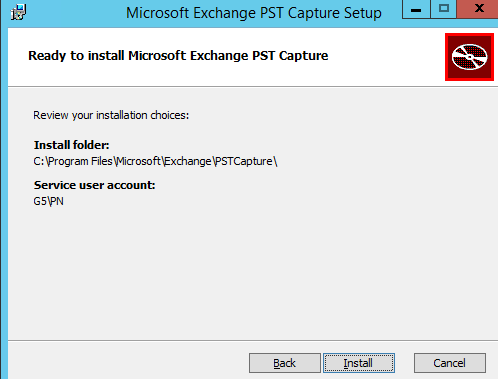
Click Install here
Click on Finish here

PST Capture Agent – Client side deployment
In order to collect the PST from whole company we need to deploy PST capture agent on all the client computers which can be laptop or desktop or terminal server.
We have to follow the below mentioned steps to deploy PST Capture agent for the domain
Open GPMC.msc
Click on “Create a GPO in this Domain, and Link it here” and name it PST CapAgent and click ok.
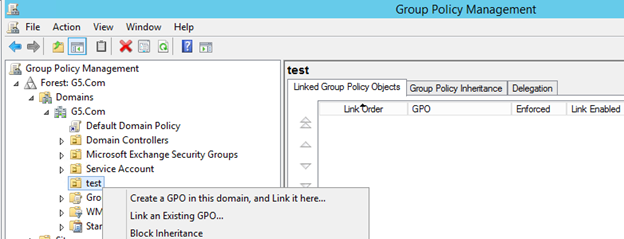
Right click and edit the GPO
Go to the properties and disable computer configuration settings
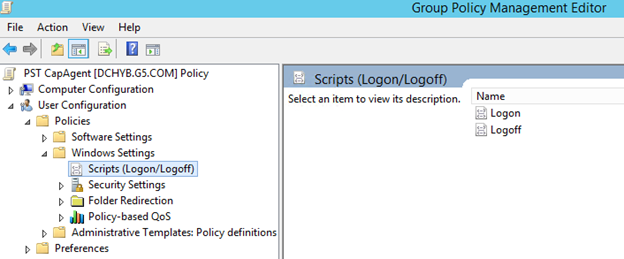
Expand User configuration and select Scripts (login/logoff) then double click on Logon
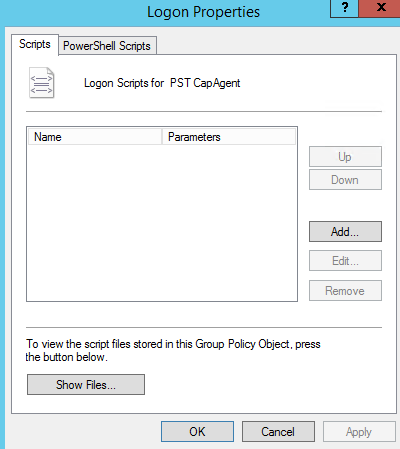
Click Add
Browse Script name
Copy both Agent Msi under logon directory.
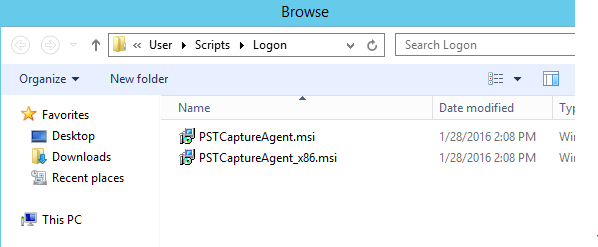
Select PSTCaptureAgent_x86.msi and click ok.
In the parameter type the below text (replace server IP) then click ok, apply ok.
/q CENTRALSERVICEHOST=<server_ip> SERVICEPORT=6674
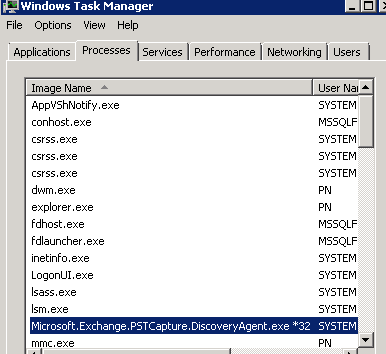
Now can log off and log in to the user computer and check the task manager, you will see Pst capture discovery agent is running.
PST Capture for Discovering PST
We will execute the following steps to discover the PST file in the client computer.
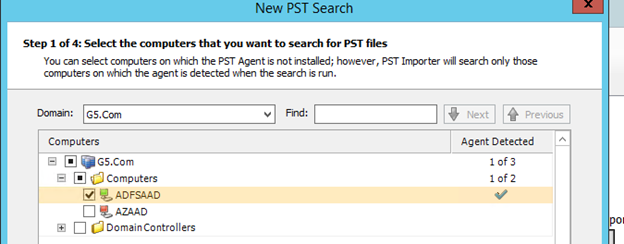
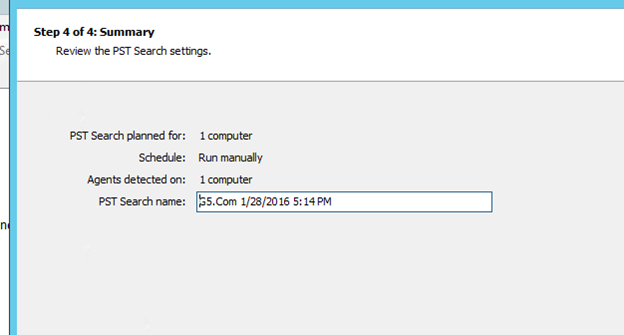
Open the PST Capture and click on New PST Search. It will open the AD OUs with computers. Select OU and click next. Note that Agent has been detected
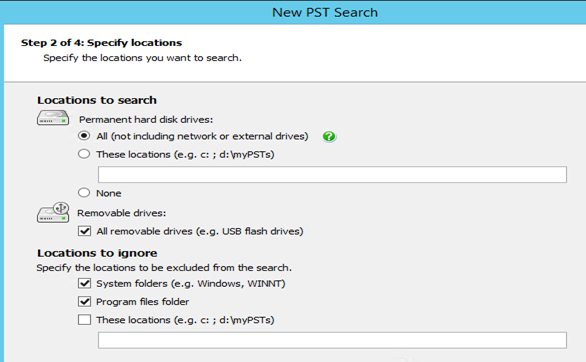
Specify locations to search and ignore then click next
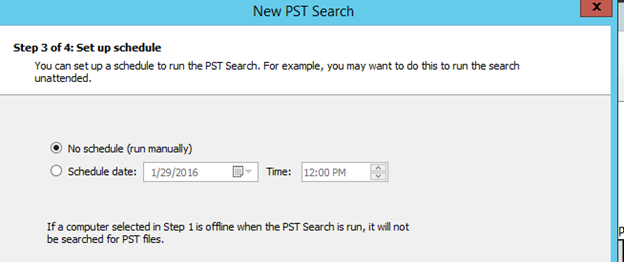
You can schedule it for later as well then click next
Click Finish here.
After this we need to click on Search All Now or we can do one by one. Now we will see PST search is running
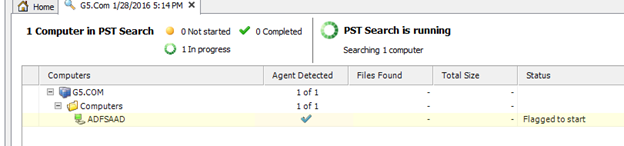
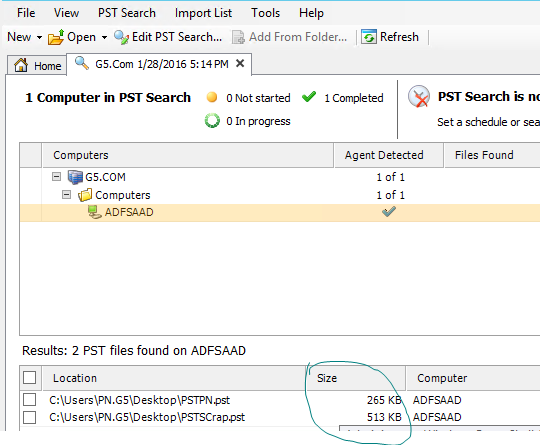
Search will finish in sometime and show us the PSTs below as shown in the screenshot below:
Click on PST Search and select “Export PST Search Results”
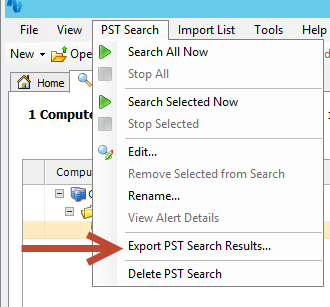
Give a name and click save.
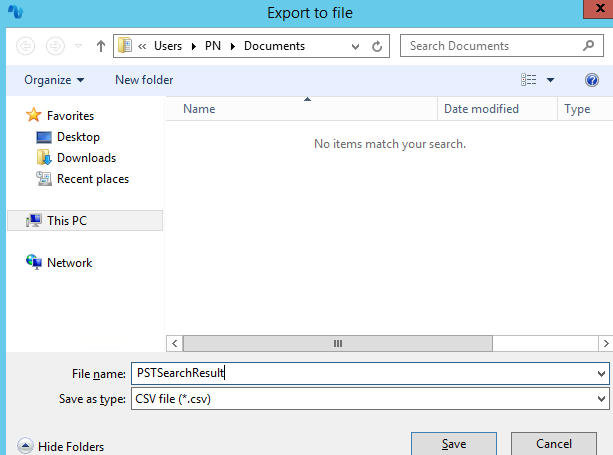
Size is shown in bytes in the csv file.

You can share CSV file for capacity planning
I will cover PST merger in the next blog so stay tuned.
Microsoft MVP | Exchange Server
Team@MSExchangeGuru
")


February 18th, 2016 at 7:59 am
I have tried this program earlier when we had Exchange 2010, and that worked great for migrating PST files to users Online Archive.
However, this does not work on Exchange 2013. Or have you gotten it to work there?
February 18th, 2016 at 8:02 am
Have you gotten the migrate pst files to users online archive working with exchange 2013?
February 29th, 2016 at 1:15 am
No, we might use Archive software to migrate the pst as well.
February 29th, 2016 at 1:16 am
I have not tested to migrate PST on 2013
July 12th, 2017 at 8:34 am
Tool link is not working. Please advise.
July 13th, 2017 at 12:42 am
PST Capture seems gone.here is the new tool
https://support.office.com/en-us/article/Use-the-PST-Collection-tool-to-find-copy-and-delete-PST-files-in-your-organization-7a150c84-049c-4a9c-8c91-22355b35f2a7?ui=en-US&rs=en-US&ad=US
July 26th, 2017 at 11:27 am
The link to the new tool doesn’t work either. Even when you login to Office 365, the page is not formatted correctly: https://portal.office.com/EAdmin/Compliance/Ingestion.aspx
Does anyone actually have these files and can you share them? Thanks