Data Loss Prevention in Exchange 2016 – Part2
In our previous article we had discussed on, what Data Loss Prevention is in Exchange 2016 and how to create the Data Loss Prevention policies using Microsoft pre-defined Templates.
In this Article, let us see how to create the Custom Data Loss Prevention policy.
Three are 3 methods exist in Exchange for using DLP:
- New DLP policy from Template: As we already discussed in our previous article, There are 80 Templates available in Exchange 2016, using these templates Administrator can quickly create and implement new DLP policies..
- Import DLP Policy: Administrator can import policies that are already been created outside of the messaging environment by any 3rd party software. Using this, Administrator can cover the DLP solution which suits their business requirements.
-
New Custom DLP Policy: Custom data loss prevention (DLP) policy allows and Administrator to create conditions, rules, and actions in order to meet his business requirements which may not be covered in the pre-defined DLP templates.
NOTE: it is always recommended to have the DLP policies enabled in test mode before running to production environment and test it on test mailboxes and send test messages that invoke the test policies in order to check the results
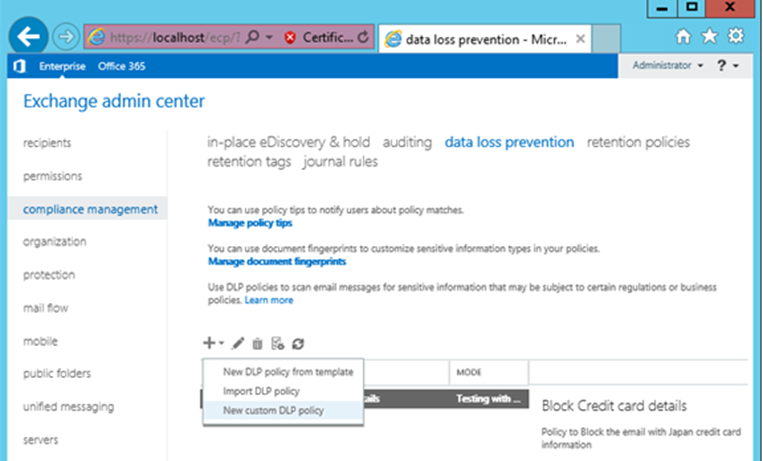
Creating Custom DLP Policy in Exchange 2016:
Open EAC and Navigate to Compliance management àClick on Drop down next to  sign and select New Custom DLP Policy:
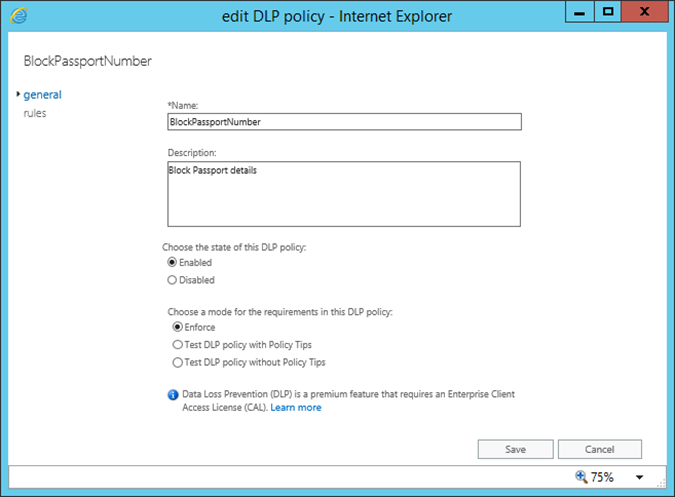
In the new Custom DLP policy window, provide the details as below and click on Save:
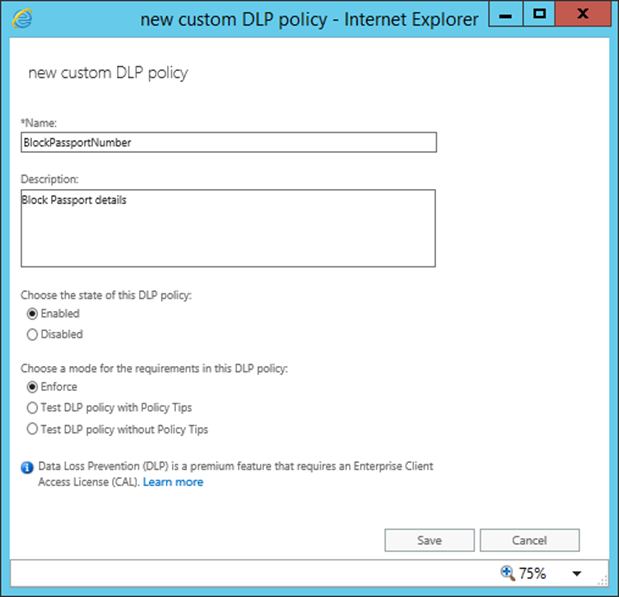
- Name: Provide the name which will be differentiate from the other policy.
- Description: Description which précis the policy (it is optional)
- Choose the status of the policy: Disabled or enabled
- Choose the Mode for the requirements: Enforce, Test Policy with Policy Tips or Test Policy without Policy Tips
Policy Tips:
Policy Tips are same like MailTips introduced in Exchange 2010, which display a notification message to Outlook users while composing an e-mail. Obviously the Policy tips display message only if Exchange detects something in the e-mail that violates a DLP Policy and if the policy has a rule to notify the sender. One of the most important feature with Data Loss Prevention [DLP] and Policy Tips is, Exchange will automatically look into a message’s subject, body and attachments while assessing conditions within the policies. An Advantage of this Policy tips is, if any user writing an e-mail is made aware in real-time that he/she might be violating a company policy, this helps in avoiding policy violation.
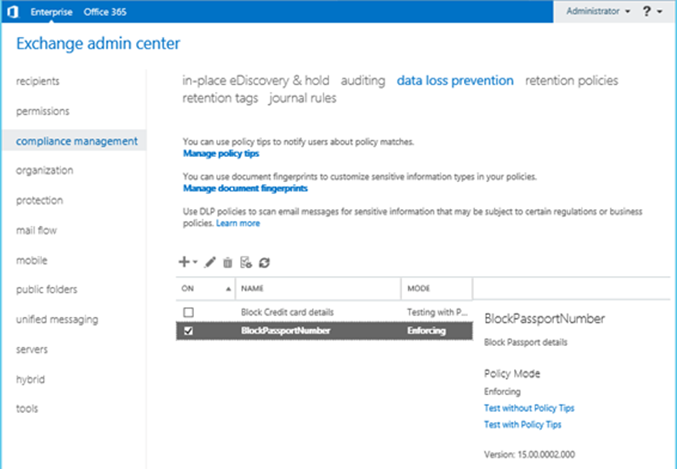
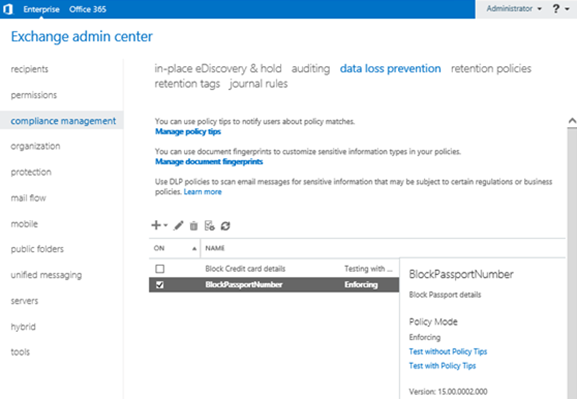
Once done, you can find the Outlook DLP policy under EAC as below:
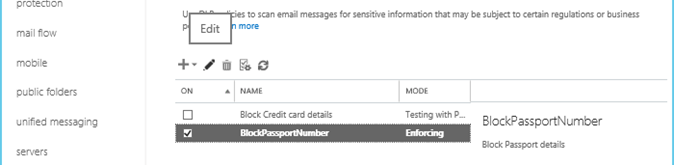
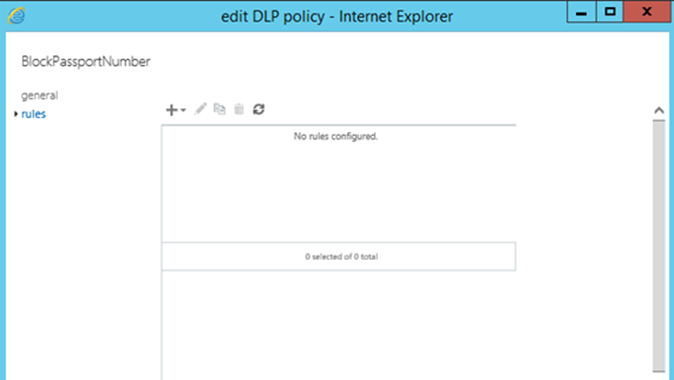
Once the policy is created, select the policy and click on  to Edit the policy and configure the rules.
Under General Tab you can find the basic details which we have chosen while creating the policy:
Click on Rules to configure the policy, as we are creating a custom policy, the rules section is empty and we need to define the rule as per the business requirement:
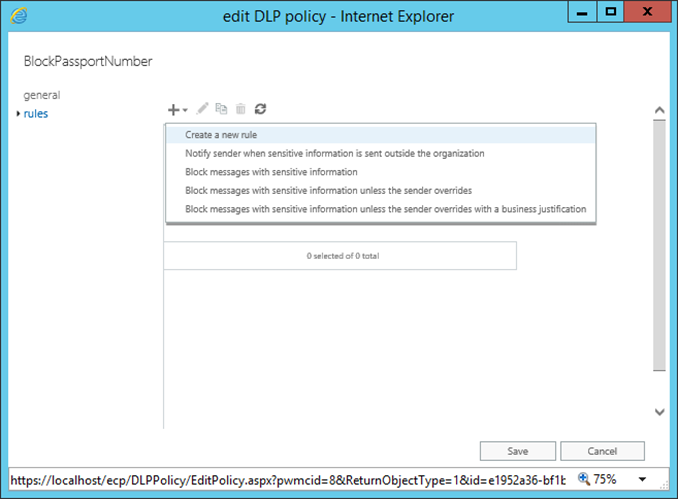
Click on Drop down next to  sign and select the appropriate option to create a rule:
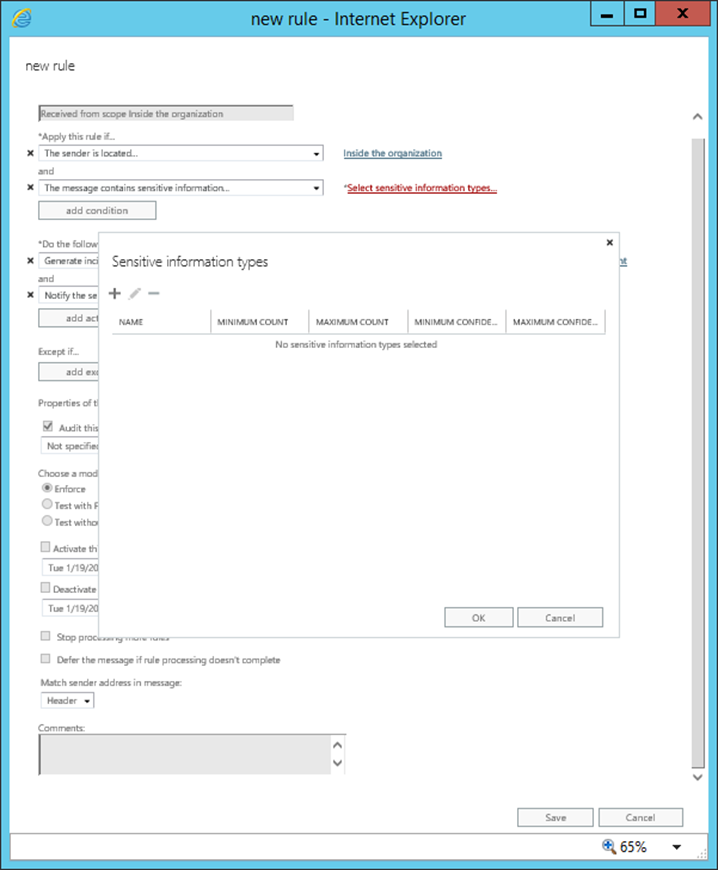
In the New Rule window, provide the details as below:
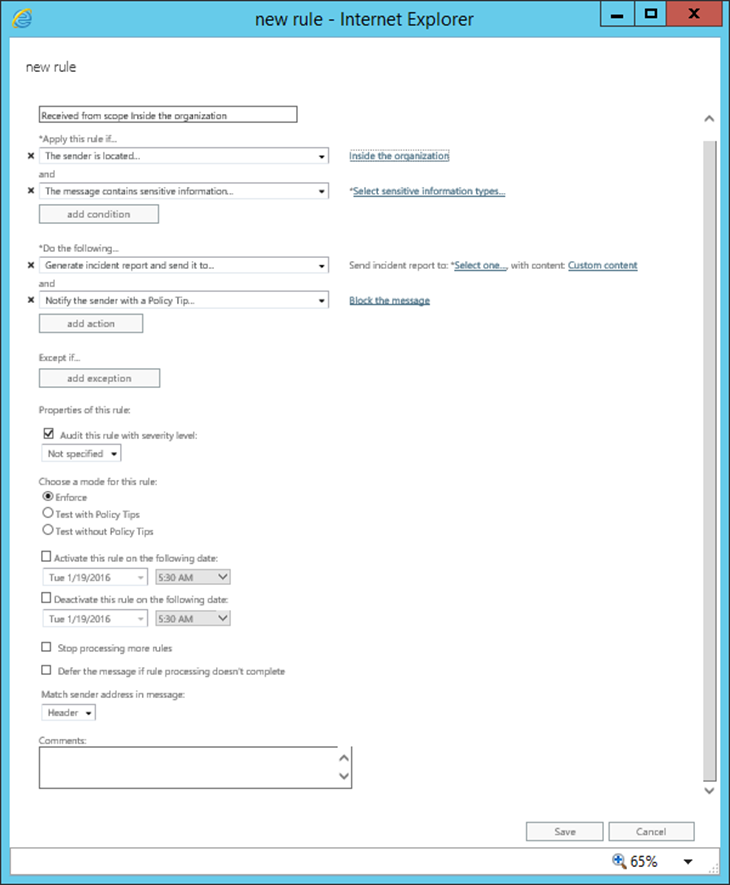
Add the condition for the Rule: Click on Select Sensitive information Types to add the Sensitive information Types to condition:
Click on  sign to find and add the sensitive information types and click on OK:
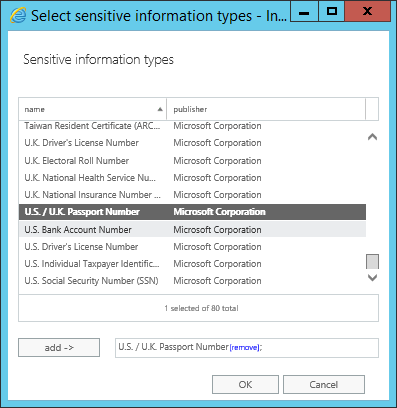
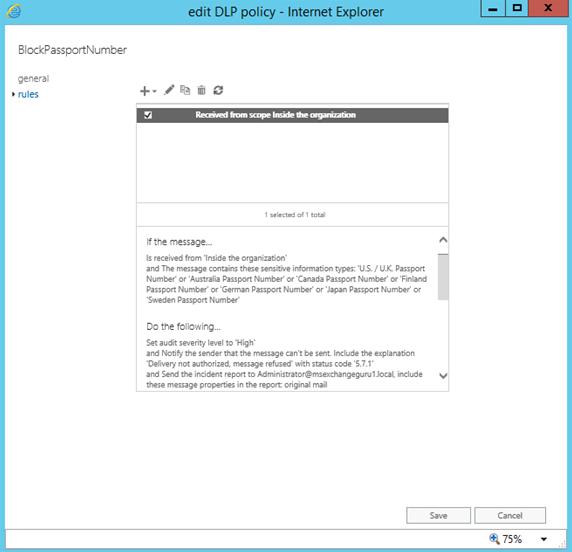
In the Sensitive information type window, we can find the passport information for several countries that this policy will be inspecting:

By editing each of them, administrator can configure several options of the discovery algorithm used by Exchange as below:
- Minimum count: This sets the lowest quantity of actions at which the rule will be activated.
- Maximum count: This sets the highest quantity of actions at which the rule will be activated
- Minimum confidence level: This sets the lowest confidence level at which the rule will be activate. Similar to a Spam Confidence Level.
-
Maximum confidence level: This sets the maximum confidence level at which the rule will be activated.
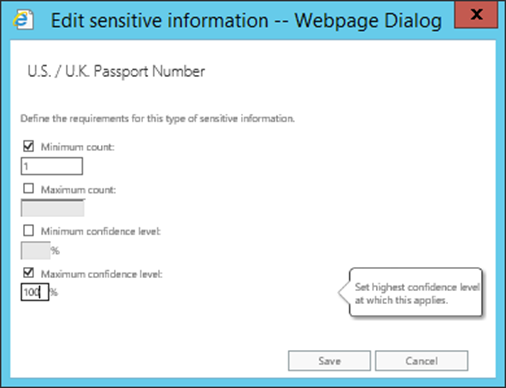
Once all settings done, click on Save:
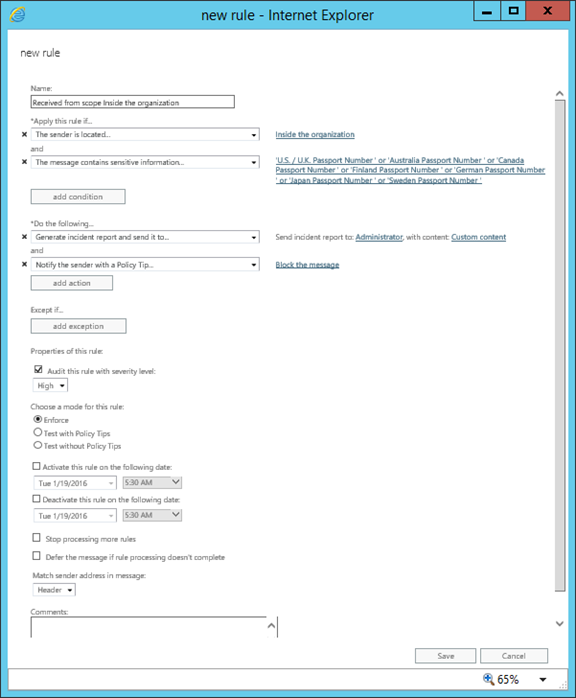
Now under Rules, will find the rule which we have created, click on save to complete the Custom rule creation process:
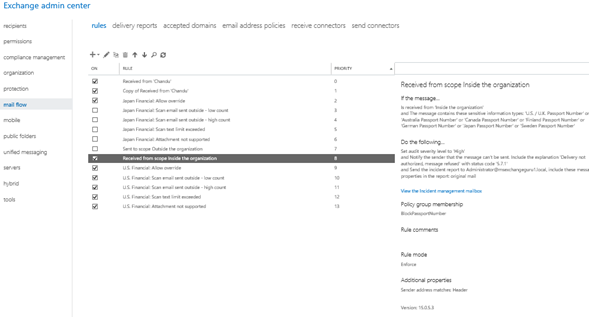
Now we can find the Rule under EAC as below:
As we all know, the DLP makes use of Transport Rules. We can find all rules created by DLP policies under EACàMail FlowàRules as below:
Using Exchange Management Shell:
DLP Policies can be created using Exchange Management Shell [EMS]. Let’s see how to create a policy in EMS:
Use the below command to find available DLP commands:
Get-Command *dlp*
Get-DlpPolicy à
to find the existing DLP policies
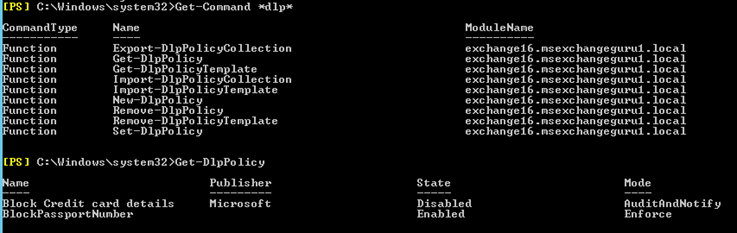
Get-DlpPolicyTemplate | Select Name à
find the Template name can be used:

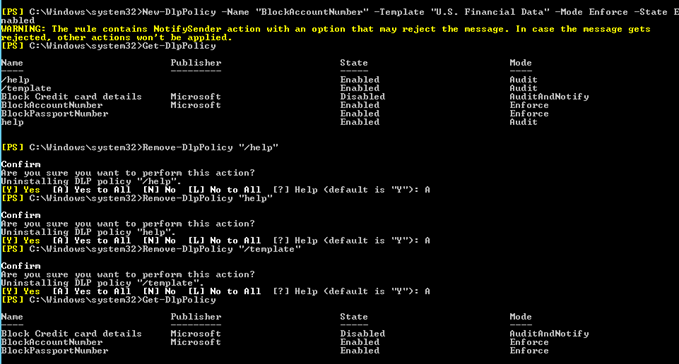
Now I am going to create new policy based on the Financial Data – U.S. Rinancial Data, Mode – Enforcement mode and state as – Enabled:
New-DlpPolicy –Name “<Policy Name>” –Template “<Template Name>” –Mode <mode type> -Status <enabled/disabled>
Remove-DlpPolicy <Name of the dlppolicy> àTo remove the DLP policy
NOTE: We can use different switches like Set-DlpPolicy, Export-DlpPolicyCollection, Import-DlpPolicyCollection, Import-DlpPolicyTemplate etc. according to the requirement.
Ratish Nair
Microsoft MVP | Exchange Server
Team @MSExchangeGuru
")


February 9th, 2016 at 12:34 am
[…] Data Loss Prevention in Exchange 2016 – Part2 […]