Office 365: Register a Domain
This was long time due on me to share how to add a new domain to office 365. There are simple 3 to 5 steps to do it. Let us have a look.
Step 1. Go to login.microsoftonline.com and login or create a login.
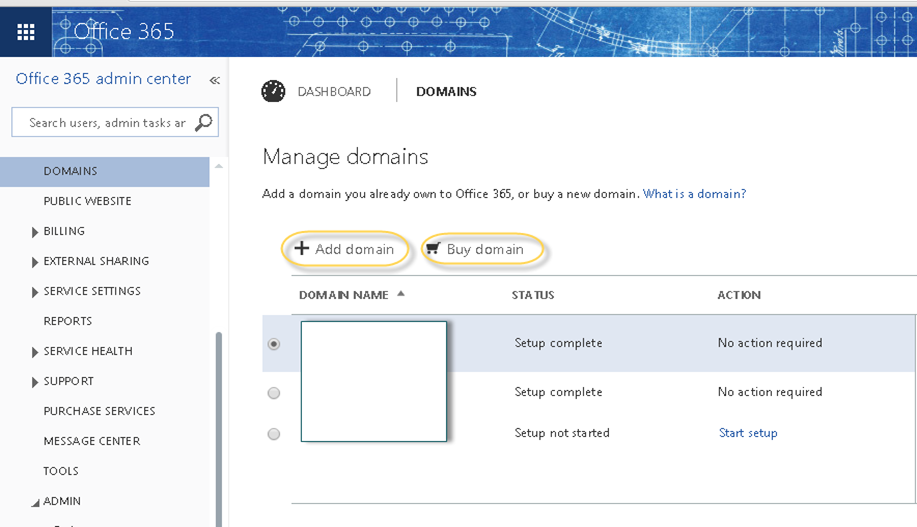
Step 2. Once you login, click on Domains then click on “Add domain” (when you have already own a domain and you can verify by login) or Buy domain (when you don’t own this domain and you need to buy a new domain). In my case I already bought this domain so I selected Add domain.
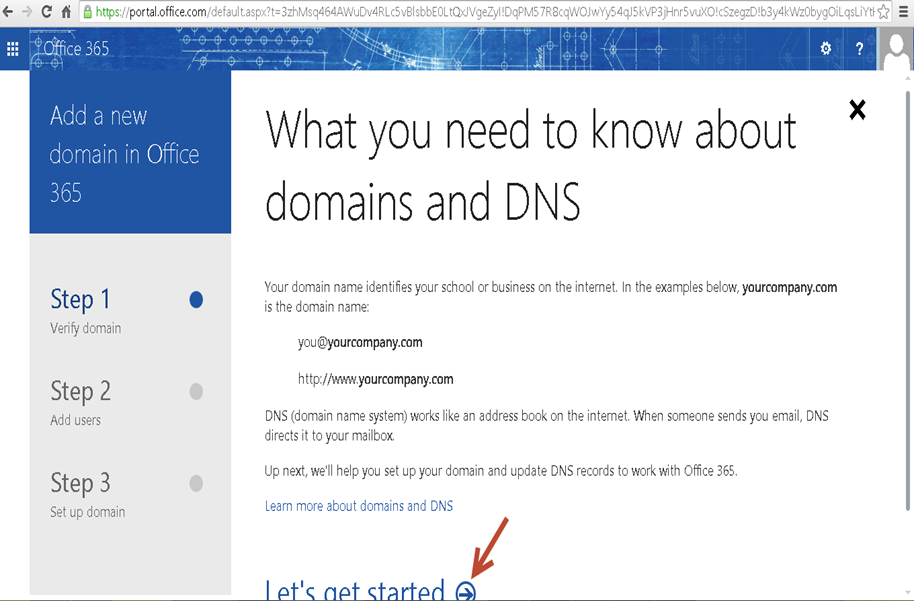
Step 3. Now you can see this is just a 3 step process but there are some critical steps coming up, watch out. Click on the arrow with round after “Let’s get started”
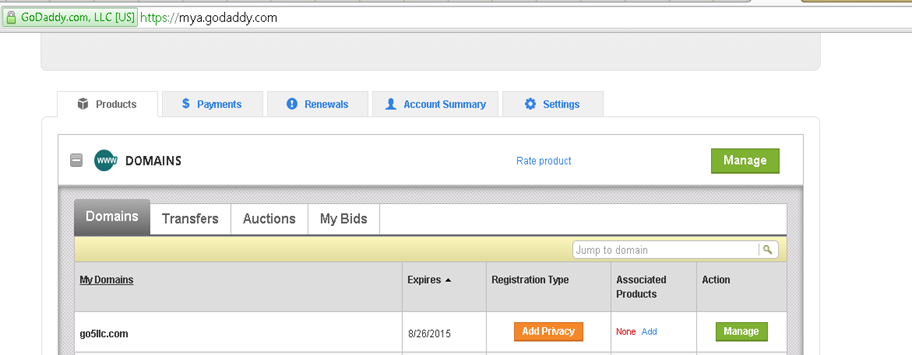
Step 4. Verify the domain. I just verified the domain from godaddy where I bought my domain. This is just to verify the correct name but not a necessary step.
Step 5. Write the domain and click next. You can also see the option of buy a domain if you don’t own a domain.

Step 6. Office 365 verified Godaddy owns the domain and will ask you to login to Godaddy to verify that you are the owner. Click on “Sign in to Godaddy”

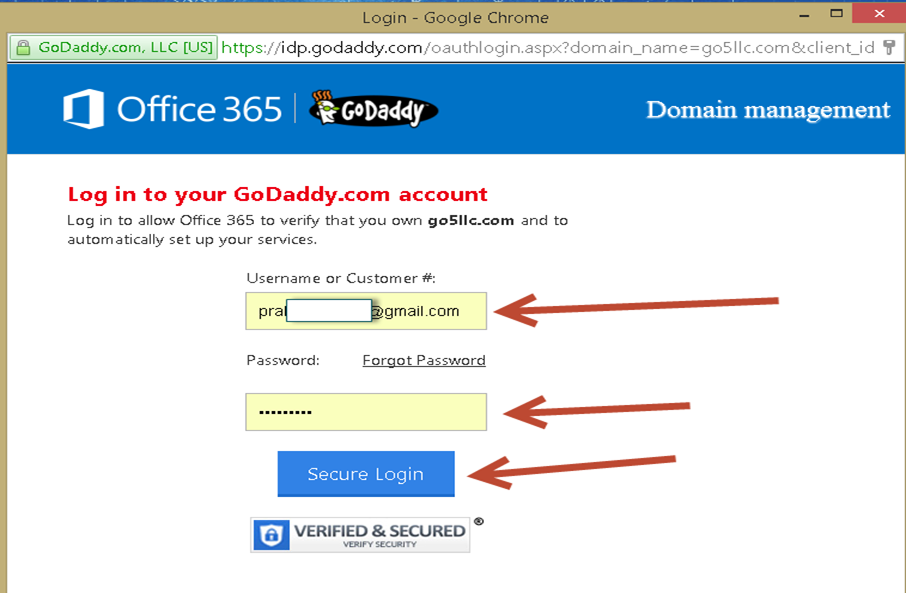
Step 7. Make sure popup is allowed on your browser. Now the popup will come for authentication. Type the user id and password then click on secure login.
Step 8. Click on accept to allow office 365 to changes in DNS.

Step 9. Now you can see domain has been verified. Step 1 has check. Click next here.

Step 10. Add new users. If this is the only place this domain exist then you might like to add few users. I will be configuring Hybrid later so I am not adding any user for now and selecting skip this step. You can always add the users later.
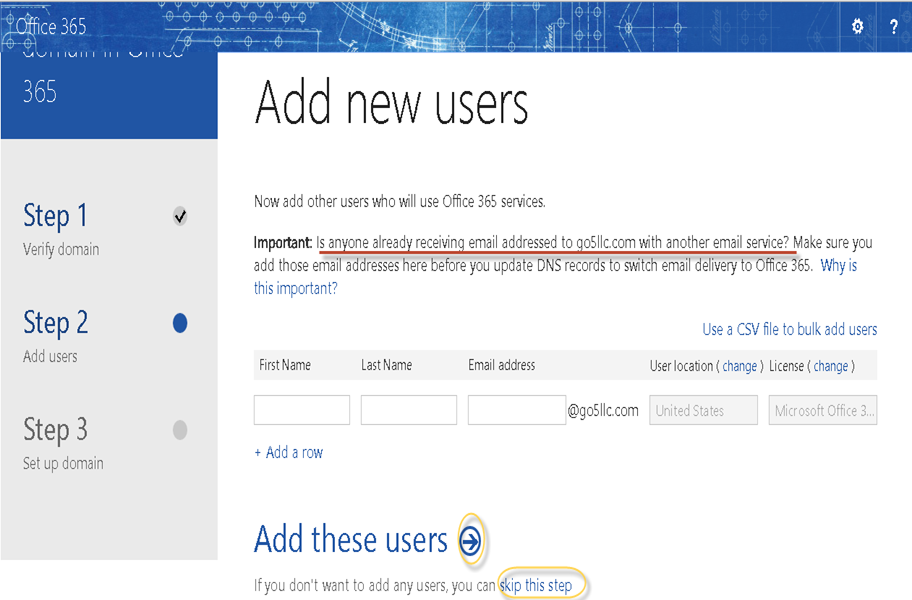
Step 11. Step 2 has completed. In the next step Office 365 will try to know the required DNS records which are based on your services. Click next here.

Step 12. Now select which services you wish to enable. There are 2 options Outlook and Lync. I am enabling both. Click next here.
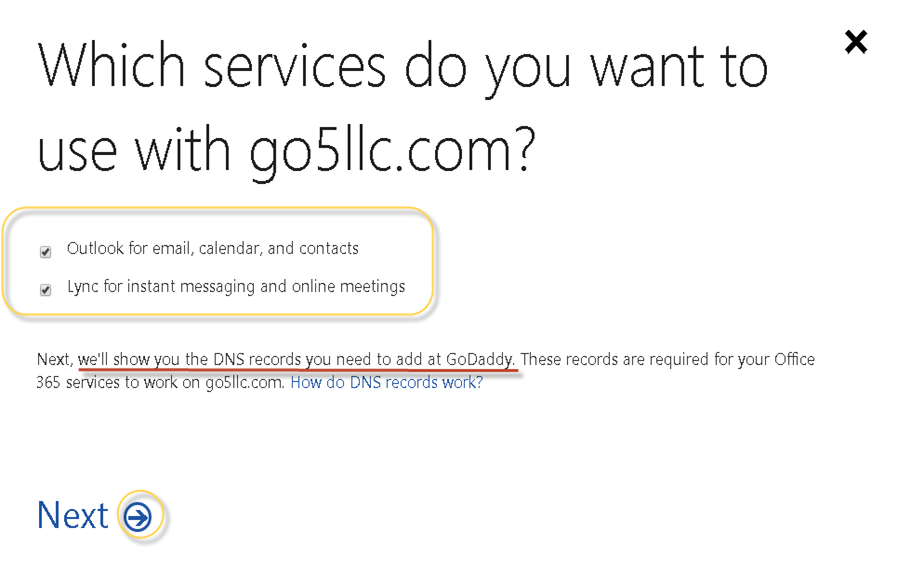
Step 13. Well! Well! Well! devil’s number 13 has come on the critical steps. Take this step as serious as the number is. There are hidden records. Don’t click next until you verify the DNS records and you know what is this going to do. Go to step 14.
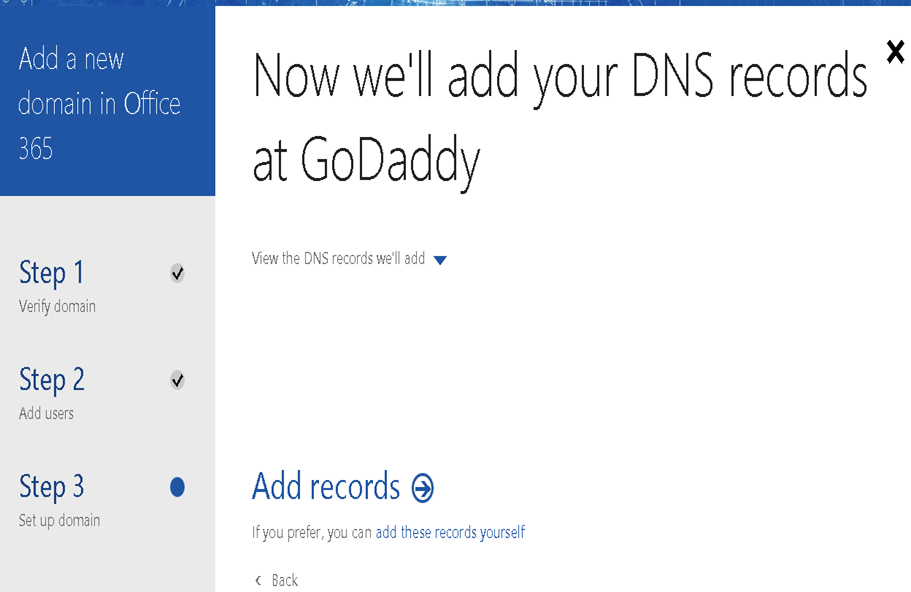
Step 14. Click on the arrow next to “View the DNS records we’ll add”. It will show all record office 365 is going to create. Review the DNS record and if you are not ready then click on skip below ADD records. If you are ready, click on Add records and office 365 will add these records in public DNS server of your domain.
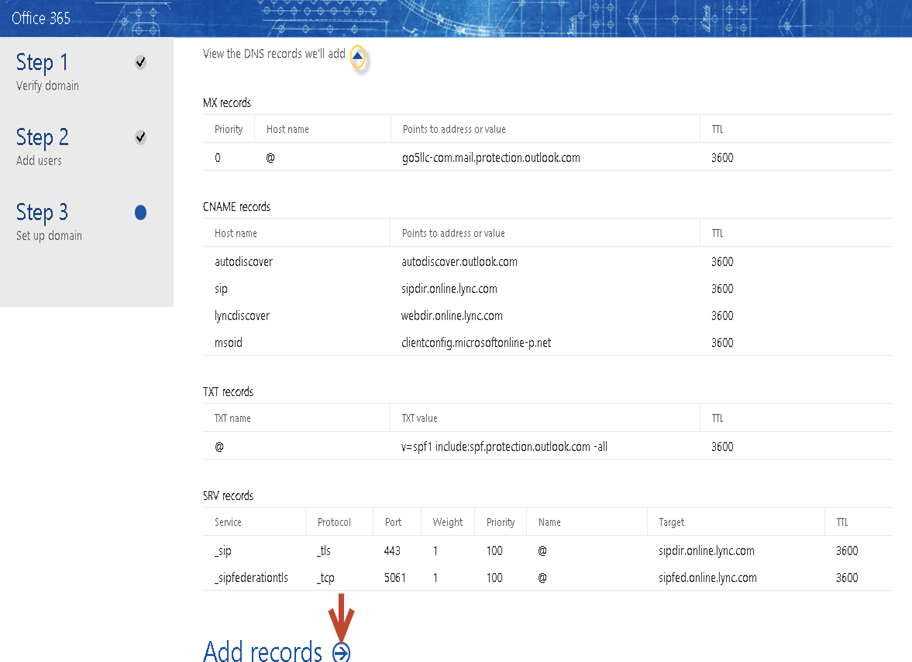
Step 15. Read everything on the next screen. All tasks are completed and you have configured your office 365 for your domain. Now verify the records it has removed. In my case these records belong to Godaddy’s email server to use Godaddy email account which comes free with eh domain name. When ready Click Finish.

Step 16. Now you will back on the domains page of the office 365 and you can see your domain status is showing complete. You can use this domain and office 365 for sending and receiving emails.

Step 17. I wanted to check the dns records in the go daddy so I logged in to the godaddy and reviewed my new dns records.

That’s it folk!!!
Prabhat Nigam
Microsoft MVP | Exchange Server
Team @MSExchangeGuru


April 5th, 2015 at 2:14 am
Very Good One Prabhat. Thanks for sharing 🙂
May 21st, 2015 at 5:28 am
[…] https://msexchangeguru.com/2015/03/31/o365-register-a-domain/ […]