AADConnect: DirSync Parallel Deployment Upgrade
Many of us will be looking for an upgrade from DirSync tool to AADConnect. AADConnect supports both In Place and Parallel Deployment upgrades. Here I am sharing simple steps to do Parallel Deployment Upgrade.
Pros:
Parallel Deployment would not cause any stop to the DirSync. We can simply avoid any database upgrade issue. It will be very little down time.
Cons:
We require new server and resources.
We would need to invest some effort in building new virtual server and resources.
Hardware requirements for Azure AD Connect
We are going for new software which might have more hardware requirement than current DirSync server. So we need to reassess the requirement to match the following:
The minimum requirements for the Azure AD Connect Server is mentioned below:
| Number of objects in Active Directory | CPU | Memory | Hard drive size |
| Fewer than 10,000 | 1.6 GHz | 4 GB | 70 GB |
| 10,000–50,000 | 1.6 GHz | 4 GB | 70 GB |
| 50,000–100,000 | 1.6 GHz | 16 GB | 100 GB |
Software requirements for Azure AD Connect
Supported Operating System:
Windows Server 2008, Windows Server 2008 R2, Windows Server 2012 and Windows Server 2012 R2
Recommended Operating System:
Windows Server 2012 R2
Windows Components for Windows 2012 R2:
.NET Framework 4.5.1
Permissions required:
Active Directory – Enterprise Admin
Azure AD – Global Admin
SQL Server Hardware Requirement
If you have above 100,000 objects, then you should use the SQL server and not use local SQL DB created by AADConnect. So let us see the SQL hardware requirement below:
| Number of objects in Active Directory | CPU | Memory | Hard drive size |
| 100,000–300,000 | 1.6 GHz | 32 GB | 300 GB |
| 300,000–600,000 | 1.6 GHz | 32 GB | 450 GB |
| More than 600,000 | 1.6 GHz | 32 GB | 500 GB |
Parallel Deployment Upgrade Steps:
Follow these steps to do parallel deployment upgrade from DirSync to AADConnect:
Download AADConnect from here. https://www.microsoft.com/en-us/download/details.aspx?id=47594
Export current configuration file from DirSync Server.
-
Login to the DirSync Server
-
Run the Azure AD Connect installer (MSI).
-
When you see the Welcome to Azure AD Connect screen, exit the installation wizard by clicking the “X” in the top right corner of the window.
-
Open a command prompt.
-
From the install location of Azure AD Connect execute the following command:
Installation Location: C:\Program Files\Microsoft Azure Active Directory Connect
AzureADConnect.exe /ForceExport

6. Click the Export settings button. When you install Azure AD Connect on a separate server these settings will be imported to migrate any settings from your current DirSync to your new Azure AD Connect installation.

Once your settings have been successfully exported, you can see the below message at the bottom

7. Now exit the Azure AD Connect wizard on the DirSync server.
Install Azure AD Connect on separate server
When we install Azure AD Connect on a new server it will assume that we want to perform a clean install of Azure AD Connect.
Since we want to use the DirSync configuration there are some extra steps to take:
-
Login to the new server which has been built for AADConnect
-
Run the Azure AD Connect installer (MSI).
-
When you see the Welcome to Azure AD Connect screen, exit the installation wizard by clicking the “X” in the top right corner of the window.
-
Open a command prompt.
-
From the install location of Azure AD Connect execute the following command:
Installation Path: “C:\Program Files\Microsoft Azure Active Directory Connect”
AzureADConnect.exe /migrate

-
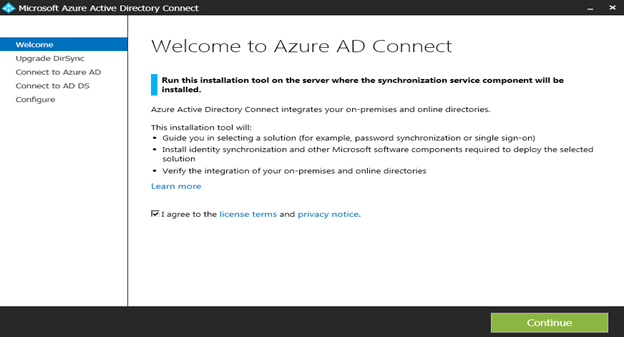
The Azure AD Connect installation wizard starts and shows the agreement. Check the checkbox then click continue here.
-
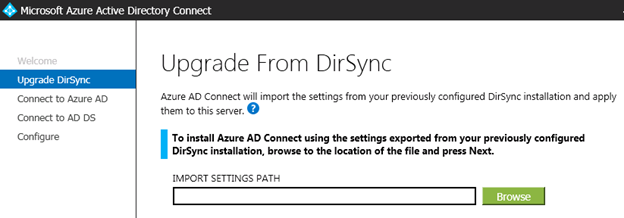
Now wizard will ask the xml file to import. Copy the file from DirSync server to a convenient location like C:\temp location:
-
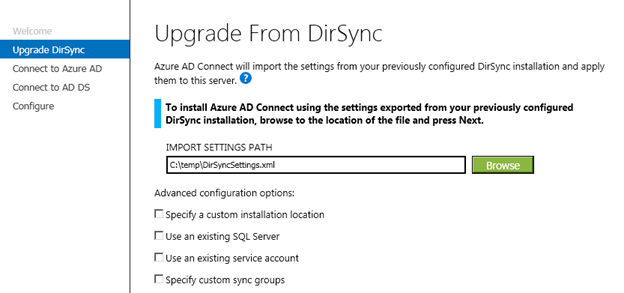
Select the settings file then Configure any advanced options including:
-
A custom installation location for Azure AD Connect.
-
An existing instance of SQL Server (Default: Azure AD Connect installs SQL Server 2012 Express). Do not use the same database instance as your DirSync server.
-
A service account used to connect to SQL Server (If your SQL Server database is remote then this account must be a domain service account). We can use same service account which was used for DirSync SQL DB.
-
Specify custom Sync Groups. Azure AD Connect will create four local groups on the server when the synchronization services are installed. These groups are: Administrators group, Operators group, Browse group, and the Password Reset Group. You can specify your own groups here. The groups must be local on the server and cannot be located in the domain. We should go with the default groups.
-
Click Next. Now Prerequisites installation will begin.

-
Give the Azure AD and Local AD Credentials when prompted. Wizard with verify your credentials


-
On the Ready to configure page, uncheck the checkboxes Start the synchronization process as soon as the configuration completes. This will allow us to choose the OUs which we wish to use to sync.
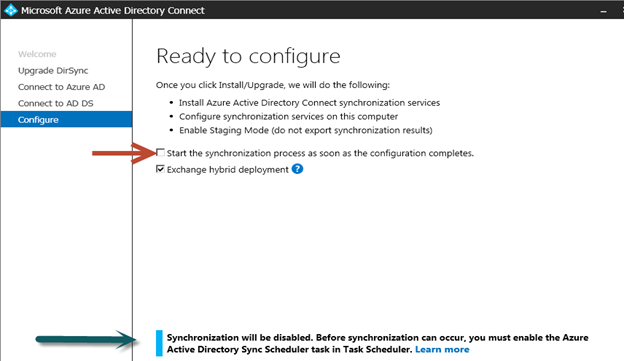
Synchronization will be disabled and we will enable it manually.
-
Click Install and let it configure.
-
After the installation has completed, restart the server.
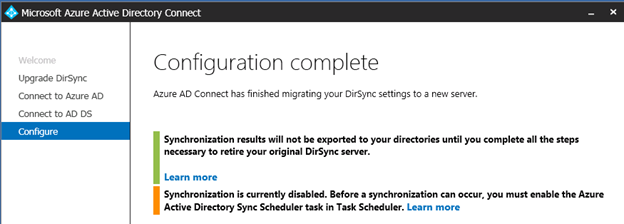
-
Now open “Synchronization Service Manager” and Click on Connectors then select local AD connector and go to properties. Then select “Configure Directory Partition” à Containers
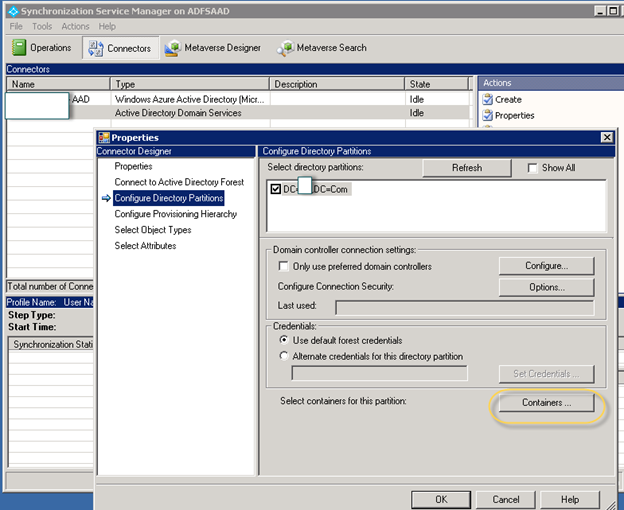
-
Give the credentials then click ok.
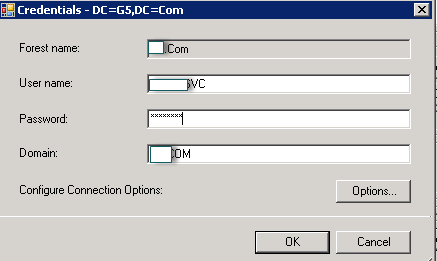
-
Now select the OU which we would like to sync with Azure AD. Then click ok then ok.
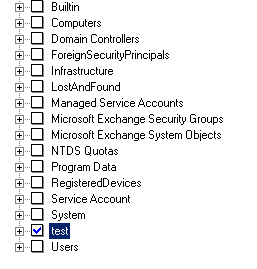
-
Now open the Task Scheduler. Select the Disabled Azure AD Sync Scheduler task and enable it. It will run in every 3 hours.

Note: Synchronization between Windows Server Active Directory and Azure Active Directory will begin, but no changes will be exported to Azure AD. Only one synchronization tool can be actively exporting changes at a time. This is called staging mode.
Verify that Azure AD Connect is ready to begin synchronization
To verify that Azure AD Connect is ready to take over from DirSync you will need to open Synchronization Service Manager in the group Azure AD Connect from the start menu.
Within the application you will need to view the Operations tab. On this tab you are looking to confirm that the following operations have been completed:
-
Full Import on the AD Connector
-
Full Import on the Azure AD Connector
-
Full Sync on the AD Connector
-
Full Sync on the Azure AD Connector

Review the result from these operations and ensure there are no errors.
Once these 4 operations have been completed, there are no errors, and you are satisfied with the changes which are about to be exported, you are ready to uninstall DirSync and enable Azure AD Connect synchronization. Complete the next two steps to complete the migration.
Uninstall DirSync (old server)
-
From Programs and features locate Windows Azure Active Directory sync tool
-
Uninstall Windows Azure Active Directory sync tool

-
Uninstallation might take up to 15 -30 minutes to complete. After DirSync uninstalled, there is no active server exporting to Azure AD. The next step must be completed before any changes in your on-premises Active Directory will continue to be synchronized to Azure AD
Enable Azure AD Connect (new server)
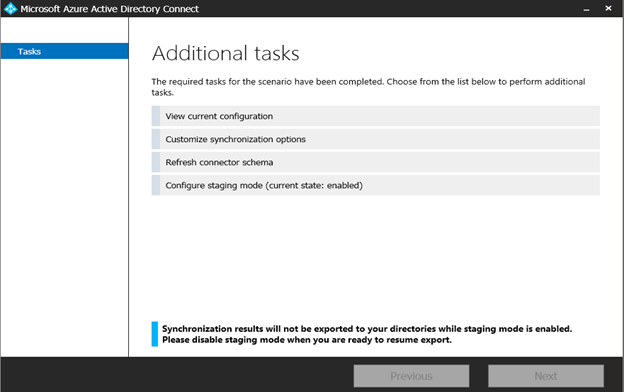
After installation, re-opening Azure AD connect will allow you to make additional configuration changes. Start Azure AD Connect from the start menu or from the shortcut on the desktop.
Do not run the installation MSI.
You should see the following:
-
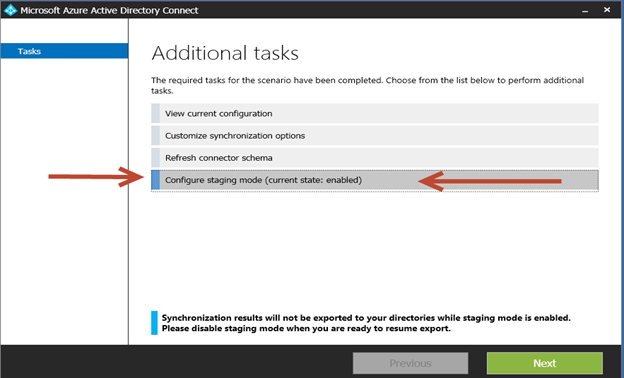
Select Configure staging mode and click next
-
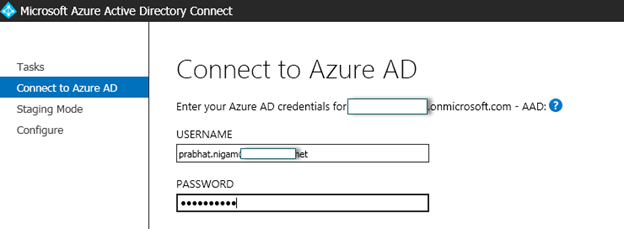
Give the credentials and click next.
-
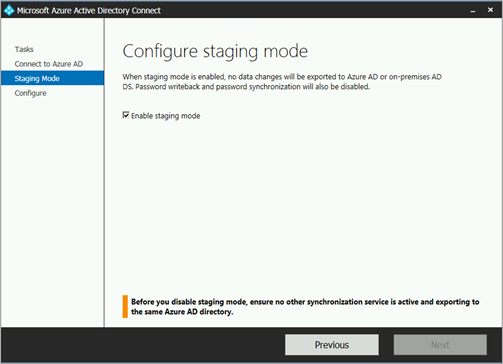
Turn off staging by unchecking the Enabled staging mode checkbox then click next
-
Check the check box “Start the Synchronization process as soon as the configuration completes” then click install.
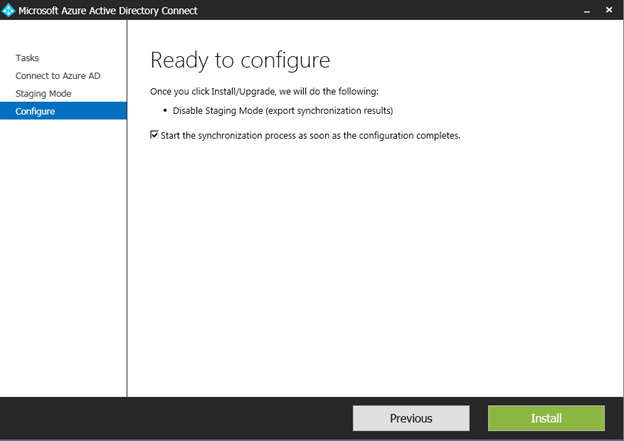
-
It will take some time to update the configuration. Click Exit when done.
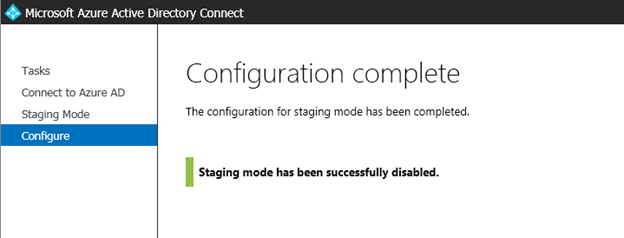
- Open the “Synchronization Service Manager” and we will see export are working as well.

At this time, we can say “AADConnect Parallel Deployment upgrade” has finished.
Microsoft MVP | Office Servers and Services
Team@MSExchangeGuru
- Open the “Synchronization Service Manager” and we will see export are working as well.


May 31st, 2016 at 2:05 pm
Nice Article Prabhat !!
July 19th, 2016 at 1:27 am
No question this is the place to get this info, thanks y’all.
August 8th, 2016 at 6:04 am
Nice Article. Very very helpful..
August 17th, 2016 at 11:43 am
Using the parallel method, do I have to uninstall the old server? Could I simply disable the services and shut it down and then take AD connect out of staging mode. This would leave me a fall back is something goes horribly wrong.
August 17th, 2016 at 1:02 pm
I would suggest to snapshot the server if this is a worry then uninstall.
June 1st, 2017 at 4:03 am
Hi there ,
thanks for guide , but when I try to export our current configuration with that command “AzureADConnect.exe /Forceexport”
not appear for me Export Settings Button.”I saw the syncronization service is suspended until this setup is closed.”
Could someone help me ?
July 15th, 2017 at 3:25 am
mail me prabhat.nigam@GoldenFive.net and we will arrange some pro help for you