Secure OWA and ECP with Multi-Factor Authentication
In this blog, we are securing Exchange OWA and ECP using Multi-Factor Authentication with ADFS Claim based Rely.
Create a relying party trust and custom claim rules for Outlook Web App and EAC
Reference: https://technet.microsoft.com/en-us/library/dn635116%28v=exchg.150%29.aspx
Outlook Web App, to create relying party trusts by using the AD FS Management snap-in in Windows Server 2012 R2:
- In Server Manager, click Tools, and then select AD FS Management.

- In AD FS snap-in, under AD FS\Trust Relationships, right-click Relying Party Trusts, and then click Add Relying Party Trust to open the Add Relying Party Trust wizard.
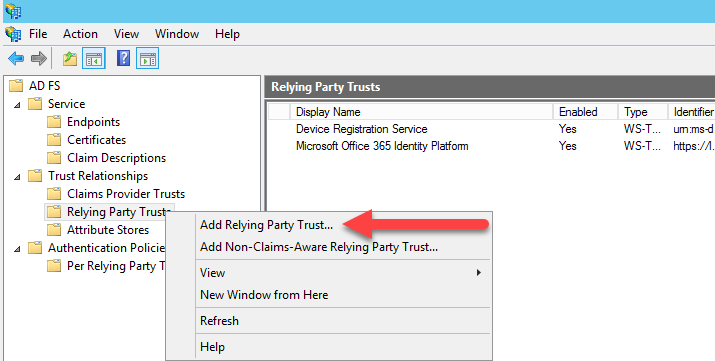
- On the Welcome page, click Start.
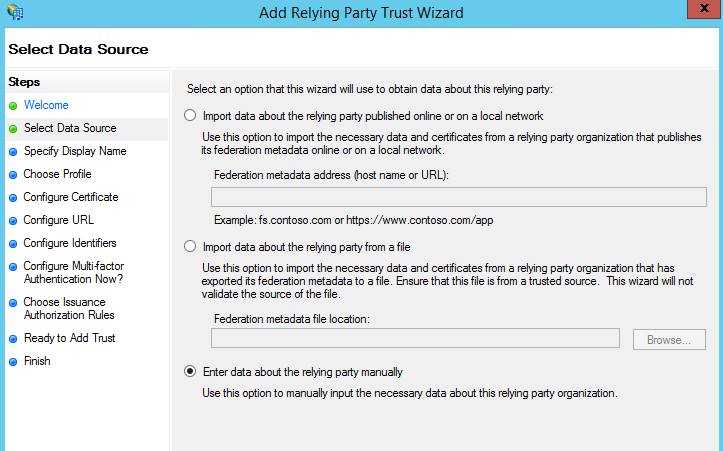
- On the Select Data Source page, click Enter data about the relying party manually, and then click Next.
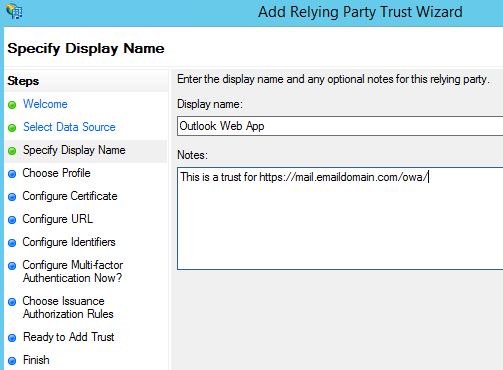
- On the Specify Display Name page, in the Display Name box, type Outlook Web App, and then under Notes, type a description for this relying party trust (such as This is a trust for https://mail.GoldenFive.net/owa/) and then click Next.
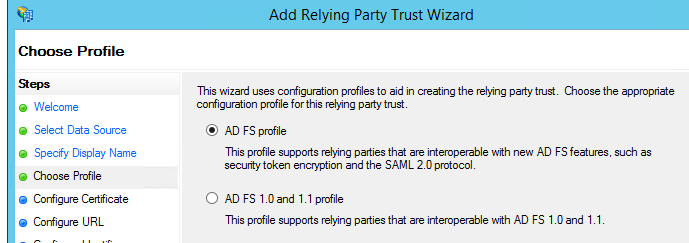
- On the Choose Profile page, click AD FS profile, and then click Next.
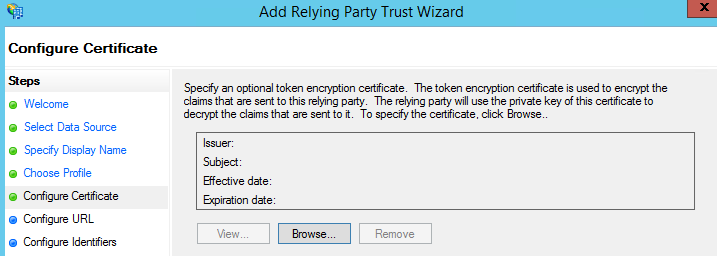
- On the Configure Certificate page, click Next. Nothing to be done here.
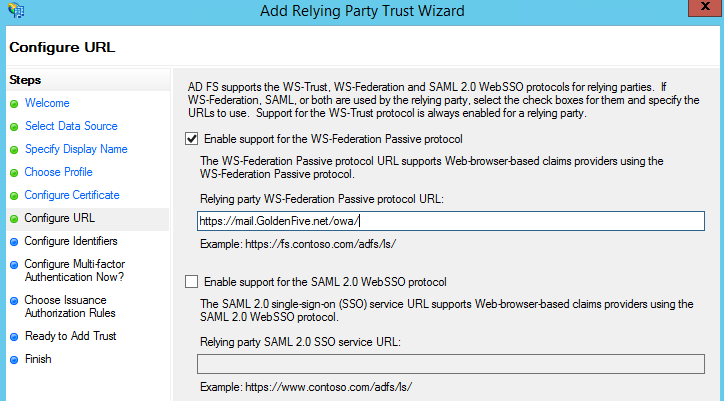
- On the Configure URL page, click Enable support for the WS-Federation Passive protocol, and then under Relying party WS-Federation Passive protocol URL, type https://mail.GoldenFive.net/ow/, and then click Next. Remember to add / in the end.
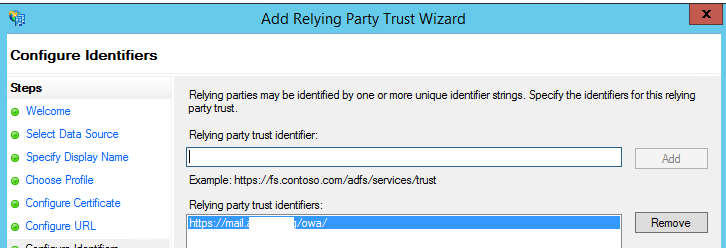
- On the Configure Identifiers page, specify one or more identifiers for this relying party, click Add to add them to the list, and then click Next. It should Add the OWA URL and we should click next.
- On the Configure Multi-factor Authentication Now? page, select Configure multi-factor authentication settings for this relying party trust.
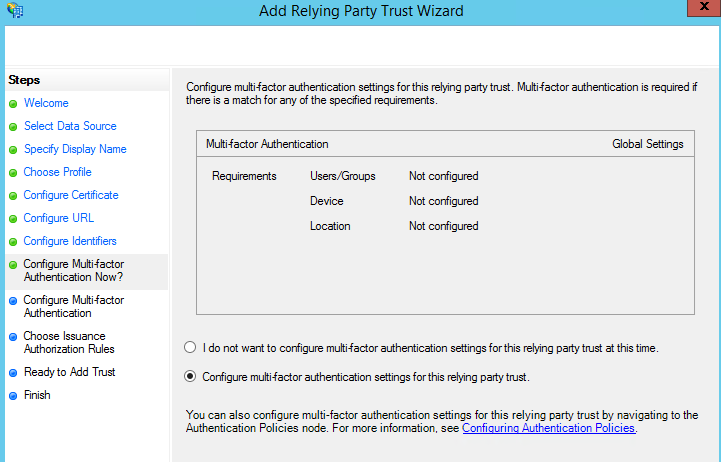
- On the Configure Multi-factor Authentication page, verify that I do not want to configure multi-factor authentication settings for this relying party trust at this time is selected, and then click Next.
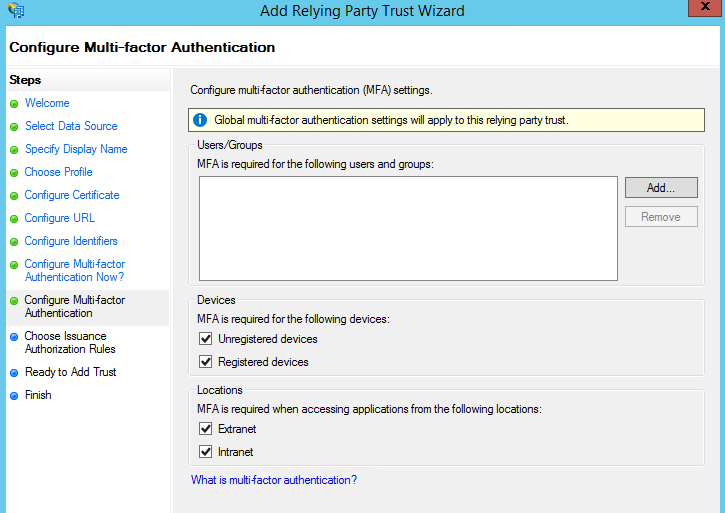
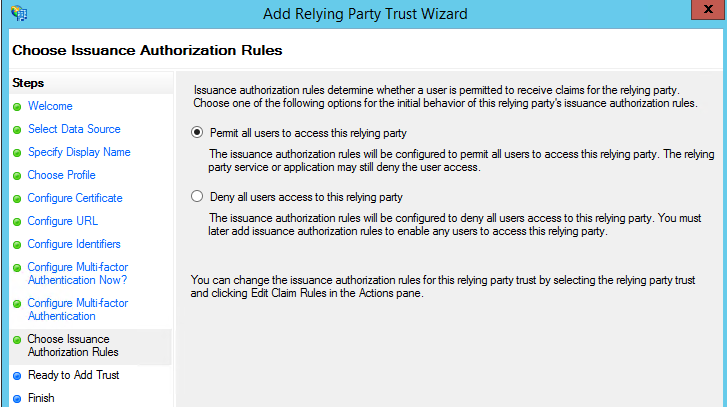
- On the Choose Issuance Authorization Rules page, select Permit all users to access this relying party, and then click Next.
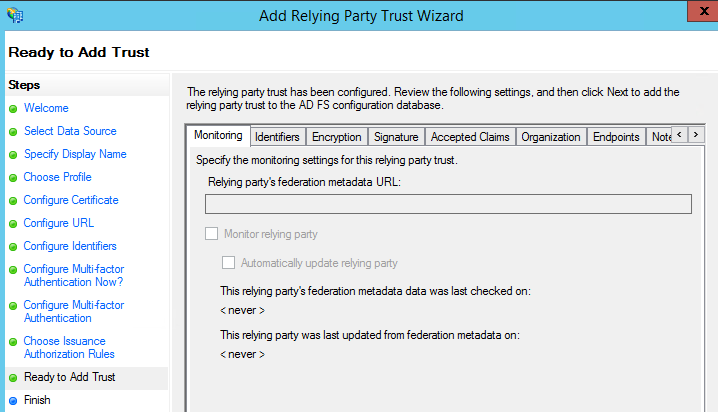
- On the Ready to Add Trust page, review the settings, and then click Next to save your relying party trust information.
- On the Finish page, verify that Open the Edit Claim Rules dialog for this relying party trust when the wizard closes isn’t selected, and then click Close. Else OWA Property will open which can

To create a relying party trust for EAC, you must do these steps again and create a second relying party trust, but instead of putting in Outlook Web App for the display name, enter EAC. For the description, enter This is a trust for the Exchange Admin Center, and the Relying party WS-Federation Passive protocol URL is https://mail.GoldenFive.net/ecp.
Claims Creation:
In a claims-based identity model, the function of Active Directory Federation Services (AD FS) as a federation service is to issue a token that contains a set of claims. Claims rules govern the decisions in regard to claims that AD FS issues. Claim rules and all server configuration data are stored in the AD FS configuration database.
It’s required that you create two claim rules:
- Active Directory user SID
- Active Directory UPN
To add the required claims rules:
- In Server Manager, click Tools, and then click AD FS Management.
- In the console tree, under AD FS\Trust Relationships, click either Claims Provider Trusts or Relying Party Trusts, and then click the relying party trust for Outlook Web App.
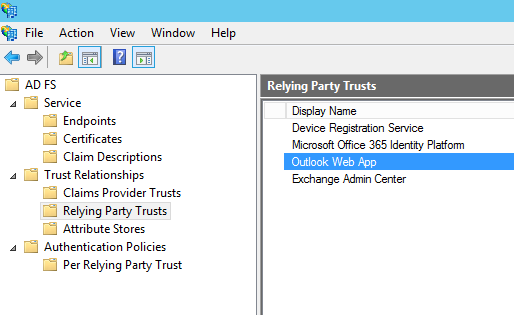
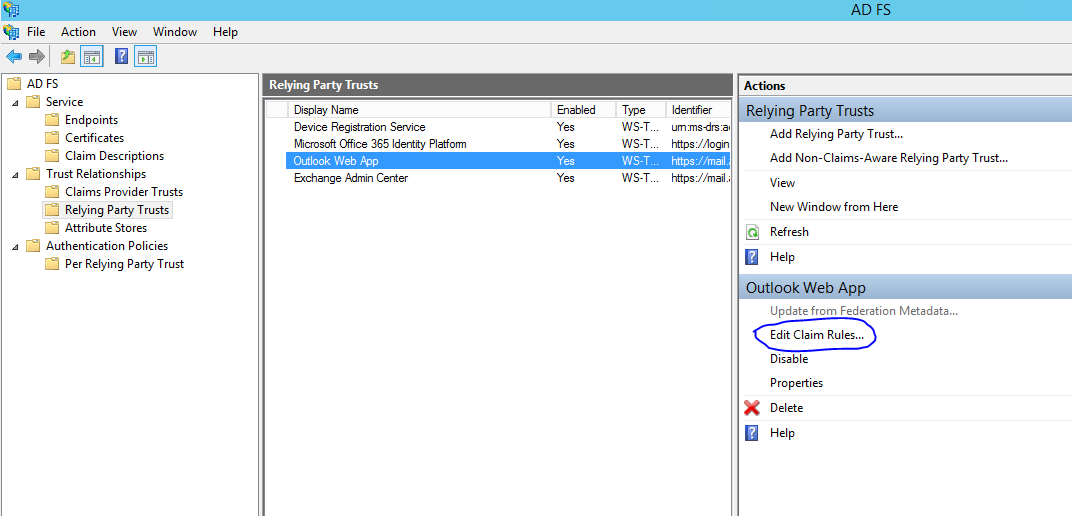
- In the Relying Party Trusts window, right-click the Outlook Web App trust, and then click Edit Claim Rules.
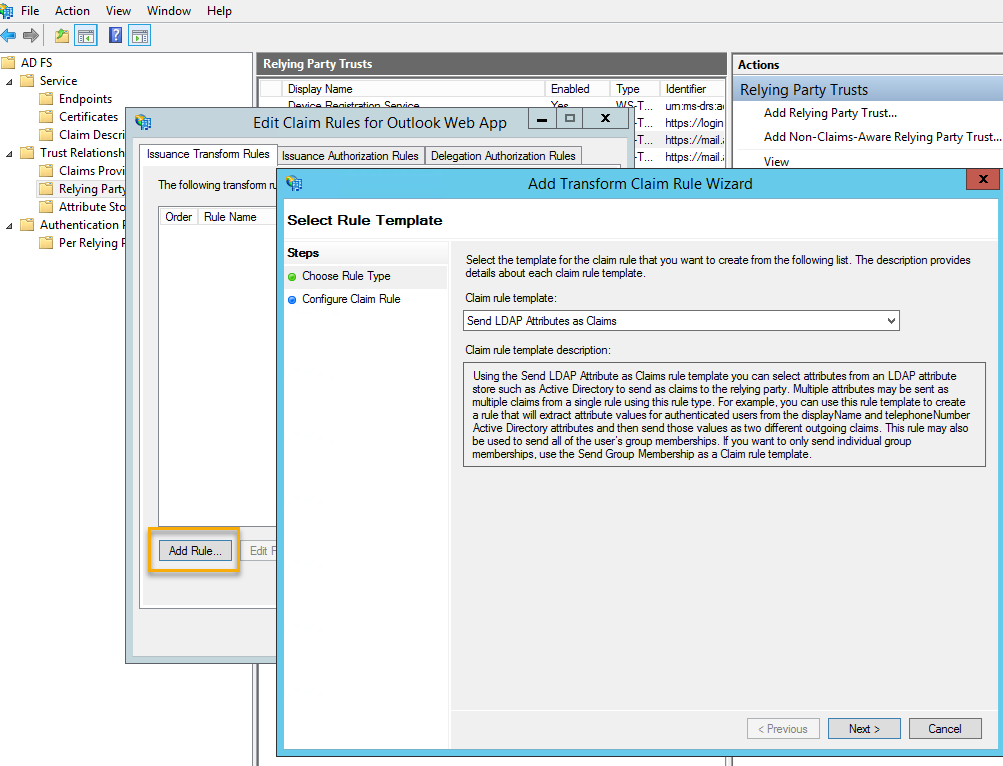
- In the Edit Claim Rules window, on the Issuance Transform Rules tab, click Add Rule to start the Add Transform Claim Rule Wizard.
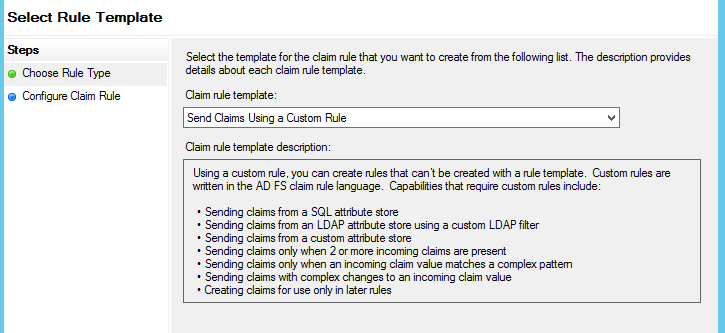
- On the Select Rule Template page, under Claim rule template, select Send Claims Using a Custom Rule in the list, and then click Next.
-
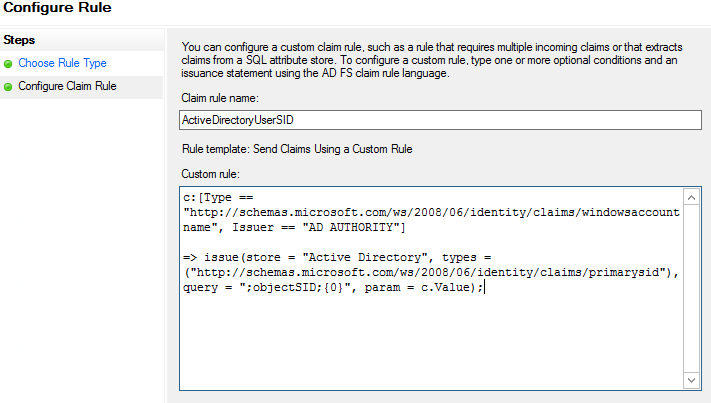
On the Configure Rule page, in the Choose Rule Type step, under Claim rule name, enter the name for the claim rule. Use a descriptive name for the claim rule—for example, ActiveDirectoryUserSID. Under Custom rule, enter the following claim rule language syntax for this rule:
c:[Type == “http://schemas.microsoft.com/ws/2008/06/identity/claims/windowsaccountname”, Issuer == “AD AUTHORITY”]
=> issue(store = “Active Directory”, types = (“http://schemas.microsoft.com/ws/2008/06/identity/claims/primarysid”), query = “;objectSID;{0}”, param = c.Value);
- On the Configure Rule page, click Finish.
- In the Edit Claim Rules window, on the Issuance Transform Rules tab, click Add Rule to start the Add Transform Claim Rule Wizard.
- On the Select Rule Template page, under Claim rule template, select Send Claims Using a Custom Rule in the list, and then click Next.
-
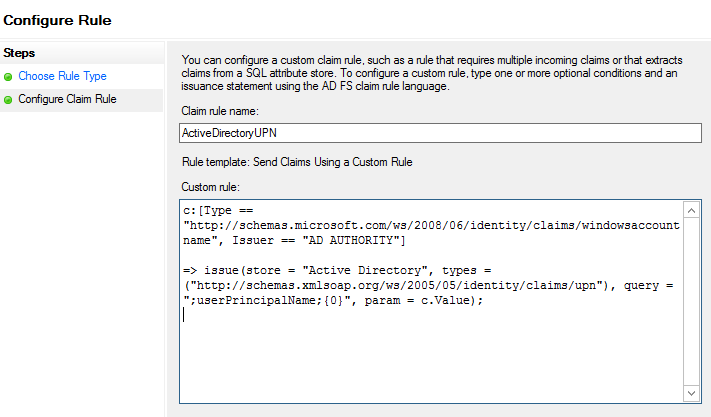
On the Configure Rule page, on the Choose Rule Type step, under Claim rule name, enter the name for the claim rule. Use a descriptive name for the claim rule—for example, ActiveDirectoryUPN. Under Custom rule, enter the following claim rule language syntax for this rule:
c:[Type == "http://schemas.microsoft.com/ws/2008/06/identity/claims/windowsaccountname", Issuer == "AD AUTHORITY"]=> issue(store = "Active Directory", types = ("http://schemas.xmlsoap.org/ws/2005/05/identity/claims/upn"), query = ";userPrincipalName;{0}", param = c.Value);
- Click Finish.
- In the Edit Claim Rules window, click Apply, and then OK.
-
Configure the same Claims for the Exchange Admin Center relying party trust.
Configure Exchange 2013 to use AD FS authentication
When you are configuring AD FS to be used for claims-based authentication with Outlook Web App and EAC in Exchange 2013, we must enable AD FS for your Exchange organization. We must use the Set-OrganizationConfig cmdlet to configure AD FS settings for your organization:
- Set the AD FS issuer to https://adfs.GoldenFive.net/adfs/ls/.
- Set the AD FS URIs to https://mail.GoldenFive.net/owa/ and https://mail. GoldenFive.net/ecp/.
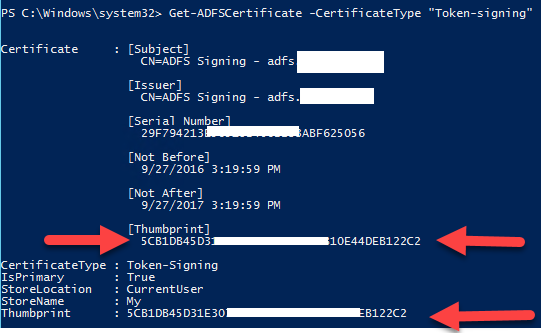
- Find the AD FS token signing certificate thumbprint by using Windows PowerShell on the AD FS server and entering Get-ADFSCertificate -CertificateType “Token-signing”. Then, assign the token-signing certificate thumbprint that you found. If the AD FS token-signing certificate has expired, the thumbprint from the new AD FS token-signing certificate must be updated by using the Set-OrganizationConfig cmdlet.
Run the following command on the ADFS server
Get-ADFSCertificate -CertificateType “Token-signing”
Run the following cmdlets in Exchange Management Shell:
$uris = @(" https://mail.GoldenFive.net/owa/","https://mail.GoldenFive.net/ecp/")

Set-OrganizationConfig -AdfsIssuer "https://adfs.GoldenFive.net/adfs/ls/" -AdfsAudienceUris $uris -AdfsSignCertificateThumbprint"Thumbprint from the ADFS server command"

Then Run iisreset /noforce
Enable AD FS authentication on the OWA and ECP virtual directories
For the OWA and ECP virtual directories, enable AD FS authentication as the only authentication method and disable all other forms of authentication.
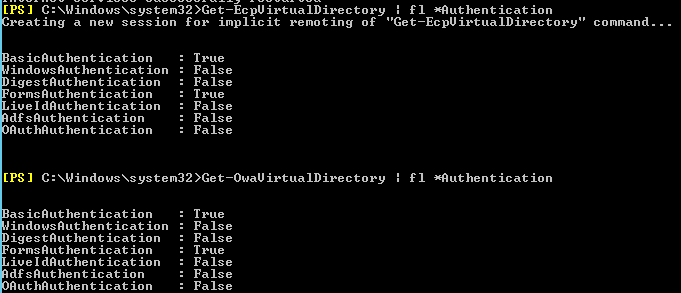
I would suggest extracting current config before the change.
Get-EcpVirtualDirectory | FL *Authentication
Get-OwaVirtualDirectory | FL *Authentication
We should configure the ECP virtual directory before you configure the OWA virtual directory.
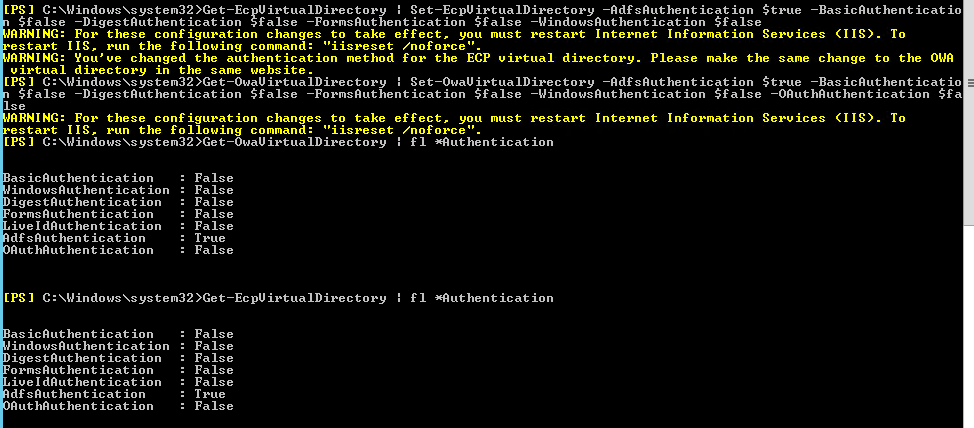
Get-EcpVirtualDirectory | Set-EcpVirtualDirectory -AdfsAuthentication $true -BasicAuthentication $false -DigestAuthentication $false -FormsAuthentication $false -WindowsAuthentication $false -OAuthAuthentication $false
Get-OwaVirtualDirectory | Set-OwaVirtualDirectory -AdfsAuthentication $true -BasicAuthentication $false -DigestAuthentication $false -FormsAuthentication $false -WindowsAuthentication $false -OAuthAuthentication $false
Then Run iisreset /noforce
Export and Install Token Signing Cert
-Install Token signing cert from ADFS
Open ADFS Management –>Services –> Certificates –> double click on the certificate under Token-Signing then click install certificate. Install the certificate normally to the local computer –> Personal folder.
-Export the Certificate from ADFS server
Open MMC –> Add certificates snap-in and select computer then local computer. Now browse to the personal folder and export the cert to a convenient location.
-Copy the cert to all exchange server.
-Install the cert in the “Trust Root Certification Authoritites” container on all Exchange servers
Run IISreset /noforce
Microsoft MVP | CTO @ Golden Five
Team@MSExchangeGuru


January 17th, 2017 at 5:17 am
You say:
Export Token Signing Cert
Install Token signing cert from ADFS
Where do we find/export the signing certificate ?
Does it need to include privat key?
January 17th, 2017 at 2:52 pm
Install Token signing cert from ADFS
On ADFS Server: Open MMC and export the cert.
Copy the cert to the exchange server.
Install the cert in the “Trust Root Authority Certificates” container.
Run IISreset /noforce
February 1st, 2017 at 5:41 pm
Hey Jason,
I have updated the steps, I hope it is clear now.
February 2nd, 2017 at 7:55 pm
[…] just implemented Claim based Exchange OWA and ECP MFA with the help of our blog here. Our customer is saying MFA prompt is not coming. Basically, ADFS web page is not […]
March 6th, 2017 at 8:02 am
Dear Mr. Prabhat,
I deployed the same setup for two of our customer. But one things is missing on Technet and your article which is GroupSID in claim rule. If we goes with TechNet article. ADFS page will be prompted user will be able to login but after login i faced error “error=groupsidsClaimmissing”
you need to create below claim rule.
c:[Type == “http://schemas.microsoft.com/ws/2008/06/identity/claims/windowsaccountname”,
Issuer == “AD AUTHORITY”] => issue(store = “Active Directory”, types =(“http://schemas.microsoft.com/ws/2008/06/identity/claims/groupsid”), query = “;tokenGroups
(SID);{0}”, param = c.Value);
March 11th, 2017 at 10:42 pm
It is not a requirement unless you have applied some group restriction in ADFS. You can use this claim to find out if the user belongs to a specific group.
March 30th, 2017 at 2:54 am
Hi Exchangeguru,
Can we use the IIS plugin for OWA (exchange 2013) and use SMS for MFA ?
I think not because OWA does not have a token insert field or is this embedded in FBA when installing the plugin?
March 30th, 2017 at 11:08 am
Don’t use IIS. Please follow this method.
SMS is fine.
March 31st, 2017 at 6:20 am
I want to thank you for your answer.