Exchange 2013: Hybrid Part 6
In the previous blog we covered the review of Exchange 2013 Hybrid configuration wizard changes and in this blog we will cover the mailbox creation and migration.
#Create Office 365 account from On-Premise Exchange 2013 EAC
You can use the Office 365 Mailbox wizard in the EAC on an Exchange server to create a mailbox in the Exchange Online organization. If you want to create more than one test mailbox, you’ll have to use this wizard for each mailbox. You can’t use the wizard to create multiple mailboxes at one time.
- Open Exchange 2013 EAC and click Recipients in the feature pane for the Enterprise organization.
- In the feature tabs, click Mailboxes.
-
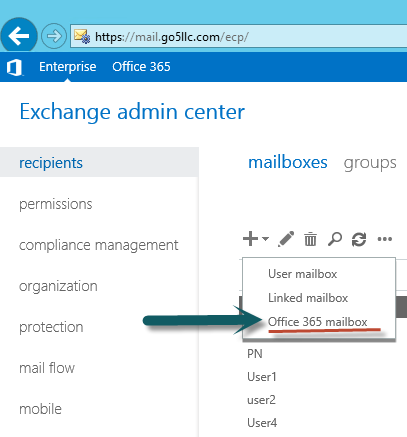
Expand the menu at the Add control and select Office 365 mailbox. This has been added by the Hybrid wizard we ran in the previous blog.
-
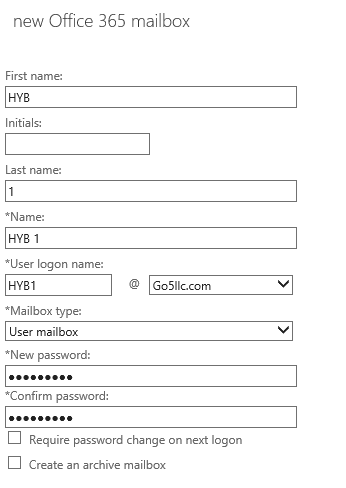
On the New Office 365 mailbox page, specify the following settings:
- First Name
- Last Name
- User logon name Type the user logon name of the new user and select the primary SMTP domain used for your other on-premises users
- Mailbox type Choose the type of mailbox to create.
- Password Type the password.
- Confirm password Retype the password.
- Make sure the Create an archive mailbox check box is not selected.
- First Name
-
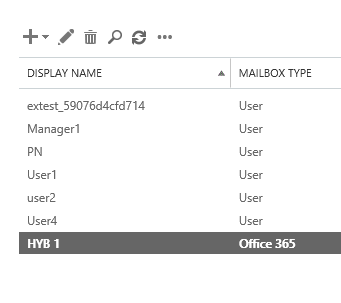
Click Save to continue. You will see the mailbox type is Office 365.
-
Force the DirSync. To force immediate directory synchronization, open a command prompt with elevated privileges and start the DirectorySyncClientCmd tool from C:Program FilesMicrosoft Azure AD SyncBin:
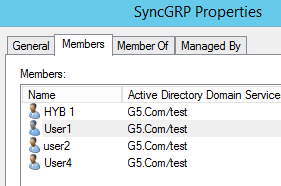
Important: If you have configure group based ADsync filtering then don’t forget to Add this user as a member of the group, else your AADsync will not pick it.

-
Log on to: Cloud-based service administration portal

-
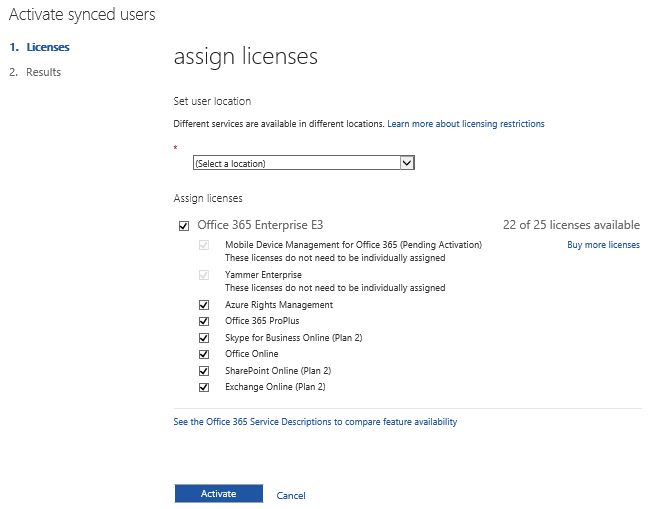
Assign a license to the new user.
#Move a Mailbox from Exchange 2013 to Office 365
- Wizard move for single batch with multiple mailboxes:
We will use the remote move migration wizard in the Office 365 tab in the Exchange admin center (EAC) on an Exchange 2013 server to move existing user mailboxes in the on-premises organization to the Exchange Online organization (office 365):
-
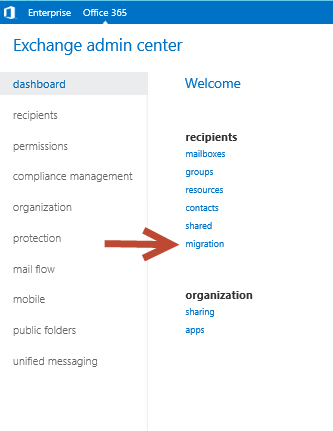
Open the EAC and navigate to Office 365àmigration.
-
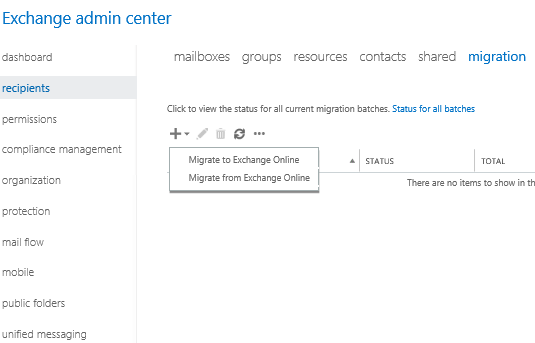
Click Add and select Migrate to Exchange Online.
-
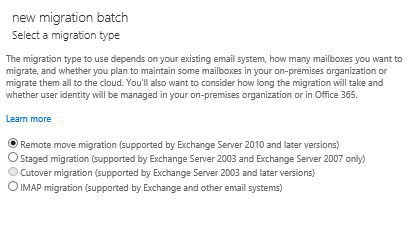
On the Select a migration type page, select Remote move and then click Next.
-
On the Select the users page, click Add, select the on-premises users to move to Office 365 or provide a csv file and click Add, and then click OK. Click Next.
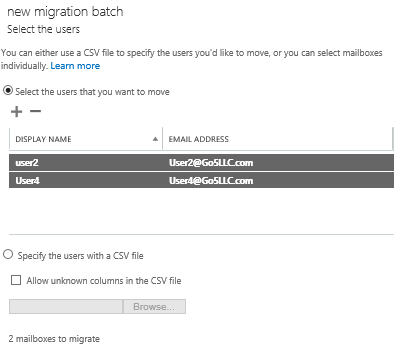
-
On the Enter the Windows user account credential page, enter the on-premises administrator authentication. Click Next.
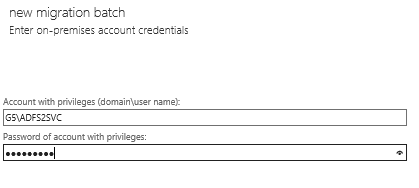
-
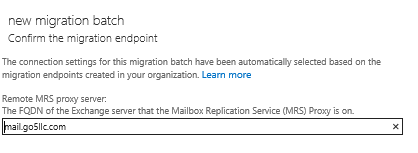
On the Confirm the migration endpoint page, verify that the FDQN of your on-premises Client Access server is listed when the wizard confirms the migration endpoint. Click Next.
The total time to complete the mailbox move depends on the total number of mailboxes selected, the size of the mailboxes, and the properties of the MRSProxy
Use the down arrow to select the target delivery domain for the mailboxes that are migrating to Office 365. In most hybrid deployments, this will be the primary SMTP domain used for both on-premises and Exchange Online organization mailboxes. Verify that the Move primary mailbox along with archive mailbox option is selected because we just don’t want to move the archive mailbox, and then click Next.
We can also assign baditemlimit and largeitemlimit.
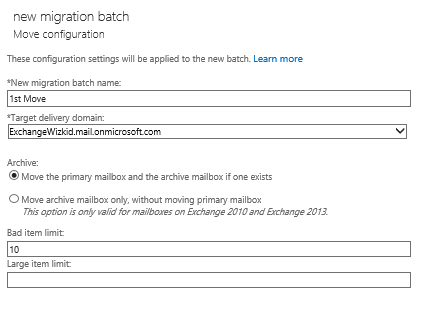
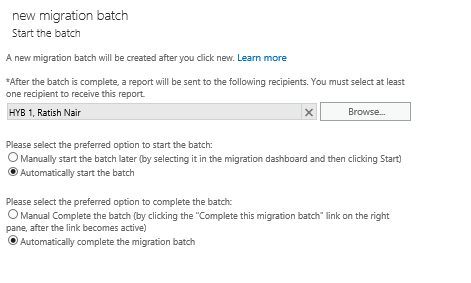
Look at this options, we can migrate the data offline and when complete the move later. This will migrate 95% of the data.
“Manual Complete the batch (by clicking the “Complete this migration batch” link on the right pane, after the link becomes active)@NewMigrationBatch_ManuallyComplete”
While the mailboxes are being moved, you will see a status of Syncing in the migration status for each mailbox moved to Office 365. After the mailbox move request reaches a status of Completed, the mailbox migration process is complete.

Now we can see moves have completed.

And we got the email to inform us, migration has completed. So you don’t need to check the status of the migration again and again.
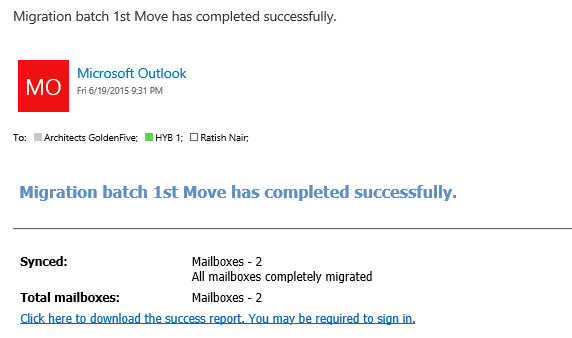
Click on the delete to clear the move batch request.
Office 365 creates endpoint which does not remove even after clearing the migration request. Exchange 2013 uses the same endpoint for multiple migrations. Click on … on the migration under office 365 or run the command Get-Migrationendpoint | fl on office 365 connected PowerShell.
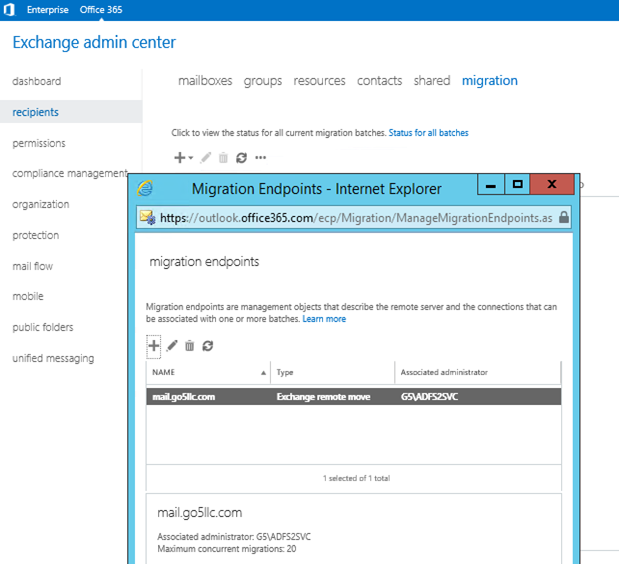
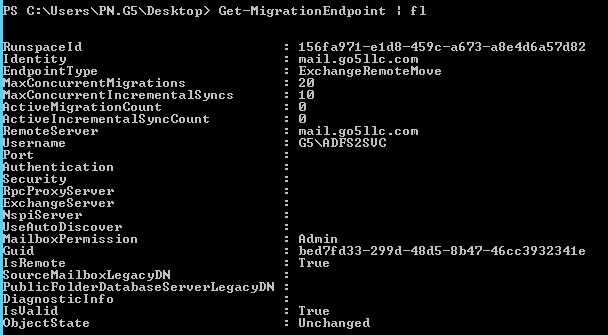
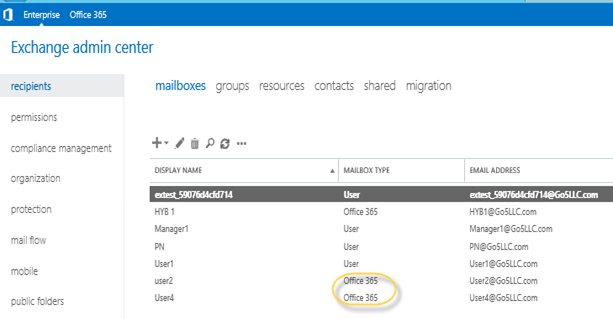
After the migration On Exchange 2013 mailboxes will look like this.
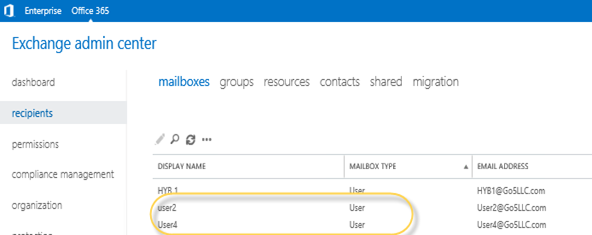
Office 365 will show like this
- Mailbox move using PowerShell command:
- Connect to the Office 365 PowerShell using this blog – https://msexchangeguru.com/2014/02/03/eop-o365-connect-powershell/
- Define variables
Provide office 365 credential
$O365Cred = Get-credential
Provide on Premise Exchange 2013 credential
$2013Cred = Get-credential
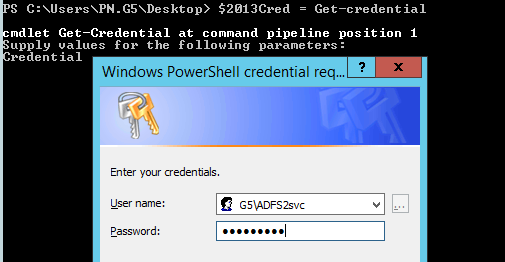
3. Run the command to connect to the Azure AD.
Connect-MsolService -Credential $O365CRED
Exchange 2013 creates Migration Endpoint which it does not remove and allow to you the same Endpoint.
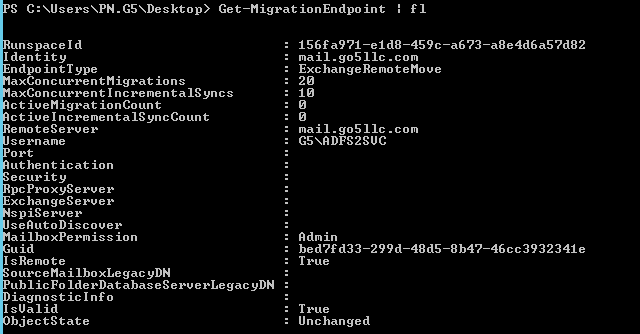
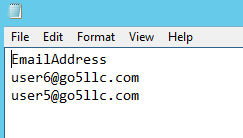
4. Prepare a csv file with email addresses which will look like the below screen
5. Get the already created migration end point with the following command
$MigEndpoint = Get-MigrationEndpoint

6. Run the below command to create a batch for migration. I have mark the values which you will change according to your configuration.
New-MigrationBatch -Name “Name of theMigrationBatch” -SourceEndpoint $MigEndpoint.Identity -TargetDeliveryDomain ExchangeWizkid.mail.onmicrosoft.com -CSVData ([System.IO.File]::ReadAllBytes(“C:tempinput.csv“))
Example command
New-MigrationBatch -Name Mig2 -SourceEndpoint $MigEndpoint.Identity -TargetDeliveryDomain ExchangeWizkid.mail.onmicrosoft.com -CSVData ([System.IO.File]::ReadAllBytes(“C:tempinput.csv”))

There are 2 more parameter which can eliminate the need of further command
-Autostart
The AutoStart parameter specifies whether to immediately start the processing of the new migration batch. If you don’t use the AutoStart parameter, you have to manually start the migration batch by using the Start-MigrationBatch cmdlet.
-AutoComplete
The AutoComplete parameter specifies whether to force the finalization of the individual mailboxes in a migration batch when the initial synchronization for a mailbox is successfully completed. Alternatively, you have to run the Complete-MigrationBatch cmdlet to finalize a migration batch. This parameter can only be used for local moves and remote move migrations.
This parameter will force the individual mailboxes to be finalized as soon as the mailbox has completed initial synchronization.
This command is without the parameter -AutoComplete will suspend the move at 95%. This parameter allows you to move the data on the backend without interrupting users until they are ready for migration.
7. Run the below command to start the migration sync. This will not complete the migration
Start-MigrationBatch -Identity Mig2

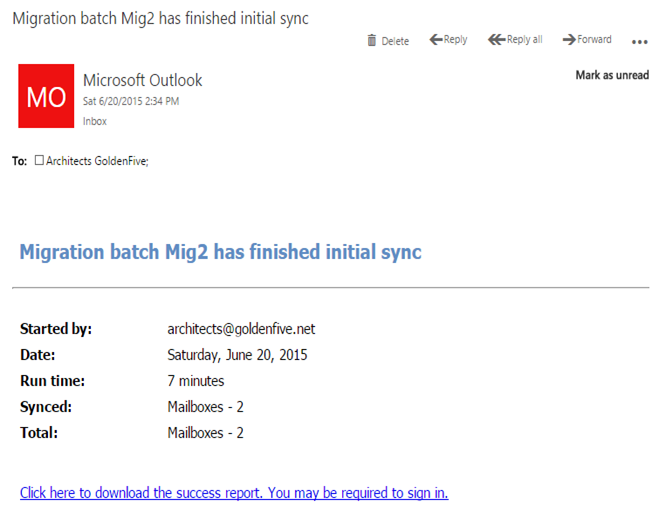
Got the email initial sync has completed J
Run the below command to monitor the move.
Get-MigrationBatch

8. Once you see the migration has synced, run the below command.
Complete-MigrationBatch -Identity Mig2

Now you will batch is completing the migration.

9.Got the email migration has completed
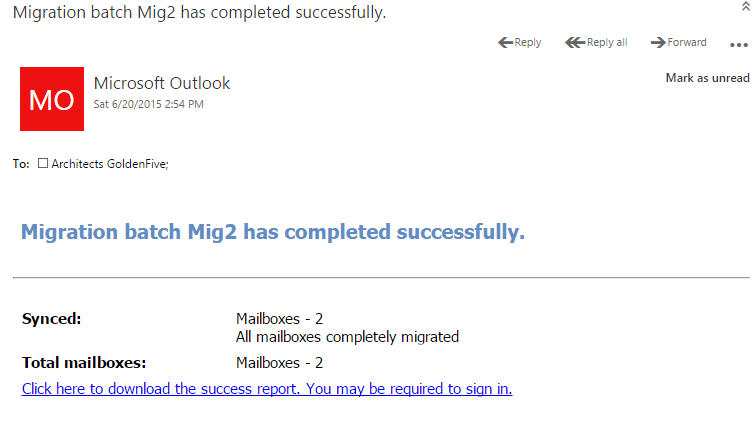
When I click the migration report. We got this link

Which downloads a csv file with the below info.

We can also check the migration configuration by running the below command
Get-MigrationConfig | FL

We can use Set-MigrationConfig to change any parameter.
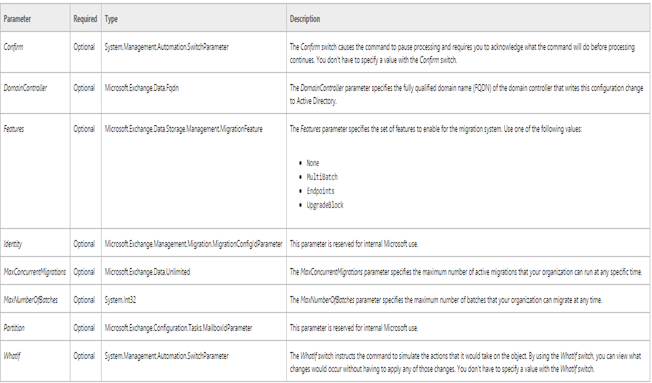
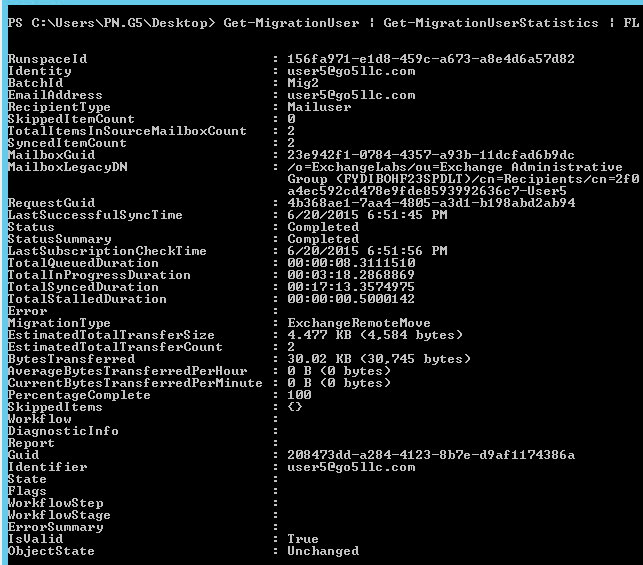
This command will show the statistics of the mailbox migration
Get-MigrationUser | Get-MigrationUserStatistics | FL
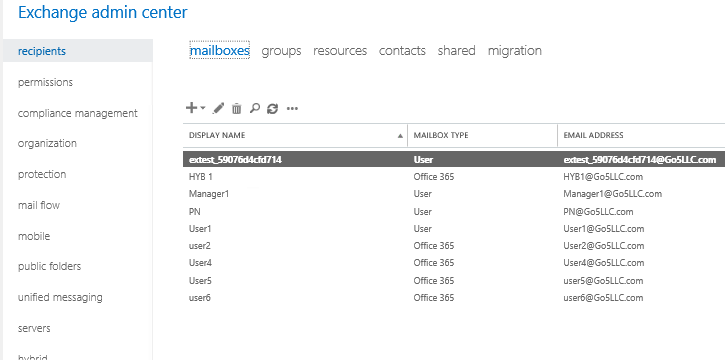
As expected mailbox moved and type changed Office 365.
#Move a Mailbox without Batch from Powershell
Run the following commands in the same powershell
New-MoveRequest -Identity “Alias” -Remote -RemoteHostName “MRSProxyURL” -TargetDeliveryDomain domainname.mail.onmicrosoft.com -RemoteCredential $SourceCRED -BadItemLimit 0
Example
New-MoveRequest -Identity “Prabhat” -Remote -RemoteHostName “mail.Go5llc.com” -TargetDeliveryDomain Go5LLC.mail.onmicrosoft.com -RemoteCredential $2013Cred -BadItemLimit 0
#Move a Mailbox from Office 365 to Exchange 2013.
We can use the remote move migration wizard on the Office 365 tab in the Exchange 2013 EAC on any Exchange server to move existing user mailboxes in the Exchange Online organization to the on-premises organization:
- Open the EAC and navigate to Office 365 à Recipients à migration.
-
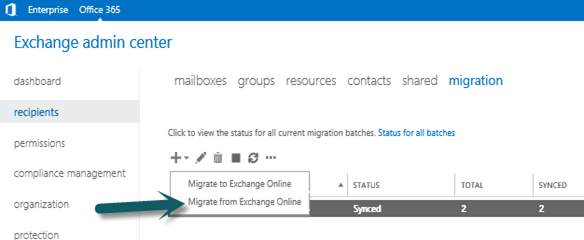
Click Add
 then select Migrate from Exchange Online.
-
Select the users that you want to move and click Next
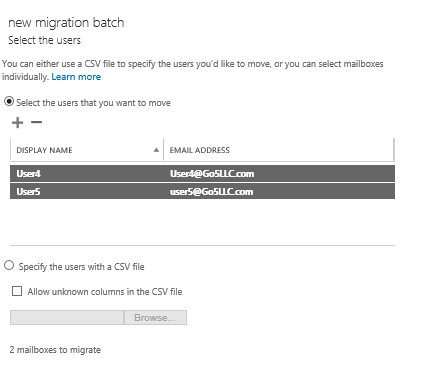
- On the Select the users page, click Add
 and then select the Exchange Online users to move to the on-premises organization, click Add and then click OK. Click Next.
-
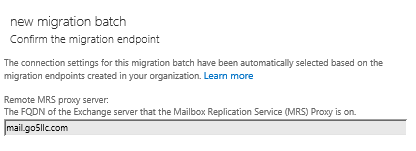
On the Confirm the migration endpoint page, verify that the FDQN of your on-premises Client Access server is listed then click next.
-
On the Move configuration page, enter the following
Required
New migration batch name
Target delivery domain
Target database
Bad item limit
Optional
Target archive database
Large item limit
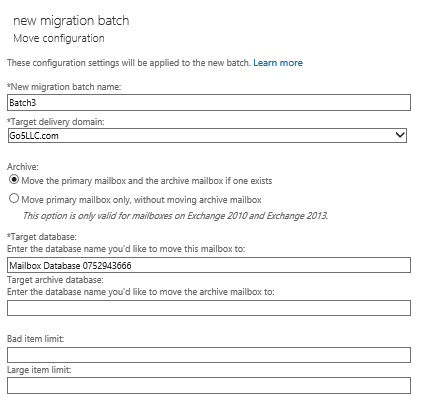
Don’t give DB name with inverted commas (“”) else you will receive the below error
Error: MigrationPermanentException: The Mailbox Replication Service was unable to find the remote database. –> The Mailbox Replication Service was unable to find the remote database. –> The call to ’https://mail.go5llc.com/EWS/mrsproxy.svc’ failed because no service was listening on the specified endpoint. Error details: There was no endpoint listening at https://mail.go5llc.com/EWS/mrsproxy.svc that could accept the message. This is often caused by an incorrect address or SOAP action. See InnerException, if present, for more details. –> The remote server returned an error: (404) Not Found. –> There was no endpoint listening at https://mail.go5llc.com/EWS/mrsproxy.svc that could accept the message. This is often caused by an incorrect address or SOAP action. See InnerException, if present, for more details. –> The remote server returned an error: (404) Not Found.
-
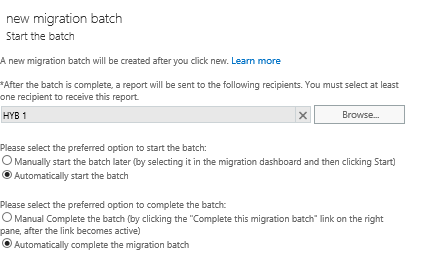
On the Start the batch page, add one recipient to receive the batch complete report.
Verify that automatically start the batch is selected and select the automatically complete the migration batch then Click New.
-
Now you will see the migrations has completed and mailbox typehas converted from Office 365 to user.
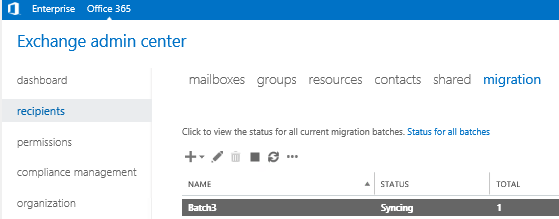
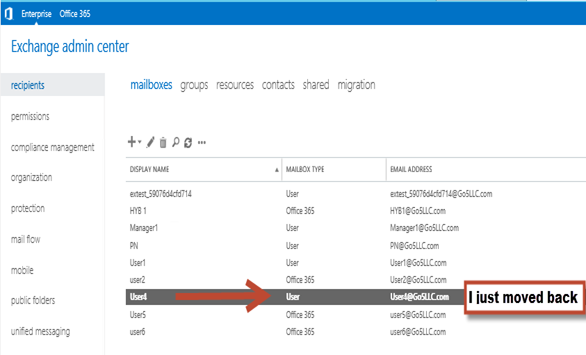
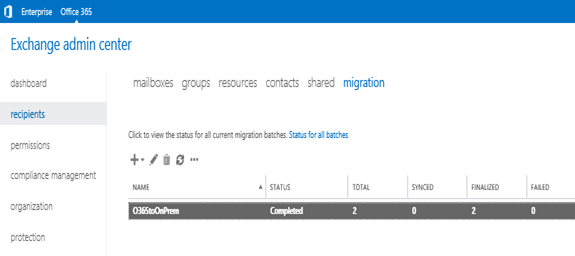
And the move completed.
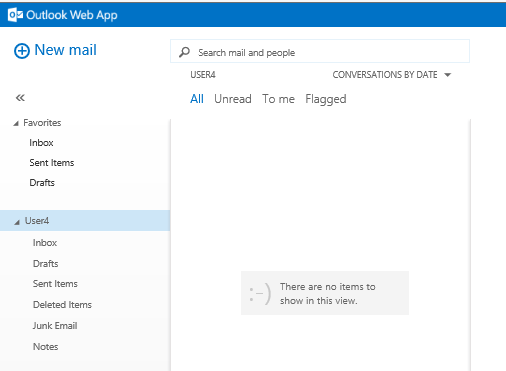
Post move login
#Mailflow:
I have tested the mailflow from office 365 to Exchange 2013, Exchange 2013 to office 365, office 365 to Internet, Exchange 2013 to Internet and Internet to Exchange 2013.
From Office 365 to Exchange 2013 on-premise
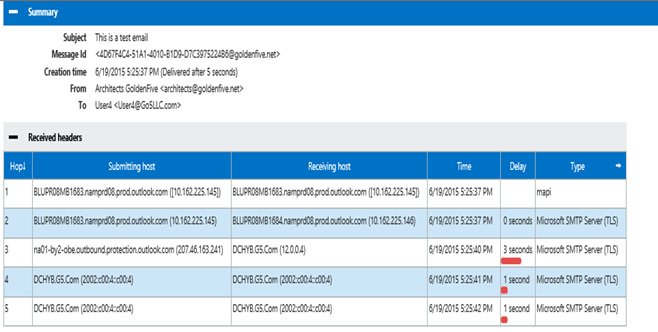
Internet to Office 365 to Exchange 2013 on-Premise
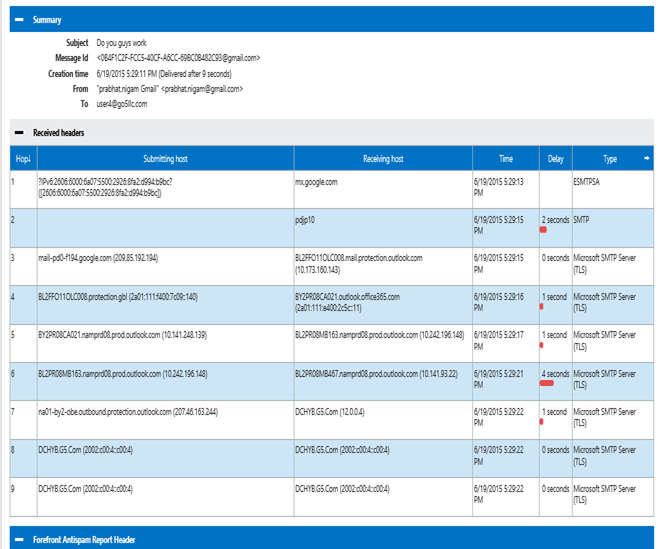
From Exchange 2013 on-premise to Office 365
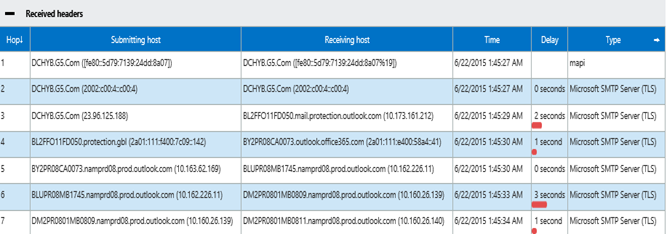
From Office 365 to Internet

From Exchange 2013 on-premise to Internet

All mailflow working as expected.
Mailbox creation and migration part of the series ends here. In the next blog we will cover post migration tasks.
Prabhat Nigam
Microsoft MVP | Exchange Server
Team@MSExchangeGuru
Tweet me @PrabhatNigamXHG



June 24th, 2015 at 1:29 pm
[…] the previous blog we covered the mailbox creation, migration and mail flow. In this blog we will cover the post […]
June 30th, 2015 at 6:05 pm
[…] Exchange 2013: Hybrid Part 6 […]
June 30th, 2015 at 6:19 pm
[…] Exchange 2013: Hybrid Part 6 […]
July 16th, 2015 at 9:07 am
Nice and very Helpful Post.
Can you complete with the way to Move mailbox from Office 365 to Exchange 2013, with PowerShell.
I’m actually trying to make from EAC, but it fails 1/2…
Thanks
July 16th, 2015 at 3:02 pm
You should not get any error except the guid mismatch error for users originally created in office 365.
I have added the resolution in part 7.